background image

Page 

29

User Manual

GARDTEC 

872

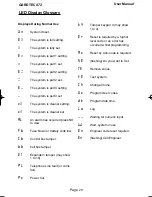
LED Display Glossary

Displays During Normal Use

T M

System Unset.

D $

The system is full setting.

$

The system is fully set.

D %

The system is part 1 setting.

%

The system is part 1 set.

D &

The system is part 2 setting.

&

The system is part 2 set.

D ]

The system is part 3 setting

]

The system is part 3 set

B

$

The system is cleaner setting.

B

$

The system is cleaner set.

AK

An alarm has occurred press NO

to view.

E B

Fuse blown or battery volts low.

( B

Control box tamper.

B B

bell box tamper.

1

Expander1 tamper (may show

1 to 16).

O K

Telephone Line fault (or coms

fail).

B

Power Cut.

S 4

Tamper keypad 4 (may show

1 to 4).

D Q

Reset is required by a higher 
level code or an error has

occurred whilst programming.

A

B

Reset by Anti-Code is required.

R D

(flashing) Do you want to Set.

rD

Remove zones.


 D

Test system.

( G

Change Chime.

B

Program User codes.

C S

Program date time.

K N

Log

] ]

Waiting for numeric input.

VW

Wait, system in use.

D M

Engineer code reset required.

D M

(flashing) Call Engineer

PR5407.qxd  05/11/2003  15:12  Page 29

Summary of Contents for GARDTEC 872

Page 1: ...G GA AR RD DT TE EC C 8 87 72 2 LCD User Instructions LED User Instructions ...

Page 2: ...ing Time Date 17 User Initiating Remote Access 18 Resetting After An Alarm 19 20 Using LED Keypads 21 Setting The System 21 Unsetting The System 21 Part Setting The System 22 Area Setting 23 Removing Zones 23 24 Testing The System 24 Viewing The Event Log 25 Changing The Chime Status 26 Programming User Codes 26 User Initiating Remote Access 27 Resetting After An Alarm 28 LED Display Glossary 29 3...

Page 3: ...cation Reserved User Code User No Keyswitch 2 Location Reserved User Code User No Keyswitch 3 Location Reserved User Code User No Keyswitch 4 Location Reserved User Code User No Keyswitch 5 Location Reserved User Code User No Keyswitch 6 Location Reserved User Code User No Keyswitch 7 Location Reserved User Code User No Keyswitch 8 Location Reserved User Code User No Installation Company Name Inst...

Page 4: ...r Code to the required level of access These may be changed at any time via a Master level code The User Code levels available and the functions available for the levels are Master Allows Setting Unsetting Zone Remove if programmed by engineer Test System View Log Chime On Off User Codes Set Time Date Reset After Alarm if programmed by engineer Unsetting Cleaner Full System Setting from unset syst...

Page 5: ...programmed onto your system a Add 1 to the first digit of any User Code e g the normal User Code is 5678 so the Duress code for this User would be 6678 If programmed to this type of Duress by the engineer the 1 digit increment will apply to all User Codes on the system b User 7 Duress Any code that is programmed as User number 7 will be the Duress code for that system Your installation company wil...

Page 6: ...fore leaving Note Setting the system with an area code will set only the area associated with that code Note Setting an unset system with a cleaner code will set the full system Setting Unsetting the System via a Keyswitch One of two types of keyswitch es may have been fitted to your system Normal To set the system with a normal keyswitch insert the key and turn to the ON position then remove the ...

Page 7: ...pany Note In the event of the system being set using ACE when the battery is low the display will show ACE Battery Low when the system is unset press Yes to clear the display and change the battery in the keyfob Part Setting The System using Master Main type codes 1 With the display showing 2 Enter a Master or Main type code the display will show for example 3 Press 1 2 or 3 for Part 1 2 or 3 the ...

Page 8: ...th the display showing 2 Enter an Area Code 1to 7 the exit tone will sound and the display will show for example 3 Press NO then 1 2 3 for the Part Set you require the display will show for example 4 The exit sounders may or may not go silent this will depend on the system settings 5 Exit the premises or retire to an unprotected part of the system At the end of the exit time either the exit sounde...

Page 9: ...ES 3 and or To turn Area 7 Off press YES 3 and or To turn the Cleaner Area Off press YES 0 As areas are turned off they will be removed from the display 5 Exit the premises or retire to an un protected area as detectors are violated the continuous exit tone will change Note Areas must first be programmed by the installation company before they will appear on the display Area Setting using Area cod...

Page 10: ...ber you wish to remove followed by YES pressing NO will un remove a zone the display will show 6 Repeat step 5 until you have removed all the required zones 7 Press 0 to escape the display will show 8 Press YES the continuous exit tone will sound 9 Exit the premises via the authorised exit route the exit tone will change as detectors are violated When the premises are secure listen that the exit t...

Page 11: ... to test is shown 7 Press YES the display will show for 3 seconds Then for example 8 Pressing 1 will enter zone Status mode All zones will show on the display and will be deleted as each zone is triggered Press 0 to escape Pressing 6 will silence the internal sounder Pressing 4 will toggle the Strobe On Off Pressing 9 will toggle the Bell On Off UN SET 01 JAN 18 58 01 Do you want to Set STUART Do ...

Page 12: ...ice the display will show Viewing The Event Log Master code only 1 With the display showing 2 Enter a Master Code the display will show for example 3 Press NO three times the display will show 4 Press YES the display will show for 3 seconds Then for example UN SET 01 JAN 18 58 01 UN SET 01 JAN 18 58 01 Do you want to Set STUART Do you want to View the LOG While Viewing 1 Printer On Off Read Log 01...

Page 13: ...day 6 When you have finished viewing the Log press 0 twice the display will show Changing The Chime Status Master code only The Chime zones will have previously been programmed by the installation company A Master level code may change the status of the Chime between On and Off To do so proceed as follows 1 With the display showing 2 Enter a Master Code the display will show for example 3 Press NO...

Page 14: ...S the display will show for example Or 5 Press NO to change the status of the Chime then press YES the display will show 6 Press 0 to escape the display will show Chime is Off ok Chime is On ok Do you want to Change Chime UN SET 01 JAN 18 58 01 ...

Page 15: ... some of the user numbers on your system have been reserved you should not use them whilst programming user codes If you do so your system may be adversely affected 1 With the display showing 2 Enter a Master Code the display will show 3 Press NO five times the display will show 4 Press YES the display will show 5 Enter the user number 1 to 99 that you wish to program followed by YES the display w...

Page 16: ...r 1 is being programmed 8 Press No until the level of code you require is displayed then press Yes The display will show for example 9 If you wish to accept the name shown press YES and jump to step 13 Or If you wish to change the name shown press NO the display will show 10 You may now enter up to nine characters for the user name using the layout shown below for the allocation of characters User...

Page 17: ...l move on to the next position 12 Continue entering characters up to 9 If you require a blank space press YES while the is displayed to show the space this will not be displayed after programming is completed 13 As you press YES for the ninth character or if you have jumped from step 9 the display will change to 14 If you wish to program other User Codes return to step 4 Or Press 0 to return to Do...

Page 18: ...n Yes The display will show 8 Press Yes Display will show 9 Enter the Day and Month e g 11 09 for the 11th September then press Yes The display will show 10 Enter the current Time using the 24Hr format e g 20 30 for 8 30pm then press Yes The display will show 11 Press 0 the display will show UN SET 01 JAN 18 58 01 UN SET 01 JAN 18 58 01 Do you want to Set STUART Do you want to Set DATE TIME Summer...

Page 19: ... To initiate the Remote Call follow the instructions below 1 Negotiate with your installation company when you should initiate the Remote Call 2 With the display showing 3 Enter a Master Code the display will show for example 4 Press NO seven times the display will show 5 Press YES the display will show Until Dialling commences Then Until Connection Then 6 When your installation company has finish...

Page 20: ...de reset enter a user followed by YES if Master or Main code is used the exit tone will sound and the display will show for example 2 Enter the code again to abort the setting 3 The system is now reset Or If a higher level of code is required one of the following displays will be shown Use a Master code to reset the system Or Call the installation company Or Call the installation company and quote...

Page 21: ...ral station or engineer as instructed by the installation company and quote the source given by the display 5 The central station or engineer will give a return Anti Code this may contain the YES NO keys for example 5 YES 2 4 6 Enter this Anti Code into the keypad 7 The system is now reset ...

Page 22: ...ore leaving Note Setting the system with an area code will set only the area associated with that code Note Setting an unset system with a cleaner code will set the full system Unsetting The System 1 Enter the premises via the authorised entry route the broken entry tone will sound 2 Proceed to the keypad enter a valid user code the display will show T M 3 The system is now Unset Note If an area c...

Page 23: ...system settings 4 Exit the premises or retire to an unprotected part of the system At the end of the exit time either the exit tone will stop or a single beep will be emitted dependant on system settings Part Setting System using Area 1 2 or 3 codes 1 With the display showing Un Enter an Area code 1 2 3 4 5 6 7 2 The exit tone will sound and the display will show D 3 Press NO then 1 2 or 3 for Par...

Page 24: ...time the exit tone will stop provided the system was clear Note Areas must first be programmed by the installation company Area Setting using Area codes Area codes are only effective to their own area with the exception of the cleaner area which may be turned off by an area code only if all areas are in the unset condition Removing Zones Master Main codes only If programmed by the installation com...

Page 25: ... System Master Main codes only 1 With the display showing T M 2 Enter a Master or Main level code the display will show R D flashing 3 Press NO twice the display will show D flashing 4 Press YES the display will show A press YES if you wish to test all areas or press NO until the area you wish to test is displayed then press YES 5 The display will show A if all zones are clear 6 Whilst in test mod...

Page 26: ...ssing 1 will toggle the printer On Off 6 Whilst viewing the Log Pressing NO will move back to the previous event Pressing YES will move forwards to the next event Pressing 7 will take you back to the first event of the previous day Pressing 9 will take you forwards to the first event of the next day Pressing 3 will display the Date Time in the format Day of month two digits Month two digits Hour t...

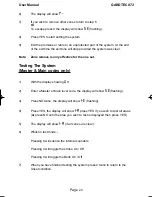
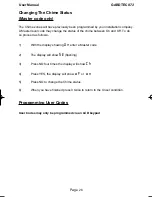
Page 27: ...e between On and Off To do so proceed as follows 1 With the display showing T M enter a Master code 2 The display will show R D flashing 3 Press NO four times the display will show G 4 Press YES the display will show N E or N M 5 Press NO to change the Chime status 6 When you have finished press 0 twice to return to the Unset condition Programming User Codes User Codes may only be programmed via a...

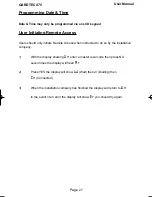
Page 28: ...instructed to do so by the installation company 1 With the display showing T M enter a master level code then press NO seven times the display will flash A Q 2 Press YES the display will show VW Wait then C H Dialling then M Connected 3 When the installation company has finished the display will return to T M In the event of an error the display will show D Q you should try again ...

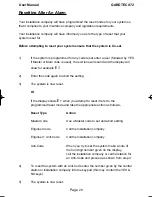
Page 29: ... D 2 Enter the code again to abort the setting 3 The system is now reset Or If the display shows D Q when you attempt to reset it refer to the programmed reset mode and take the appropriate action as follows Reset Type Action Master Code Use a Master code to set and abort setting Engineer Code Call the installation company Engineer Anti Code Call the installation company Anti Code When you try to ...

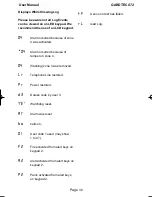
Page 30: ...as occurred press NO to view E B Fuse blown or battery volts low B Control box tamper B B bell box tamper D 1 Expander1 tamper may show 1 to 16 O K Telephone Line fault or coms fail O B Power Cut S 4 Tamper keypad 4 may show 1 to 4 D Q Reset is required by a higher level code or an error has occurred whilst programming A B Reset by Anti Code is required R D flashing Do you want to Set rD Remove zo...

Page 31: ...Alarm occurred because of tamper on zone 4 04 flashing zone 4 was removed K Q Telephone Line restored O Q Power restored C 3 Duress code by user 3 rD Watchdog reset A r Alarm was reset B N bells on 0 1 User code 1 used may show 1 to 47 E 2 Fire activated from alert keys on keypad 2 A 2 Alert activated from alert keys on keypad 2 O 2 Panic activated from alert keys on keypad 2 E A zone on test has ...

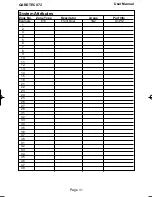
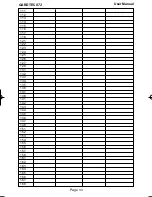
Page 32: ... User Manual System Attributes Zone No Zone Type Descriptor Areas Part Info Example E E Front Door 1 2 A1 Pt2 1 2 3 4 5 6 7 8 9 10 11 12 13 14 15 16 21 22 23 24 25 26 27 28 31 32 33 34 35 36 37 38 41 42 43 44 45 46 47 48 ...

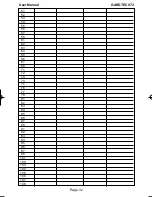
Page 33: ...Page 32 GARDTEC 872 User Manual 51 52 53 54 55 56 57 58 61 62 63 64 65 66 67 68 71 72 73 74 75 76 77 78 81 82 83 84 85 86 87 88 91 92 93 94 95 96 97 98 101 102 103 104 105 106 107 108 ...

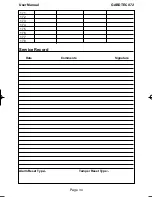
Page 34: ...DTEC 872 User Manual 111 112 113 114 115 116 117 118 121 122 123 124 125 126 127 128 131 132 133 134 135 136 137 138 141 142 143 144 145 146 147 148 151 152 153 154 155 156 157 158 161 162 163 164 165 166 167 168 ...

Page 35: ...Page 34 GARDTEC 872 User Manual 171 172 173 174 175 176 177 178 Service Record Date Comments Signature Alarm Reset Type Tamper Reset Type ...

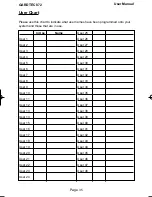
Page 36: ...er 1 User 2 User 3 User 4 User 5 User 6 User 7 User 8 User 9 User 10 User 11 User 12 User 13 User 14 User 15 User 16 User 17 User 18 User 19 User 20 User 21 User 22 User 23 User 24 User 25 User 26 User 27 User 28 User 29 User 30 User 31 User 32 User 33 User 34 User 35 User 36 User 37 User 38 User 39 User 40 User 41 User 42 User 43 User 44 User 45 User 46 User 47 User 48 ...

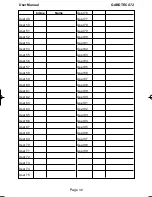
Page 37: ...ser 59 User 60 User 61 User 62 User 63 User 64 User 65 User 66 User 67 User 68 User 69 User 70 User 71 User 72 User 73 User 74 User 75 User 76 User 77 User 78 User 79 User 80 User 81 User 82 User 83 User 84 User 85 User 86 User 87 User 88 User 89 User 90 User 91 User 92 User 93 User 94 User 95 User 96 User 97 User 98 User 99 ...

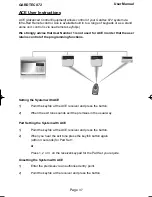
Page 38: ...ng functions Setting the System with ACE 1 Point the keyfob at the ACE receiver and press the button 2 When the exit tone sounds exit the premises in the usual way Part Setting the System with ACE 1 Point the keyfob at the ACE receiver and press the button 2 When you hear the exit tone press the keyfob button again within 3 seconds for Part Set 1 or Press 1 2 or 3 on the receiver keypad for the Pa...

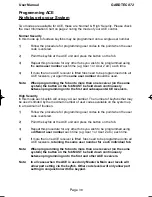
Page 39: ...t and subsequent ACE receivers High Security In this mode each keyfob will occupy a User number The number of keyfobs that may be used is limited by the maximum number of user codes available on the system up to a maximum of fourteen 1 Follow the procedure for programming user codes to the point when the user code is entered 2 Point the keyfob at the ACE unit and press the button on the fob 3 Repe...

Page 40: ...GardTec Ltd Internet http www gardtec ltd uk e mail sales gardtec ltd uk PR5407 Rev1 0 ...

Reviews: