15
TESTING PROCEDURE
Turn gas supply on and plug the unit into
the power supply. (Caution 115V)
TO CHECK BURNER PRESSURE
• Refer to Rating Plate.
• Remove the wiring cover panel.
• Remove test point plug and attach
manometer to test point.
The test point is on the front injector
block.
• Light heater, turn to High heat setting and
check pressure.
• If adjustments are necessary, the
regulator is situated on the front of the
gas control.
• After checking pressure, turn the unit off,
remove manometer and replace test
point plug.
• Turn the heater on and off a few times to
check ignition.
• When you are satisfied that the heater is
working correctly, reassemble panels.
• All burner aeration is factory preset and
cannot be adjusted.
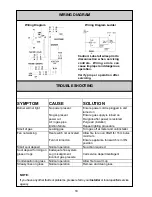
• If you are unable to get the unit to operate
correctly, refer to Troubleshooting on
Page 18, before contacting your local
service contact as listed on Page 3.
• It may take approximately 2 hours for the
logs to achieve their full flame pattern
and glow.
•
During the initial burning in period,
some smoke and smell may be
experienced. The
heater should be run
on the high position in a well ventilated
room until these dissipate.
TESTING AND COMMISSIONING
It is the responsibility of the installer to
check that under normal operating
conditions of the appliance, all flue gases
are exhausted to the outside atmosphere
and that there is no spillage of combustion
gases into the room.
COMMISSIONING
INSTALLATION AND COMMISSIONING
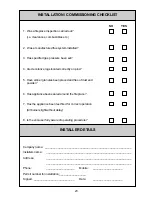
CHECKLIST
Complete the installation checklist and the
installer details on page 23 and make sure
that this instruction book is left with the
customer.
INSTRUCT CUSTOMER ON USE OF
UNIT
Explain to customer about use and care of
unit. Make sure the customer understands
the instructions.
EXPLAIN
Ignition, Adjusting heat level, Fan Switch,
Turning “OFF”.
NOTE:
THE MANUFACTURE RESERVES THE
RIGHT TO CHANGE OR MODIFY
SPECIFICATIONS WITHOUT NOTICE


