


39
• REF:
press this key to enable the reference waveform function. You
can compare the waveform actually measured with the reference
waveform.
• Decode1, Decode2:
press any key to open the corresponding decod-
ing function menu.
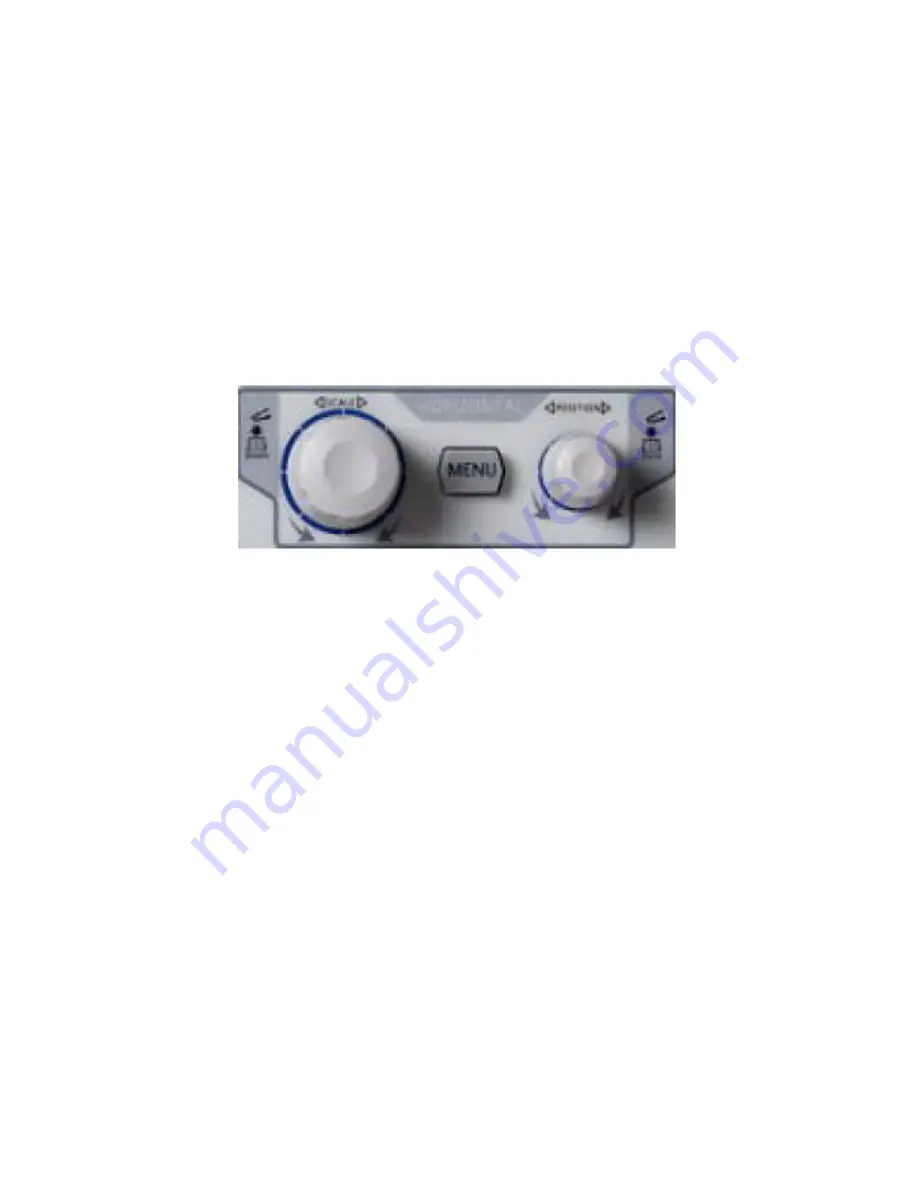
HORIZONTAL
• MENU:
press this key to open the horizontal control menu. You can turn
on or off the delayed sweep, switch between different horizontal time
base modes, switch between “Coarse” and “Fine” adjustments of the
horizontal time base as well as modify the horizontal reference setting.
• HORIZONTAL SCALE:
horizontal scale knob. Turn the knob to modify
the horizontal time base. During the modification, the waveforms dis
-
played are expanded or compressed horizontally; the horizontal time
base message at the upper-left side of the screen changes accord-
ingly. Pressing down the knob can quickly turn on or off the delayed
sweep. When delayed sweep is turned on, turning the knob can modi-
fy the delayed sweep time base. During the modification, the delayed
sweep waveform is expanded or compressed horizontally; the de-
layed sweep time base message at the middle of the screen changes
accordingly.
Summary of Contents for DS4024
Page 10: ...08 1 Turn on the power to the oscilloscope and wait for it to ini tialize...
Page 11: ...09 2 Attach the probe to the BNC terminal of the oscilloscope...
Page 12: ...10 3 Connect the probe s ground clip to ground in the circuit...
Page 13: ...11 4 Connect the probe s measuring clip to the point within your circuit you wish to measure...
Page 15: ...13 6 You should see your waveform on the screen...
Page 19: ...17 10 You can zoom into the horizontal view by pressing the dial...
Page 20: ...18 11 To return to the default view press the scale button again...
Page 22: ...20 13 To return to the original position press the horizontal posi tion button...
Page 25: ...23 16 To return to the default vertical position press the vertical position button...
Page 29: ...27 20 Press the Display All soft key...
Page 31: ...29 22 Return to the original trigger level by pressing the trigger dial button...
Page 32: ...30 253 To store a screen shot insert a USB drive into the port on the front panel...
Page 33: ...31 24 Press the Storage button on the front panel...
Page 34: ...32 25 Rotate the Multi Function Knob to highlight DiskD and press to select the USB drive...
Page 35: ...33 26 Press the New File soft key...
Page 36: ...34 27 Name the file if needed...
Page 37: ...35 28 Press the OK soft key...
Page 38: ...36 29 Press the Menu button on the right of the screen to exit...


