19
Bolero 2.0 User Manual
·
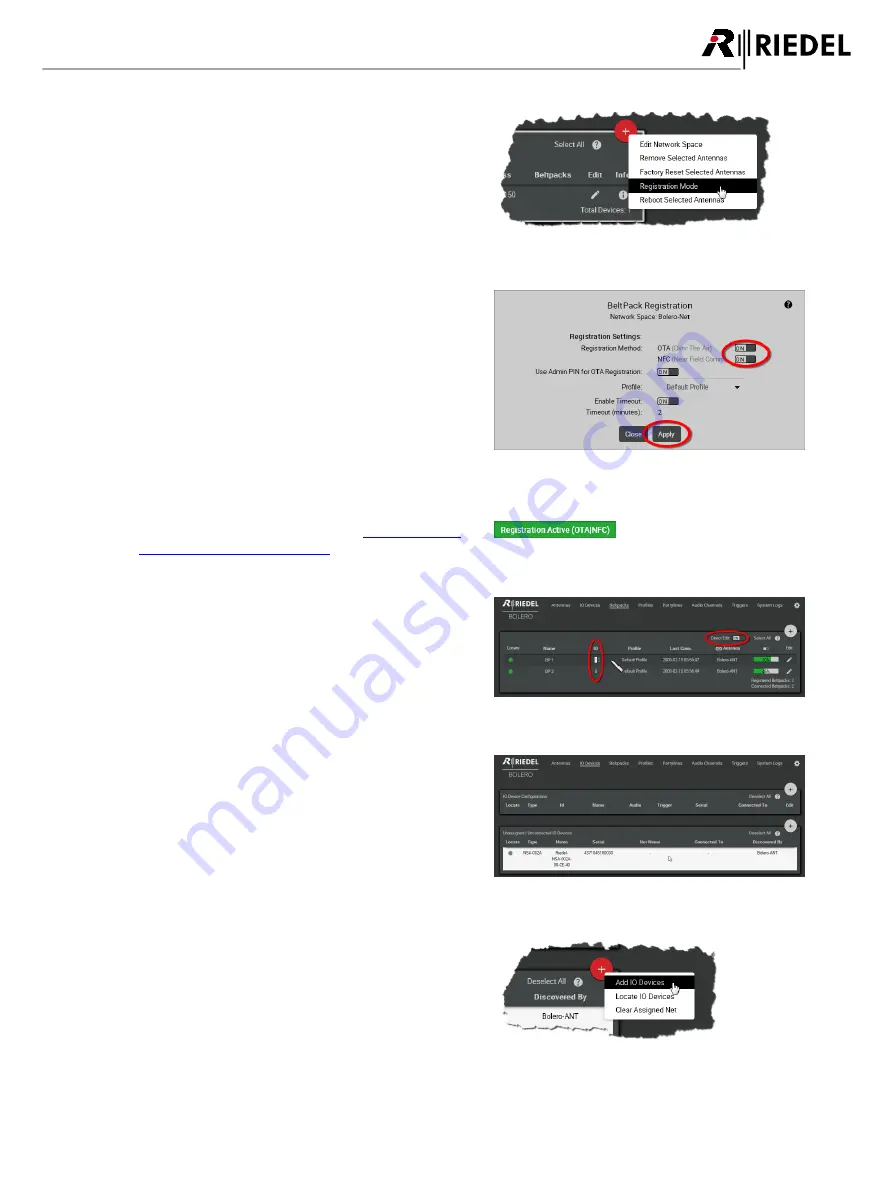
Click on the plus symbol and select the entry
Registration
Mode
.
A dialog is opened to enter the registration options.
Figure 14: Registration Mode
·
Enable the
OTA
and/or
NFC
registration method.
·
Apply
the changes.
Beltpacks require a PIN for the OTA registration. By default
the
Admin PIN
is used. If the function '
Use Admin PIN for
OTA Registration
' is
disabled
, a different
OTA Registration
PIN
can be defined for the OTA registration.
Figure 15: Dialog – Beltpack Registration
Beltpacks are able to register to this net as long as the
registration mode is active (see chapter
Features in Detail > Add Beltpacks
).
Figure 16: Beltpack Registration active
Registered Beltpacks are listed on the page
Beltpacks
.
·
Enable the
Direct Edit
switch.
·
Click on the Beltpack's ID and enter a unique Beltpack ID
(0–999).
Figure 17: Registered Beltpacks
·
Open the page
IO Devices
.
·
Select the unassigned IO Devices (NSA-002A) by left
clicking.
Selected elements will be highlighted.
Figure 18: Selected IO-Devices
·
Click on the plus symbol and select the entry
Add IO
Devices
.
A dialog is opened to select the device configuration.
Figure 19: Add IO Devices
Summary of Contents for Bolero 2.0
Page 1: ...User Manual 03 000HB01EG B10 Bolero 2 0 Next Generation Wireless ...
Page 6: ...Bolero 2 0 User Manual Notes 123 6 4 Index 125 ...
Page 123: ...123 Bolero 2 0 User Manual 6 4 Notes ...
Page 124: ...124 Bolero 2 0 User Manual Notes ...
Page 130: ...www riedel net Riedel Communications GmbH Co KG Uellendahler Str 353 42109 Wuppertal Germany ...


