DISPOSAL
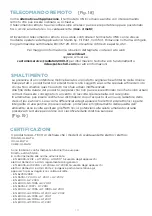
[Fig. 19]
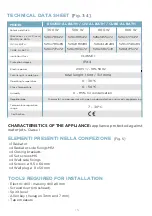
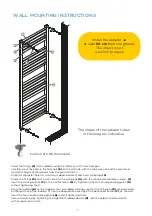
A crossed-out wheelie bin symbol on the product means that all electrical products in the
European Union are subject to special collection at the end of their life cycle.
DO NOT dispose of these products with unsorted household waste.
At the end of the product’s life, the appliance must not be disposed of with common
household waste but must be delivered to a special collection centre in the region in
question. Alternatively, the product can be returned to the distributor after buying a new
appliance of the same type and use. Separate collection of electrical and electronic appliances
is an integral part of a policy on preserving, protecting and improving the quality of the
environment; this is designed to avoid potentially harmful effects on human health due to
the presence of hazardous substances, thus classified by European regulations.
Using the remote control, it is possible to control the SMART thermostat with the
same operating modes: Stand-by, Fil Pilot, Comfort, Night, Antifreeze, Thermostat
Programmable, BOOST 2H, ECO, detection of open windows, ASC.
For more information and detailed instructions, see the website.
www.ridea.it
or write to
for technical information
for other information
WI-FI MODULE
REMOTE CONTROL
As an
alternative to the application
, the electronics also communicate with a remote control
which can be purchased on request.
The remote control has a wireless connection: it can be portable or attached to the wall near
the radiator (
max. 4 meters
).
To activate the Wi-Fi module and control the domestic radiators remotely, proceed
as following:
1) Go to the Wi-Fi area of the application [Fig. 17a];
2) Select
ADD WI-FI
[Fig. 17b];
3) Select
ADD THERMOSTAT NOT YET CONNECTED TO THE HOME NETWORK
[Fig. 17c];
4) Activate the Wi-Fi of the smartphone / tablet;
5) Connect to the thermostat's Wi-Fi network;
6) The application will ask you to connect to the home network.
7) Enter the password for the home router. (
ATTENTION
: if you enter a password
wrong pass, activate RESET procedure: press the connection button on the
thermostat for 15 seconds.)
8) Select
ADD WI-FI
again [Fig. 17b];
9) Select
ADD THERMOSTAT ALREADY CONNECTED TO THE HOME NETWORK
[Fig. 17c];
10) At this point, scan the QR code provided with the thermostat packaging;
11) Rename the radiator as you prefer.
[Fig. 18]
21

