Chapter
7 - 2
7.1.1.1 Installing TCP/IP
Follow the instructions for the TCP/IP package of your choice to set up the TCP/IP on the
workstations.
7.1.1.2 Loading the lpr Spooler
Follow the instructions for the lpr spooler of your choice to set up the spooler on the
workstations.
7.1.1.3 Setting up the Network Interface Board
The Network Interface Board must be given IP address and routing information to be
used with TCP/IP. This can be done with either the ARP procedure or the BOOTP Lite
program.
Prior to running these programs, install the Network Interface Board in your printer.
Power-up the printer. Keep the status sheet handy for the Ethernet (MAC) address. It
should show that TCP/IP is enabled, but that the Protocol address is not configured. If the
unit already has an IP address, these procedures will not work. However, you can use
the “User Tools” menu on the operator panel of the printer, Telnet to the unit or use the
HTML pages accessed by a Web Browser to change the IP parameters.
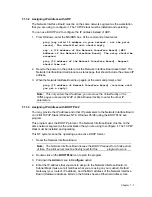
7.1.1.4 Assigning IP Address with ARP
The Network Interface Board must be on the same network segment as the workstation
that you are using to configure it. The TCP/IP stack must be installed and operating.
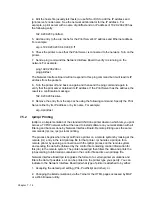
Use the procedures in 7.1.1.5 Assigning IP Address with BOOTP Lite, if you prefer to use
BOOTP Lite to configure the IP address instead of ARP:
1.
From Windows, enter the MS/DOS box.
2.
At the command prompt enter:
ping [any valid IP address on your network - not the print
server]; the identified unit should reply
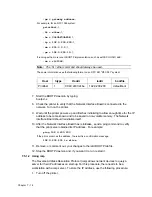
arp -s [IP address of Network Interface Board] [MAC Address
of Network Interface Board]; the entry should be accepted
ping [IP address of Network Interface Board]; request should
time out
3.
Recycle the power on the printer, or let the Network Interface Board reset itself.
The Network Interface Board will produce a status page that should include the
entered IP address.
4.
When the Network Interface Board is up again, type the following at the command
prompt:
ping [IP address of Network Interface Board] (continue until
you get a reply)
Note:
This only enters the IP address; you must use the Telnet facility or the
HTML pages accessed by a Web Browser to complete the IP setup for networks
Summary of Contents for NIB 450-E
Page 3: ......
Page 8: ......
Page 14: ......
Page 18: ......
Page 40: ......
Page 44: ......
Page 46: ......
Page 86: ...2 ...
Page 106: ...Dynamic Host Configuration Protocol DHCP 22 4 ...
Page 112: ...Windows NT Configuration 28 5 ...
Page 118: ...34 UE USA A855 ...
Page 119: ...Copyright 1998 ...


