11. OPERATION
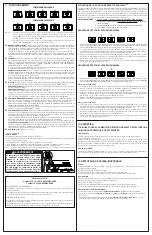
Master ON/OFF:
Press this key to turn on the light and the fan at the last saved intensity. The backlights of
the master ON/OFF key, fan key and light key are turned ON. When either light and fan are ON, pressing
on this key will memorize the current fan speed and lighting level prior to shut them OFF.
Whenever there is an active function (light or fan is turned ON directly by pressing the fan or light key), the
master ON/OFF backlight is turned ON. When the last active function is turned OFF (light or fan is turned
OFF directly by pressing the fan or light key), the master ON/OFF backlight is also turned OFF.
Fan:
When fan is OFF, a key press turns ON the fan to the last saved speed. If there was no speed saved,
the fan will be set on LOW speed. To change the fan speed, press the key again until the desired speed is
reached (PM400SV unit: from LOW, to MEDIUM to HIGH speed to OFF - PM600SSV unit: from LOW, to
MEDIUM-LOW, to MEDIUM-HIGH, to HIGH speed to OFF).
When the fan is ON (no matter the speed level), a long key press turns the fan OFF and the current fan
speed setting is saved to memory.
Filter Cleaning Reminder
: When the user turns the fan OFF, and the fan key backlight flashes slowly during
30 seconds, then this means it is time to clean the hood and filter (refer to Maintenance section). This will
happen every time the user turns the fan OFF (and the timer has not been reset).
Once the cleaning is done, at any time during the 30 second signal (and the fan is OFF), a long press of the
fan key will reset the timer and stop the key backlight flashing.
Lights:
Press this key to turn ON the lights to the last saved intensity. If there was no light intensity saved,
the lights will be set on LOW intensity.
PM400SSV unit only:
Press another time to set the lights to HIGH intensity. Pressing another time after
the HIGH intensity will turn OFF the lights.
PM600SSV unit only:
To change the lights intensity, press the key again until the desired level is reached
(from LOW, to MEDIUM, to HIGH intensity, to OFF).
When the lights are ON, a long press turns the lights OFF and the current light intensity is saved to
memory. The next time the lights are turned ON (either with the light key or the master ON/OFF key),
it does so at the last saved intensity.
Delay OFF (PM400SSV unit only):
When fan is ON, press this key to activate the delay function; the delay
off button backlight will be ON for the duration of the delay (or until cancelled). The fan will continue to operate
for 10 minutes and then, will shut off automatically.
When the delay mode is active, it is possible to change the fan speed by pressing the fan key without
affecting the remaining time of the delay.
To cancel the delay function before the end of the 10 minute-cycle, press again on the delay OFF key or on
the Master ON/OFF key.
Auto key (PM600SSV unit only):
When the fan is ON, press this key to activate the Auto mode. When a
cooking session is detected, this function will automatically start the fan and adjust the fan speed according
to heat detected over cooktop.
When the hood is OFF and not in use for 3 minutes, the Auto key backlight
will automatically turn OFF. Pressing any key will turn the backlight back ON.
To disable the Auto mode, press for a long time the Auto key until the backlight turns OFF.
Overriding the Auto mode
: When the Auto mode is operating, it is possible to manually increase or decrease
the fan speed using the fan key. The Auto key backlight will flash slowly to indicate that the Auto mode is no
longer controlling the fan. After the fan has been manually turned OFF for 10 minutes, the Auto mode will
automatically be re-enabled.
WiFi
®
/Bluetooth
®
:
See next page.
PM400SSV CONTROL
PM600SSV CONTROL
HEAT SENTRY™
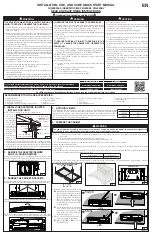
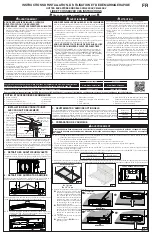
Your unit is equipped with a HEAT SENTRY™ thermostat.
This thermostat is a device that will turn on or speed up the blower if it senses excessive heat above the cooking
surface.
1) If blower is OFF - it turns blower ON to HIGH speed.
2) If blower is ON at a lower speed setting - it turns blower up to HIGH speed.
When the temperature level drops to normal, the blower will return to its original setting.
NOTE: When Heat Sentry is activated, the fan key backlight flashes slowly and the fan speed cannot be changed.
WARNING
The HEAT SENTRY thermostat can start
the blower even if the hood is turned OFF.
When this occurs, it is impossible to turn the
blower OFF with its key. If you must stop the
blower, set the main power switch (located
behind the filter, on inner side of the unit
faceplate) in OFF position (if it is possible to
do so safely). See inset in FIG. 31.
!
FIG. 31
FCC/IC Statements
Contains FCC ID: 2AC7Z-ESP32WROVERE
Contains IC: 21098- ESPWROVERE
FCC COMPLIANCE STATEMENT
This device complies with part 15 of the FCC Rules. Operation is subject to the following two conditions:
(1) This device may not cause harmful interference, and (2) this device must accept any interference received,
including interference that may cause undesired operation.
INDUSTRY CANADA STATEMENT
This device complies with Industry Canada license exempt RSS standard(s). Operation is subject to the following
two conditions:
(1) this device may not cause interference, and (2) this device must accept any interference, including interference
that may cause undesired operation of the device.
CODE READY TECHNOLOGY™ ACTIVATION
The Code Ready Technology option allows to change the blower output from the factory setting
(PM400SSV: 400 CFM, PM600SSV: 600 CFM) to a maximum of 300 CFM for PM400SSV unit
and 400 CFM or 300 CFM for PM600SSV unit. Activating the CRT option will reduce the airflow, so that the
powerpack insert will perform within the allowable limit of Make-Up Air (MUA) codes (to meet some building
code requirements). Do not change the blower CFM setting unless this change is required by code. This
change will alter the performance of the product.
IMPORTANT NOTES:
1. This change CANNOT be reverted.
2. CRT can only be set within the first 5 minutes of applying power to the unit.
3. A power outage will not deactivate the CRT.
4. Fan and lights must be OFF.
CRT PROCEDURE FOR PM400SSV UNIT
1. Switch power ON using the main power switch (located behind the filter) and press simultaneously on Fan (
A
)
and Lights (
B
) keys for 5 seconds; Fan (
A
) and Lights (
B
) key backlights will now flash to indicate you entered
the CRT menu.
2. To select the 300 CFM maximum airflow, press on the Lights (
B
) key for 5 seconds, then release; the Lights
key backlight will now flash to indicate 300 CFM has been selected (the Fan (
A
) key backlight will be shut).
3. A second 5-second press on the Lights (
B
) key and release confirms the selection; the Lights key backlight
quickly flashes twice and the buzzer sounds a double beep. The user interface returns to normal operation.
4. Locate the CRT sticker near the HVI Certification label inside the hood, behind the filter.
Check the proper box (300 CFM).
A
B
CRT PROCEDURE FOR PM600SSV UNIT
1. Switch power ON using the main power switch (located behind the filter) and press simultaneously on Fan (
A
)
and Lights (
B
) keys for 5 seconds; Fan (
A
) and Lights (
B
) key backlights will now flash to indicate you entered
the CRT menu.
400 CFM
MAXIMUM
AIRFLOW
2. To select the 400 CFM maximum airflow, press on the Fan (
A
) key for 5 seconds, then release; the Fan key
backlight will now flash to indicate 400 CFM has been selected (the Light (
B
) key backlight will be shut).
3. A second 5-second press on the Fan (
A
) key and release confirms the selection; the Fan key backlight quickly
flashes twice and the buzzer sounds a double beep. The user interface returns to normal operation.
4. Locate the CRT sticker near the HVI Certification label inside the hood, behind the filter.
Check the proper box (400 CFM).
300 CFM
MAXIMUM
AIRFLOW
2. To select the 300 CFM maximum airflow, press on the Lights (
B
) key for 5 seconds, then release; the Lights
key backlight will now flash to indicate 300 CFM has been selected (the Fan (
A
) key backlight will be shut).
3. A second 5-second press on the Lights (
B
) key and release confirms the selection; the Lights key backlight
quickly flashes twice and the buzzer sounds a double beep. The user interface returns to normal operation.
4. Locate the CRT sticker near the HVI Certification label inside the hood, behind the filter.
Check the proper box (300 CFM).
A
B
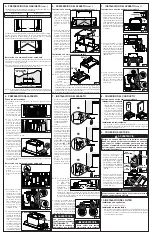
12. MAINTENANCE
ALWAYS SWITCH OFF THE ELECTRICITY SUPPLY BEFORE CARRYING OUT ANY
OPERATIONS ON THE APPLIANCE.
Grease Filter
The grease filter should be cleaned frequently. Use a warm dishwashing detergent solution. Grease filter is
dishwasher safe.
Clean the filter in the dishwasher using a non-phosphate detergent. Discoloration of the filter may occur if using
phosphate detergents, or as a result of local water conditions - but this will not affect filter performance. This
discoloration is not covered by the warranty. To minimize or prevent discoloration, hand wash filter using a mild
detergent.
Non-Ducted Recirculation Filter
The Non-Ducted Recirculation filter should be changed every 3 to 6 months. Replace more often if your
cooking style generates extra grease, such as frying and wok cooking.
13. STAINLESS STEEL CLEANING
Do:
•
Regularly wash with clean cloth or rag soaked with warm water and mild soap or liquid dish detergent.
•
Always clean in the direction of original polish lines.
•
Always rinse well with clear water (2 or 3 times) after cleaning. Wipe dry completely.
•
You may also use a specialized household stainless steel cleaner.
Don’t:
•
Use any steel or stainless steel wool or any other scrapers to remove stubborn dirt.
•
Use any harsh or abrasive cleansers.
•
Allow dirt to accumulate.
•
Let plaster dust or any other construction residues reach the unit. During construction/renovation, cover
the unit to make sure no dust sticks to the stainless steel surface.
Avoid when choosing a detergent:
•
Any cleaners that contain
bleach
will attack stainless steel.
•
Any products containing:
chloride
,
fluoride
,
iodide
,
bromide
will deteriorate surfaces rapidly.
•
Any combustible products used for cleaning such as
acetone
,
alcohol
,
ether
,
benzol
, etc., are highly
explosive and should never be used close to a range.
NOTES: 1. Each time a key is pressed, a beep is emitted to acknowledge the command. To disable, when the
fan and lights are OFF, press on the Lights key (
)
for 5 seconds. To put it back, when the fan and
lights are OFF, press again on the Lights key (
) for 5 seconds.
2. Each time a key is pressed, its backlight turns ON. When a function is turned OFF, so does the
corresponding key backlight.

