background image

SAFETY

RC12  12-05

Safety Section 1-18

© 2005 Alamo Group Inc.

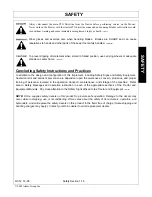
SAFETY

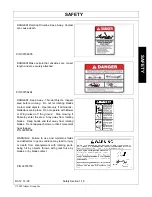
Decal Description

Peligro Translation, If you do not know how to read
English, please find someone who knows how to
read English.

P/N 00725746

PELIGRO! Spanish Translation for Driveline Safety

P/N 00773723

DANGER!  Mult-Hazard Warning.  Failing to follow
these Safety Messages and Operating Instructions
can cause serious bodily injury or even death to
operator and others in the area.    

(See Inside Front Cover)

P/N 002369

DANGER! Guard Missing Do Not Operate.

P/N 00756004

Summary of Contents for RC-12

Page 1: ... Ave Gibson City IL 60936 800 446 5158 Email parts servis rhino com FLAIL SHREDDER This Operator s Manual is an integral part of the safe operation of this machine and must be maintained with the unit at all times READ UNDERSTAND and FOLLOW the Safety and Operation Instructions contained in this manual before operating the equipment C01 Cover RC 12 ...

Page 2: ...ety equipment properly attached to minimize the chance of acci dents BEFORE YOU START Read the safety messages on the implement and shown in your manual Observe the rules of safety and common sense WARRANTY INFORMATION Read and understand the complete Warranty Statement found in this Manual Fill out the Warranty Registration Form in full and return it to Rhino within 30 Days Make certain the Seria...

Page 3: ...UG INSTALLATION 3 2 TONGUE ASSEMBLY INSTALLATION 3 2 3 POINT HITCH ASSEMBLY INSTALLATION 3 5 ATTACHING AXLE ASSEMBLIES TO MAIN WHEEL BAR TUBE 3 6 ATTACHING OPTIONAL HYDRAULIC CYLINDER 3 6 OPERATION SECTION 4 1 Standard Equipment and Specifications 4 3 OPERATOR REQUIREMENTS 4 4 ROPS and SEAT BELT 4 5 Tractor Safety Devices 4 5 Tractor Horsepower 4 6 3 Point Hitch 4 6 Drawbar Pull Type Mower 4 6 Fro...

Page 4: ...ging the Power Take Off PTO 4 26 PTO RPM and Ground Speed 4 27 Operating the Mower 4 27 Shutting Down the Implement 4 29 DISCONNECTING THE MOWER FROM THE TRACTOR 4 30 MOWER STORAGE 4 31 TRANSPORTING THE TRACTOR AND IMPLEMENT 4 31 Transporting on Public Roadways 4 33 Hauling the Tractor and Implement 4 35 MAINTENANCE SECTION 5 1 GENERAL MAINTENANCE 5 2 LUBRICATION 5 2 ROUTINE MAINTENANCE 5 3 CUTTER...

Page 5: ...Safety Section 1 1 2005 Alamo Group Inc SAFETY SECTION ...

Page 6: ...ow is used throughout this manual and on decals which are attached to the equipment The Safety Alert Symbol means ATTENTION BECOME ALERT YOUR SAFETY IS INVOLVED The Symbol and Signal Word are intended to warn the owner operator of impending hazards and the degree of possible injury faced when operating this equipment The lowest level of Safety Message warns of possible injury Decals located on the...

Page 7: ... Safety Messages found in the Manual or on the Tractor and Implement Learn how to stop the tractor engine suddenly in an emergency Never allow inexperienced or untrained personnel to operate the Tractor and Implement without supervision Make sure the operator has fully read and understood the manuals prior to operation SG 4 The operator and all support personnel should wear hard hats safety shoes ...

Page 8: ... Equipment safely NEVER knowingly allow anyone to operate this equipment when their alertness or coordination is impaired Serious injury or death to the operator or others could result if the operator is under the influence of drugs or alcohol SG 27 Prolonged operation may cause operator boredom and fatigue affecting safe operation Take scheduled work breaks to help prevent these potentially impai...

Page 9: ... the Tractor Be careful when operating or transporting this equipment to prevent the Implement from running into or striking sign posts guard rails concrete abutments or other solid objects Such an impact could cause the Implement and Tractor to pivot violently resulting in loss of steering control serious injury or even death Never allow the Implement to contact obstacles S3PT 12 There are obviou...

Page 10: ...ining debris being removed and mowed again at desired final height This will also reduce power requiredto mow reduce wear and tear on the Mower drivetrain spread cut material better eliminate streaking and make the final cut more uniform SFL 6 Operate this Equipment only with a Tractor equipped with an approved roll over protective system ROPS Always wear seat belts Serious injury or even death co...

Page 11: ...e could present a hazard Do not check for leaks with your hand High pressure oil streams from breaks in the line could penetrate the skin and cause tissue damage including gangrene To check for a hose leak SHUT the tractor ENGINE OFF and remove all hydraulic pressure Wear oil impenetrable gloves safety glasses and use Cardboard to check for evidence of oil leaks If you suspect a leak REMOVE the HO...

Page 12: ...fail upon impact with heavy solid objects such as metal guard rails and concrete structures Such impact could cause the broken objects to be thrown outward at very high velocities To reduce the possibility of property damage serious injury or even death never allow the cutting blades to contact such obstacles SGM 4 Extreme care should be taken when operating near loose objects such as gravel rocks...

Page 13: ...slip clutches and gearboxes Periodically shut down the Tractor and Mower and clean clippings and collected debris from the mower deck SGM 12 The Mower is designed for certain mowing applications and is rated to cut up to a specific size vegetation see Mower Standard Equipment and Specifications DO NOT use this mower to cut vegetation above the Mower s rated capacity or to cut any type of non veget...

Page 14: ...ke before you or anyone else attempts to connect or disconnect the Implement and Tractor hitches S3PT 15 Never operate the Tractor and Mower if the Implement input driveline is directly connected to the Tractor transmission Tractor braking distances can be substantially increased by the momentum of the rotating Mower blades driving the Tractor transmission even though the Tractor clutch has been d...

Page 15: ... property damage or possible injury Do not transport unless 3 Point lift lever is fully raised and in the latched transport position Dropping implement in transport can cause serious damage to the tractor and or Implement and possibly cause the operator or others to be injured or killed S3PT 2 Allow sufficient clearance for the Implement to swing outward while turning Implements carried behind the...

Page 16: ...ximum safe turning speed for you and this equipment before operating on roads or uneven ground Only transport the Tractor and Implement at the speeds that you have determined are safe and which allow you to properly control the equipment Be aware of the operating conditions Do not operate the Tractor with weak or faulty brakes When operating down a hill or on wet or rain slick roads the braking di...

Page 17: ... the Implement Never work on the Implement with the tractor PTO driveline connected and running Rotating Parts Blades or Drivelines could turn without warning and cause immediate entanglement injury or death S3PT 11 All Safety Shields Guards and Safety devices including but not limited to the Deflectors Steel Guards Gearbox Shields PTO integral shields and Retractable Door Shields should be used a...

Page 18: ...n handling sharp objects such as blades knives and other cutting edges Be alert to worn component surfaces which have sharp edges Sharp surfaces can inflict severe laceration injuries if proper hand protection is not worn SG 37 Replace bent or broken blade with new blades NEVER ATTEMPT TO STRAIGHTEN OR WELD ON BLADES SINCE THIS WILL LIKELY CRACK OR OTHERWISE DAMAGE THE BLADE WITH SUBSEQUENT FAILUR...

Page 19: ...Drivelines could turn without warning and cause immediate entanglement injury or death SRM 3 Wear gloves and exercise care when handling blades Blades are SHARP and can cause lacerations to hands and other parts of the body if not safely handled SSM 09 To prevent tipping of Implement when stored in folded position use carrying wheels or adequate stands on center frame S3PT 6 In addition to the des...

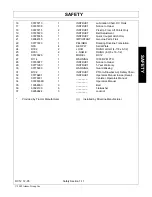
Page 20: ...00756004 3 1 DANGER Driveline Shield Missing 6 00756005 3 1 DANGER Rotating Driveline 7 02967668 1 DANGER Cutting Blades Thrown Objects 8 00756059 1 WARNING Leak Detection Oil Penetration 9 00756494 1 DANGER Driveline Safety 10 00758194 1 WARNING Pitch Point V Belt Pulley 11 03200347 1 REFLECT SMV Reflector 12 1458392 2 REFLECT Red Reflector 13 1458393 2 REFLECT Yellow Reflector 14 00725747 1 INST...

Page 21: ...rial Plate 24 D302 2 LOGO RHINO LOGO 4 7 8 x 6 1 2 25 D303 2 L NAME RHINO 4 3 8 x 16 1 2 26 00725626 1 MODEL RC12 27 D114 1 WARNING 1000 RPM PTO 28 00763977 1 INSTRUCT Notice to Owner 29 00771283 1 INSTRUCT 5 Year Warranty 30 00775933 1 WARNING Guard Missing 31 D102 1 INSTRUCT PTO to Drawbar Adj Safety Chain 32 00776481 1 INSTRUCT Operators Manual Inside Decal 33 00776031 1 ________ Canister Opera...

Page 22: ... who knows how to read English P N 00725746 PELIGRO Spanish Translation for Driveline Safety P N 00773723 DANGER Mult Hazard Warning Failing to follow these Safety Messages and Operating Instructions can cause serious bodily injury or even death to operator and others in the area See Inside Front Cover P N 002369 DANGER Guard Missing Do Not Operate P N 00756004 ...

Page 23: ...lid objects Operate only if all Guards Deflectors are in place Do not operate with Mower or Wing raised off the ground Stop mowing if Passerby enter the area Stay away from rotating blades Keep hands and feet away from rotating blades Do not approach mower until all movement has stopped P N 02967668 WARNING Failure to use and maintain shields and deflectors in good condition may lead to injury or ...

Page 24: ...Y Information that Grease Fitting is present and must apply grease P N 000678 8 Hour Lubrication Chart P N 00725713 Operator s Manual with repair parts and warranty was attached to this implement during final inspection P N 00763977 Logo Product Name Rhino P N D302 ...

Page 25: ...oup Inc SAFETY P N D303 Logo Product Name Rhino WARNING Guard Missing Do Not Operate P N 00775933 WARNING Tractor rearing P N 999001 Slow Moving Vehicle Decal Keep SMV reflector clean and visible DO NOT transport or operate without the SMV P N 03200347 ...

Page 26: ...ed Reflector Keep reflectors clean and visible P N 1458392 Amber Reflector Keep reflectors clean and visible P N 1458393 INFORMATION Use Genuine Rhino Flail Parts P N 02964510 WARNING Never use your hand to check for oil leaks Always use paper or cardboard P N 00756059 ...

Page 27: ...or s Manual Inside P N 00776481 WARNING Do not operate with Belt Shield removed Finger s may be pinched off if caught between V Belt and Pulley P N 00758194 Instructions for operation and maintenance of Flail Shredders P N 00725747 Instructions for filling Gearbox with oil P N 00725738 ...

Page 28: ...n 1 24 2005 Alamo Group Inc SAFETY Instructions for Lifting Unit with chain or cable P N 00725715 Instructions for proper Belt Tension P N 00725720 Instructions to use CAT III Quick Coupler Hitch P N 00725745 Model Name RC12 00725626 ...

Page 29: ...ction 1 25 2005 Alamo Group Inc SAFETY WARNING Avoid Bodily Injury Use 1000 RPM PTO Speed Only P N D114 INFORMATION 5 Year Gearbox Warranty P N 00771283 IMPORTANT Required For Jackshaft Unit Suggested for standard shaft P N D102 ...

Page 30: ...operation and servicing of all equipment with which the employee is or will be involved Employer Responsibilities To ensure employee safety during Tractor and Implement operation it is the employer s responsibility to 1 Train the employee in the proper and safe operation of the Tractor and Implement 2 Require that the employee read and fully understand the Tractor and Implement Operator s manual 3...

Page 31: ...Introduction Section 2 1 2005 Alamo Group Inc INTRODUCTION SECTION ...

Page 32: ...the owner operator how to work the Shredder correctly and attend to appropriate maintenance The Trouble Shooting Guide helps diagnose difficulties with shredder and offers solution to the problems Safety is of primary importance to the owner operator and to the manufacturer The first section of this manual includes a list of Safety Messages that if followed will help protect the operator and bysta...

Page 33: ...hredder Record the Shredder Model and Serial Numbers on the Warranty page at the rear of the Operator s Man ual Keep this as part of the permanent maintenance file for the Shredder This Flail Shredder is designed for medium duty work It will mow grass and weeds and shred row crop stalks very effectively For Non Agricultural use OSHA ASAE SAE and ANSI standards require the use of Chain Guards Defle...

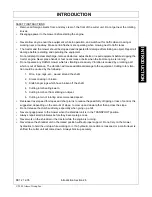
Page 34: ...educe fire hazard keep tractor engine free of grass leaves or excessive grease Thoroughly check the condition of the mower before mowing The cutter shaft must be free to turn before starting the mower Do not start the mower while in the cut Allow the cutter shaft to develop full speed before mowing Disengage power to the mower when transporting or not in use NEVER engage the power to the mower whe...

Page 35: ...out of balance The vibration will cause additional damage to the equipment Cutting rotor vibra tion could be caused by the following 1 Wire rope rags etc wound around the shaft 2 Knives missing or broken 3 Knife hanger lugs which have broken off the shaft 4 Cutting rotor bearings worn 5 Cutting rotor bent from striking an object 6 Cutting rotor not rotating at recommended speed Decrease travel spe...

Page 36: ......

Page 37: ...Assembly Section 3 1 2005 Alamo Group Inc ASSEMBLY SECTION ...

Page 38: ...t with 1 7 16 pins Raise front of hitch with hoist to attach 1 top pins Fasten in place with snapper pins The tongue assembly has two height posi tions for normal operation pin tongue in top hole for additional crop clearance pin tongue in second hole set Clean and apply anti seize compound to gearbox input shaft Remove eccentric lock collar on jack shaft bearing item 1 by loosening set screw inse...

Page 39: ... Group Inc ASSEMBLY Attach gearbox shield item 1 to gearbox with four 5 8 bolts flatwashers and lockwashers Asm FL 0065 Bolt shield mount plate item 2 to topside of front edge of gearbox shield with two 3 8 bolts flatwashers and lockwashers Asm FL 0065 ...

Page 40: ...ws item 2 Align set screws with dimples in jack shaft Apply thread locking compound to threads to prevent loosening Ensure driveline and jackshaft U joint are in phase Asm FL 0066 Place jack shaft shield item 1 in place over shield mount item 2 and bearing stand Fasten in place with two 3 8 bolts lockwashers and washers at shield mount and on either side of bearing mount Asm FL 0067 ...

Page 41: ...g point on top front of center plate Attach spacer item 5 to end of pin item 4 and fasten with 1 2 bolt item 6 and lockwasher Asm FL 0068 Raise hitch with hoist and insert pin item 7 through slotted end of link bar and top rear hole on hitch assembly Fasten with snapper pin item 2 Asm FL 0068 Slide PTO shaft on to gearbox input shaft and align hole in yoke with hole on shaft Shaft will only attach...

Page 42: ...em 1 to wheel bar item 2 with clamp plate item 3 and four 3 4 bolts item 4 lockwashers and nuts items 5 6 Tighten bolts evenly and progressively torque to 200 ft lbs RC12 is shipped standard with two Axle Assemblies Attach ratchet screw jack Rhino p n 00554600 between cylinder bracket mount and ear on rear of center plate ATTACHING OPTIONAL HYDRAULIC CYLINDER P N 00725933 Attach clevis end of hydr...

Page 43: ...Operation Section 4 1 2005 Alamo Group Inc OPERATION SECTION ...

Page 44: ...ound Never leave tractor seat while mower or tractor are operating Always slow tractor to an idle disengage PTO and wait for all rotation to cease Apply parking break and shut off engine before dismounting READ AND UNDERSTAND THE ENTIRE OPERATING INSTRUCTIONS AND SAFETY SECTION OF THIS MANUAL AND THE TRACTOR MANUAL BEFORE ATTEMPTING TO USE THE TRACTOR AND MOWER If you do not understand any of the ...

Page 45: ...ickness 3 16 End Plate Thickness 1 4 Drive Belt 5 x 5V Banded Front Safety Deflectors Std Weight Approx 4025 lbs with adequate front weights 1000 RPM The Mower is designed for certain mowing applications and is rated to cut up to a specific size vegetation see Mower Standard Equipment and Specifications DO NOT use this mower to cut vegetation above the Mower s rated capacity or to cut any type of ...

Page 46: ...ved Personal Protective Equipment PPE for the job conditions when attaching operating servicing and repairing the equipment PPE is designed to provide operator protection and includes the following safety wear PERSONAL PROTECTIVE EQUIPMENT PPE Protective Eye Glasses Goggles or Face Shield Hard Hat Steel Toe Safety Footwear Gloves Hearing Protections Close Fitting Clothing Respirator or Filter Mask...

Page 47: ... the operator from falling off the tractor especially during a roll over where the driver could be crushed and killed Only operate the tractor with the ROPS in the raised position and seat belt fastened Tractor model not equipped with a ROPS and seat belt should have these life saving features installed by an authorized dealer OPS U 0003 Operate this Equipment only with a Tractor equipped with an ...

Page 48: ...when coupling with quick hitch Remove or adjust drawbar to provide clearance for driveline on lift type units Adjust top link so machine does not tilt back when raised increasing angles of u joints which may cause premature failure 2 6 Front End Weight Maintain a minimum of 20 total tractor weight on the tractor front end at all times Front end weight is critical to maintain steering ability and t...

Page 49: ...utch between the Tractor PTO and the Mower driveline to prevent this potentially dangerous situation S3PT 3 GETTING ON AND OFF THE TRACTOR Before getting onto the tractor the operator must read and completely understand the implement and tractor operator manuals If any part of either manual is not completely understood consult an authorized dealer for a complete explanation OPS U 0007 Do not mount...

Page 50: ...ey and wait for all motion to completely stop Never leave the seat until the tractor its engine and all moving parts have come to a complete stop Use hand rails and steps when exiting the tractor Be careful of your step and use extra caution when mud ice snow or other matter has accumulated on the steps or hand rails Use all handrails and steps for support and never rush or jump off the tractor OP...

Page 51: ...position The hydraulic remote control levers are in the neutral position The tractor transmission levers are in park or neutral Refer to the tractor owner s manual for tractor starting procedures Only start the tractor while seated and belted in the tractor operator s seat Never bypass the ignition switch by short circuiting the starter solenoid After the tractor engine is running avoid accidental...

Page 52: ... float may be locked out by reversing center lock plate in link assembly This lock plate should only be used in level conditions and on tractors which are unable to maintain lift level Semi Mount Models The cutting height is maintained with a combination of tractor 3 Point Lift adjustment and wheel bar adjustment Individual caster adjustment is to level caster pivot pin angle perpendicular with th...

Page 53: ...fting device scissors jack or hydraulic jack under center of cutter housing 4 Remove hex nuts washers and carriage bolts from bracket at each end of roller Make certain that roller bracket is free to move once the fasteners are removed A stuck roller could drop unexpectedly and cause injury 5 Use lifting device to reposition cutter housing to desired cutting height Align bracket holes with cutter ...

Page 54: ...rom objects thrown from the Blades SRM 7 7 DRIVELINE ATTACHMENT The driveline yoke and tractor PTO shaft must be dirt free and greased for attachment To connect the mower driveline to the tractor PTO output shaft pull the driveline yoke collar back and align the grooves and splines of the yoke with those of the PTO shaft Push the driveline yoke onto the PTO shaft release the locking collar and pos...

Page 55: ...tor PTO by pushing the PTO into the Tractor and through the support bearings or downward onto the PTO shaft breaking it off A broken drive line can cause personal injury S3PT 18 Driveline Clearance Pull Type Units After adjusting drawbar to correct length and attaching mower check driveline for telescoping clearance Before engaging PTO ensure driveline does not bottom out during sharp turns Check ...

Page 56: ...with a longer shaft Consult an authorized dealer to purchase the required driveline length NOTE If the driveline cannot be shortened and still maintain the required profile engagement the operator must be made aware of terrain conditions and avoid situations which pose a potential problem to avoid damaging the driveline OPS F 0002 8 PRE OPERATION INSPECTION AND SERVICE Before each use a pre operat...

Page 57: ...y service and inspection Tire condition air pressure Wheel lug bolts Steering linkage PTO shield SMV sign is clean and visible Tractor s lights are clean and functional Tractor Seat belt is in good condition Tractor ROPS is in good condition ROPS is in the raised position No tractor oil leaks Radiator free of debris Engine oil level and condition Engine coolant level and condition Power brake flui...

Page 58: ...H SUBSEQUENT FAILURE AND POSSIBLE SERIOUS INJURY FROM THROWN BLADES SGM 10 The operator s manual and decals affixed on the unit contain important instructions on the safe and proper use of the equipment Maintain these important safety features on the implement in good condition to ensure the information is available to the operator at all times Ensure the manual canister is secured to the equipmen...

Page 59: ... of the drive belts Ensure the slip clutch rear mower section only is properly adjusted and the friction plates are not frozen together Reference the Maintenance Section for proper slip clutch maintenance Ensure the slop clutch shield and drive belts shields are in place and in good repair Ensure the tractor PTO master shield is in place lowered and in good condition OPS F 0016 Inspect oil level i...

Page 60: ... pins for looseness and excessive wear Make sure the mower is securely blocked up before crawling beneath Replace damaged worn and missing knives as complete sets to maintain cuttershaft balance Remove any grass or other debris which may be wrapped around the cuttershafts Inspect the condition of deck skid shoes and hardware OPS F 0007 This Implement is wider than the Tractor Be careful when opera...

Page 61: ...s safe to operate at a higher speed Use extreme care and reduce your speed when turning sharply to prevent the tractor and implement from turning over Determine the maximum safe turning speed for you and this equipment before operating on roads or uneven ground Only transport the Tractor and Implement at the speeds that you have determined are safe and which allow you to properly control the equip...

Page 62: ...lowing single rear wheel braking action or locked together to provide simultaneous rear wheel braking FOR MOST DRIVING AND OPERATING CONDITIONS THE BRAKE PEDALS SHOULD BE LOCKED TOGETHER TO PROVIDE THE MOST EFFECTIVE BRAKING ACTION Always disengage the tractor differential lock when turning When engaged the differential lock will prevent or limit the tractor from turning During normal cutting cond...

Page 63: ...e operator from stopping quickly during an emergency If the power steering or engine ceases operating stop the tractor immediately as the tractor will be difficult to control Drive the tractor with the 3 Point lift arms in the raised position and lock the control lever in the transport detent position to prevent damage to the mower driveline and tongue when turning Perform turns with the tractor a...

Page 64: ...eed disengage PTO and stop tractor Wait for all rotation to cease before dismounting tractor Check for missing or broken knives Never operate machine while knives are missing 9 5 Crossing Ditches and Steep Inclines When crossing ditches with steep banks or going up sharp inclines it is possible that the main driveline inner profile will penetrate into the outer housing to its maximum depth until t...

Page 65: ...ith the ground may cause soil rocks and other debris to be thrown out from under the mower resulting in possible injury and or property damage Ground contact also produces a severe shock load on the mower drive and to the mower blades resulting in possible damage and premature wear OPS R 0022 10 OPERATING THE TRACTOR AND IMPLEMENT THE OPERATOR MUST COMPLETELY UNDERSTAND HOW TO OPERATE THE TRACTOR ...

Page 66: ...operator Stop mowing immediately if blades strike a foreign object Repair all damage and make certain rotor or blade carrier is balanced before resuming mowing SGM 5 Many varied objects such as wire cable rope or chains can become entangled in the operating parts of the mower head These items could then swing outside the housing at greater velocities than the blades Such a situation is extremely h...

Page 67: ...of the debris Inspect the condition of the mower and make any needed repairs immediately Make sure the blades are not damaged and the carrier is balanced before resuming operation Always wear your seat belt securely fastened and only operate the tractor and mower with the ROPS in the raised position If the tractor or mower hits a tree stump rock or bump a sudden movement could throw you off of the...

Page 68: ...in spread cut material better eliminate streaking and make the final cut more uniform SFL 6 10 3 Engaging the Power Take Off PTO Before engaging the PTO make certain that the area is clear of bystanders and passersby The implement must be completely lowered and the deck positioned at a safe operating height NEVER engage the PTO with the implement in the raised position Set the tractor engine speed...

Page 69: ...terrain condition and grass type density and height of cut Normal ground speed range is from 0 to 5 mph Use slow mowing speeds when operating on or near steep slopes ditches drop offs overhead obstructions power lines or when debris and foreign objects are to be avoided SGM 7 10 5 Operating the Mower Only operate the mower from the tractor operator s seat with the seatbelt securely fastened on a R...

Page 70: ... persons behind the mower and use extreme care when mowing in reverse Mow only at a slow ground speed where you can safely operate and control the tractor and mower Never mow an area that you have not inspected and removed debris or foreign material SGM 8 Follow these guidelines to reduce the risk of equipment and grass fires while operating servicing and repairing the Mower and Tractor Equip the ...

Page 71: ...by reducing the engine speed before disengaging the PTO Wait for all motion to stop before proceeding to drive or shut down the tractor Park the tractor on a level surface place the transmission in park or neutral and apply the parking brake lower the attached implement to the ground shut down the engine remove the key and wait for all motion to come to a complete stop before exiting the tractor O...

Page 72: ...in from the mower Next remove both lower hitch pins Use extreme care to keep feet and hands from under the mower and clear of any pinch points OPS F 0012_A After disconnecting the 3 lift points remove the mower driveline from the tractor PTO shaft Lay the driveline down carefully to avoid damaging the driveline or its shield Do not let the driveline fall into mud or dirt which can contaminate the ...

Page 73: ...n the appearance of the mower It is critical that the driveline clutch slip when an obstacle or heavy load is encountered to avoid mower and or tractor damage If the mower sits outside for an extended period of time or is exposed to rain and or humid air the clutch lining plates must be inspected to ensure they are not frozen together from rust or corrosion If the mower has been exposed to such co...

Page 74: ...dle the tractor engine disengage the PTO and wait for all mower moving parts to come to a complete stop Raise the mower sections and ensure transport locks engage OPS F 0021 Before transporting the tractor on a public roadway or boarding a trailer for transport the tractor brake pedals should be locked together Locking the pedals ensures that both wheels brake simultaneously while stopping especia...

Page 75: ...019 Only tow the Implement behind a properly sized and equipped Tractor which exceeds the weight of the Implement by at least 20 DO NOT tow the Implement behind a truck or other type of vehicle Never tow the Implement and another Implement connected in tandem Never tow the Implement at speeds over 20 MPH STI 6 Never allow children or other persons to ride on the Tractor or Implement Falling off ca...

Page 76: ...ts and modifications available to upgrade the lighting on older tractor models OPS U 0021 When operating on public roads have consideration for other road users Pull to the side of the road occasionally to allow all following traffic to pass Do not exceed the legal speed limit set in your country for agricultural tractors Always stay alert when transporting the tractor and implement on public road...

Page 77: ... and rear of the tractor utilizing the proper tie down locations as specified by the tractor manufacturer OPS U 0025 Arrange the chains so that when tightened the chains are pulling downward and against themselves Carefully tighten the securing chains or other fasteners used as much as possible using boomers or binders to apply maximum tension Use extreme care when attaching and removing the secur...

Page 78: ...lug Improper type lubricant Replace with proper lubricant Excessive trash build up Remove trash around gearbox Bearing or gears set up Consult your Dealer improperly Gearbox Noisy Rough Gears Run in or change gears Worn Bearing Replace bearing Noise Damaged Belt Shield Straighten or replace Shields Rubbing on pulleys or belt Worn Bearing or Gear Replace Bearing or Gear Gearbox Leaking Damaged oil ...

Page 79: ... too fast Use a lower tractor gear PTO RPM too low Mow at engine RPM to match 540 PTO RPM Blades Scalping High Places Mowing too low Raise height of cut Rough uneven ground Use a slower speed Lower rollers Turning Tractor too fast Slow down when turning Uneven Cut Travel speed too fast Use a slower speed Mower deck not level Level the mowing deck Blades dull or unbalanced Sharpen or balance blades...

Page 80: ......

Page 81: ...MAINTENANCE RC12 12 05 Maintenance Section 5 1 2004 Alamo Group Inc MAINTENANCE MAINTENANCE SECTION ...

Page 82: ...ry 8 hours of operation The gearbox is shipped with the proper amount of Chevron Delo gear lubricant 80w 90w Rhino p n 00724177 Check the level of the gearbox The oil level should be filled to the bottom of the plug at the rear of the gear box Do not overfill the gearbox as this will damage the seals The gearbox lubricant should be changed after 100 hours of operation and every 1000 hours of opera...

Page 83: ...ension will result in premature belt failure Check belt tension after first hour of operation Mnt FL 0029_A Inspect for and tighten any loose fasteners Routinely inspect cutter shaft for missing or worn knives Replace knives as outlined in Blade Replacement Procedure Maintenance Section page 5 4 Clear any debris from gear box area to prevent overheating Clean area around breather plug regularly Al...

Page 84: ...NT AND REPLACEMENT To adjust belt loosen both pivot bolts slightly item 1 and tighten nut on tension rod item 2 which pivots drive assembly forward to tension belt Correctly ten sioned belt should require a maximum of 85 lbs force across entire band to deflect belt 3 8 as illustrated Do not over tension belt as excessive loads will be placed on bearings Tighten pivot bolts and lock in place with j...

Page 85: ...nt FL 0039 To relocate pulleys on drive and cuttershaft first loosen belt tension and check for shaft movement to ensure they are not loose or have moved Mark present location of bushing on shaft for future reference Pulleys are locked to shaft by a tapered hub bushing Loosen socket head set screw located above key Loosen and remove all mounting cap screws in bushing Insert cap screws in all threa...

Page 86: ...orce which may split bushing Never apply lubrication to threads or mating surfaces when assembling pulley and bushing After correctly locating hub and placing key in shaft keyway move pulley into position over taper hub and align tapped holes with through holes in hub Install all mounting cap screws Carefully tighten the cap screws alternately and progressively until tapers are seated Check alignm...

Page 87: ...shaft set screws are lock tightly in place Place floor jack under cuttershaft inside end plate to support weight of shaft Remove dirt debris and paint from shaft Unbolt bearing and mount plate assembly by removing four outer bolts Mnt FL 0041 item 11 Remove bearing from mount plate INSTALLATION Clean all debris from shaft Attach bearing 1 to bearing plate 2 using four 5 8 bolts 3 and locknuts 4 Sl...

Page 88: ...pressure to loosen Clean shaft and remove any burrs before attempting to slide bearing outward on shaft To install the bearing slide bearing over shaft and align set screws with dimples in shaft Tighten both set screws securely to shaft Lock with both set of set screws apply a thread locking compound Installation of shaft assembly is reverse of removal procedure TOP DRIVE ASSEMBLY SERVICING To rep...

Page 89: ...g both portions of driveline align phase key on end of square shaft half with groove in tube side Step 1 To disassemble the universal joint remove the four snap rings FIGURE Mnt FL 0032 Step 2 With snap rings removed support drive in vise hold yoke in hand and tap on yoke to drive cup up out of yoke FIGURE Mnt FL 0033 Step 3 Clamp vise as shown and tap on yoke to completely remove cup from yoke Re...

Page 90: ...oss is started into bearings and continue pressure with vice squeezing in as far as possible Tap yoke to aid in process Step 6 Seat cup by placing a drift or socket slightly smaller than the cup on the cup and squeeze in vise Install snap ring and repeat on opposite cup Repeat steps five and six to install remaining cups in remaining yoke FIGURE Mnt FL 0036 Move both yokes in all directions to che...

Page 91: ...ch grease may damage the bearing seals Loosen the Set Nut and Spindle Jack to relieve drive belt tension NOTE Before next season s use be sure to adjust the drive belt tension Coat all exposed surfaces inside the mower with oil or grease to prevent rusting and pitting during storage Pre season Check 1 Check the oil level in the Gearbox and lubricate all bearings See Lubrication 2 Adjust drive belt...

Page 92: ...eeding a reasonable amount as determined by Manufacturer and for returning the goods to the Dealer whether or not the claim is approved Purchaser is responsible for the transportation cost for the goods or part s from the Dealer to the designated factory 3 LIMITATION OF LIABILITY 3 01 MANUFACTURER DISCLAIMS ANY EXPRESS EXCEPT AS SET FORTH HEREIN AND IMPLIED WARRANTIES WITH RESPECT TO THE GOODS INC...

Page 93: ...e to the protected area provided by the ROPS REQUIRED OF THE OPERATOR 1 Securely fasten seatbelt if the tractor has a ROPS 2 Where possible avoid operating the tractor near ditches embankments and holes 3 Reduce speed when turning crossing slopes and on rough slick or muddy surfaces 4 Stay off slopes too steep for safe operation 5 Watch where you are going especially at row ends on roads and aroun...

Page 94: ...RC12 12 05 P N 00726339C Printed U S A ...

Reviews: