TM005 Rheem Solar Hiline Service Instructions REV D
D.O.I 20/02/2009
This document is stored and maintained electronically by
Service. All printed copies not bearing this statement in RED are deemed “uncontrolled”.
26
Component Replacement
Draining the Water Heater (Procedure 1)
1.
Isolate the power supply to the electric booster circuit.
2. Isolate the water supply to the water heater.
3.
Relieve pressure from the water heater through the temperature and pressure
relief valve.
4. Disconnect collector cold pipe from the collector. To prevent flooding under roof tiles
drain water onto a deflection sheet of plastic or sheet metal.
5. Open the temperature and pressure relief valve to allow air into the system.
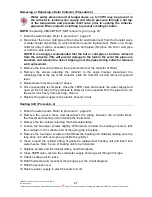
Removing or Replacing Solar Storage Tank (Procedure 2)
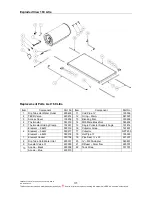
Should it be necessary to remove a solar water heater from the roof, it is advisable to use
a crane. This equipment will result in the least amount of damage to the roofing material
and reduce the possibility of personal injury.
When the roofing material is of terracotta or cement tiles, particular care should be taken
to ensure that tiles are not broken. If damage does occur,
immediate repairs are
essential to prevent further water damage during periods of rain.
1.
Isolate the power supply to the electric booster circuit.
2. Isolate the water supply to the water heater.
3.
Relieve pressure from the water heater through the temperature and pressure
relief valve.
4. Remove the access cover and disconnect the wiring from the terminal block, undo the
conduit terminator lock nut and disconnect the conduit from the water heater.
5. Disconnect the water supply pipe from the Sunstat valve.
6. Disconnect the hot water outlet pipe from the water heater.
7. Disconnect the drain line and pull cord from the T&PR valve.
8. Disconnect the cold pipe from the Sunstat valve and the hot pipe from the tank.
9. Remove the Sunstat valve and the brass adapter from the hot pipe end of the tank and
retain for fitting to the replacement tank.
10. Disconnect the hot and cold pipes from the collectors and relocate pipes to a safe
location.
NOTE: It is strongly recommended that the hot and cold pipes be removed from
the collectors. This will prevent damage to the connectors in the event the pipes
are knocked, and remove the risk of tripping over the pipes
during tank removal
and replacement.
11. Disconnect the straps or brackets holding the tank in place and remove the tank to
ground level.
Ensure the tank is restrained while the straps or brackets are
disconnected to prevent the tank from rolling off the roof.
12. Reassemble in the reverse order of above.
13. Once reassembly is complete, restore the water supply and open all the hot taps in the
premises to allow air to be expelled from the pipe work. As the water runs freely from
each tap, close it.
14. Restore the power supply to the electric booster circuit.

