


Developer Kit Assembly and Testing:
Note: the NETGEAR WGR614 router has been preconfigured for use with the WSN802GDK developer’s
kit.
Do not reconfigure the router
.
1. Observe ESD precautions when handling the WSN802GDK developer board. Install an AC plug on
the 9 V developer board power supply. Plug the power supply cable into the developer board power
connector. See Figure 1.
2. Referring to Figures 1 and 2, install the patch antenna on the developer board antenna connector.
The antenna “snaps” onto the connector with moderate pressure. Plug the 9 V power supply in.
3. If using a PC with WiFi, connect the NETGEAR wall-plug power supply cable to the NETGEAR
router and plug the power supply in. No other connections to the router are required. Confirm the PC
is configured for DHCP. Open the
Wireless Network Connection
dialog box on the PC. The NETGEAR
router will be operating on channel 11 with an SSID of WSN-Default in secure mode. The security
passphrase to allow router access is WSN-PASSWORD. Establish a wireless connection to the router.
4. If using a PC without WiFi, connect the Ethernet cable between the PC and one of the
LAN
ports on
the NETGEAR router. Confirm the PC is configured for DHCP. Connect the NETGEAR wall-plug
power supply cable to the NETGEAR router and plug the power supply in.
5. Copy WSNConfig.exe and WSNApp.exe from the
Programs
folder on the kit CD to a convenient
folder on the PC. These programs run using ordinary Window’s resources and do not require any
framework installations, registry entries, etc., to run.
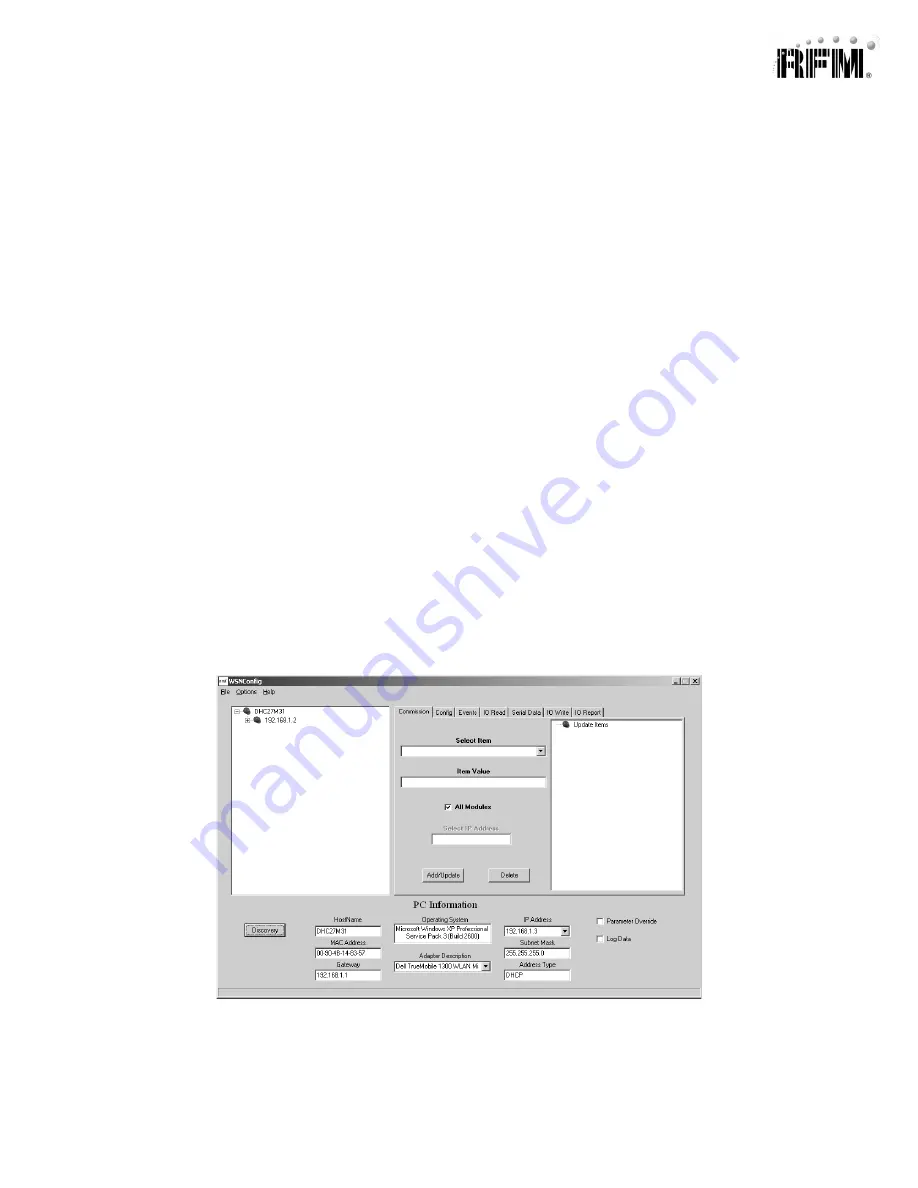
6. Start the WSNConfig.exe program. Click on the WSNConfig.exe
Discovery
button. In a few moments
the IP address of the WSN802G module will be displayed near the top of the left hand text box on the
WSNConfig window, as shown in Figure 3.
RFM module technical support: [email protected], Phone +1.678.684.2000, FAX +1.678.684.2001, www.RFM.com
Figure 3


