RFD TX Module User Manual
www.rfdesign.com.au
10
Version 1.0 Last update 07/03/2019
“Station Password”
, leave
“
Station IP
”
,
“
Station Gateway
”
and
“
Station Subnet Mask
”
as 0.0.0.0 then
press
“
Save
”
and finally reboot the device. You can connect the to the WiFi network with the TX
Module on it then open the browser and enter the following address http://TXMOD-XX-XX-XX.local
where the Xs are the same as the Xs in the access point network name.
Advanced users
The module must be set up by choosing
‘
S
tation’ in ‘WiFi Mode’,
set the correct SSID (in StationSSID)
and password of the network
in “Station Password”
.
You will need to find the Gateway and Subnet mask of the network then to write the appropriate
values in
‘Station Gateway’, ‘Station Subnet’
. Assigning the
‘Station IP’
requiring that a static IP is set
on the DHCP server, normally the network router, this is so the device will be at a known address on
the network allowing for the user to connect using this new fixed IP in place of the 192.168.4.1 of
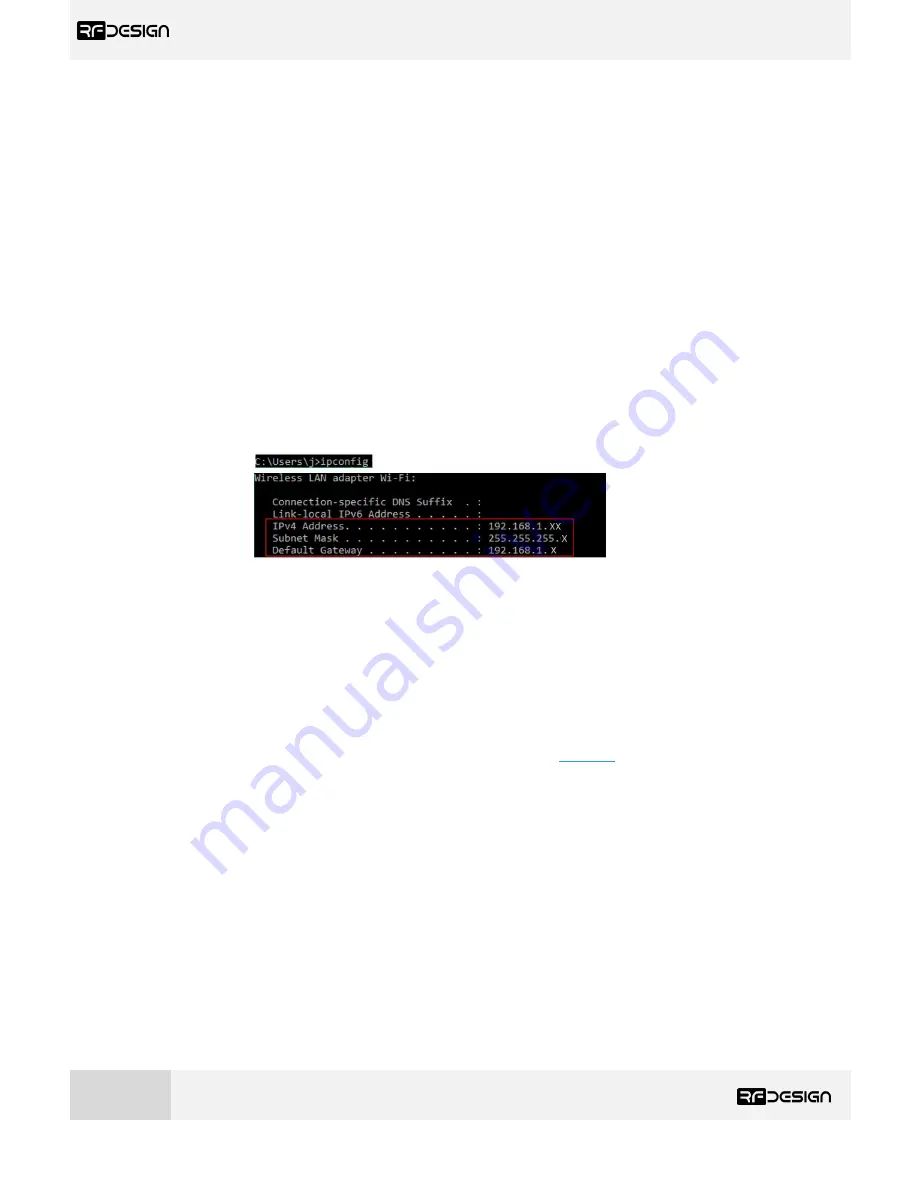
access point mode. Network information such as the Subnet Mask and Gateway address can be found
on a network connected device. For instance, in windows launch a command prompt, type
‘
ipconfig
’
and press enter. Information similar to figure 10 will be shown. In linux based devices typing
‘i
f
config’
to the terminal should give similar results.
Figure 10
–
Command Prompt.
Default Gateway ->
‘Station Gateway’
Subnet Mask ->
‘Station Subnet’
e)
Firmware Update:
To update the WiFi firmware on the TX Module, follow the links in
section 7
to find and download the
required firmware version. Then, on the browser configuration landing page, as per figure 7, select
‘
Update Firmware
’.
Updating the WiFi interface uses
two different files; the ESP8266 ‘firmware.bin’
and the
‘spiffs.bin’ file
s. These files should not be uploaded and flashed simultaneously. Click first on
the
‘Choose File’ button
in the ESP8266 section
, then on ‘Update & Reboot’
and follow on-screen
instructions. See figure 11 below. After that, proceed to upload the
‘spiffs.bin’
file by selecting it using
the ‘Choose File’ button and then on ‘Update SPIFFS’ at the very bottom sec
tion of the page. Follow
commands and you’ll have s
uccessfully updated the WiFi firmware on the TX Module.


