7
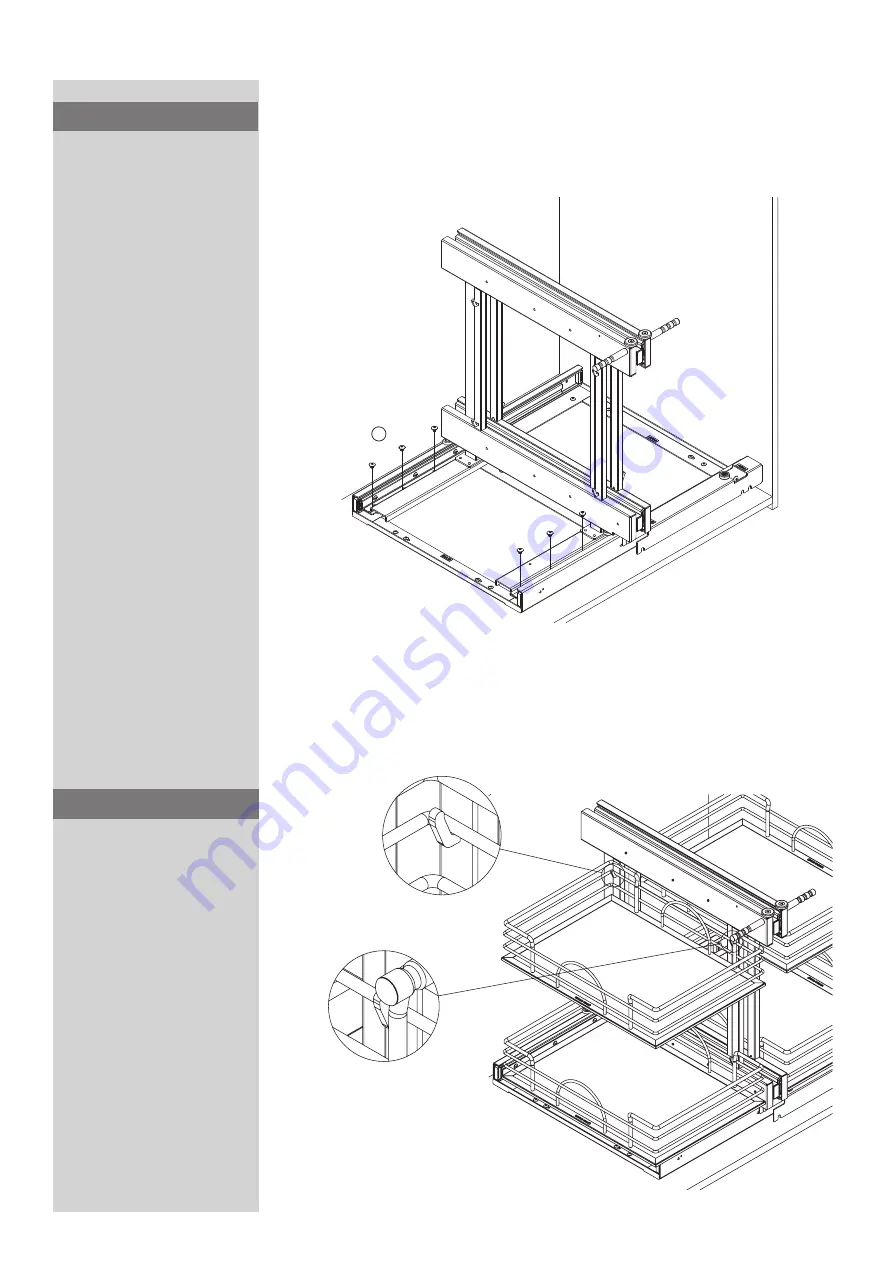
Secure the assembled frame to
the base inside of the cabinet
by using (6) of the M5 x 6 mm
flat head screws. Make sure
to follow the placement on
Figure F
.
STEP 5
Attach the (4) baskets onto the
unit
(See Figure G)
STEP 6
Fig. F
Fig. G
4
Page 1: ...5 16 5 8 1 2 2 1 90 2 2 2 2 2 2 1 16 INSTALLATION OPTIONS 5PSPSC 15 15 Opening page 2 left handed door 5PSPSC 15 15 Opening page 5 right handed door FITTING PARTS LIST PANEL PARTS LIST Description QTY...
Page 2: ...ews to secure the base to the bottom of the cabinet See Fig C 1 Note Pre drilling the screws is recommended Install the guide channel on the base of the unit by securing it with 2 of the M5 x 6 mm fla...
Page 3: ...es onto the frame using 2 of the M4 x 10 mm Flat head screws See Figure D STEP 3 Attach the two feet to the frame using 8 of the M6 x 10 mm wafer head screws Each foot will use 4 screws See Fig E STEP...
Page 4: ...sembled frame to the base inside of the cabinet by using 6 of the M5 x 6 mm flat head screws Make sure to follow the placement on Figure F STEP 5 Attach the 4 baskets onto the unit See Figure G STEP 6...
Page 5: ...OM SHELF FOR THE UNIT Unscrew the M4 x 4 5 mm Pan Head Screws from the bottom of the shelf Choose the desired color by flipping the shelf Install the bottom shelf back by screwing the M4 x 4 5 mm Pan...
Page 6: ...es onto the frame using 2 of the M4 x 10 mm Flat head screws See Figure D STEP 3 Attach the two feet to the frame using 8 of the M6 x 10 mm wafer head screws Each foot will use 4 screws See Fig E STEP...
Page 7: ...sembled frame to the base inside of the cabinet by using 6 of the M5 x 6 mm flat head screws Make sure to follow the placement on Figure F STEP 5 Attach the 4 baskets onto the unit See Figure G STEP 6...
Page 8: ...8...