STEP 9: FRONT BASKET (GIRLS MODELS)
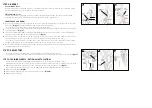
The Top Mounting Bracket is factory installed. You will install the Lower Mounting
Bracket and mount the basket to the brackets.
(Fig. 21)
.
Installing the Lower Bracket: loosen the front brake Center Bolt Nut several turns – loosen do not remove -
enough to slide in the Lower Mounting Bracket
(Fig. 22)
.
Slide the lower bracket between the Brake Center Bolt Washer and Brake, and down until stops and rests on the
Center Bolt.
(Fig. 23)
.
Center and level the bracket and tighten the Center Bolt Nut. Be sure that the brake arms are evenly
spaced from the wheel and there is some clearance between the brake pads and the rim surface. If the
brake pads are not evenly spaced from the wheel, you can balance the spacing by gripping the brake
assembly and rotating until it is centered with the wheel
(Fig.23)
.
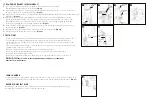
Mount the basket starting from the top bracket, bolts inside the basket, nuts on the back of the bracket.
Do not fully tighten
(Fig.24)
.
Install the basket to the lower bracket – same as Step 5. Do not fully tighten
(Fig.25)
.
Center position the basket, tighten all four nuts
(Fig. 26)
.
1 -
2 -
3 -
4 -
5 -
6 -
7 -
STEP 10: TIRES
Locate the tire manufacturer’s recommended inflation pressure found on the tire sidewall (listed as “PSI”).
Using a hand or floor pump with a gauge, begin to inflate the tire to half its recommended inflation
pressure and check to see that the tire is properly seated on the rim. Be sure to inspect both sides of the
tire for proper fit.
If the tire is seated unevenly or bulges out along the rim, let some air out of the tire and reposition the tire
by hand so that it sits evenly on the rim.
Continue to inflate the tire to the manufacturer’s recommended pressure.
Do not exceed the recommended pressure as this will cause an unsafe condition potentially
causing the tire to unexpectedly explode.
Do not use a compressed air device to inflate your tires as the rapid inflation of the tire can cause it
to blow off the rim.
NOTE: Tires and tubes are not warranted against damage caused by over-inflation or
punctures from road hazards.
BEFORE YOUR FIRST RIDE
We strongly recommend you take your bike to a professional bike shop and have them check your
work and fine tune the bike to ensure your bike is safe to ride.
SERIAL NUMBER
It is important that you locate and record the serial number of your bicycle in case of a recall or if the bicycle
is stolen. The serial number can be found under the crank bottom bracket stamped into the frame
.
(Fig. 27)
24
26
22
27
top mounting
bracket
center
bolt nut
horizontal
tighten upper 2
nuts
tighten lower
2 nuts
slide down
over brake
center bolt
Lower
mounting
bracket
top mounting
bracket
lower mounting
bracket
21
25
23


