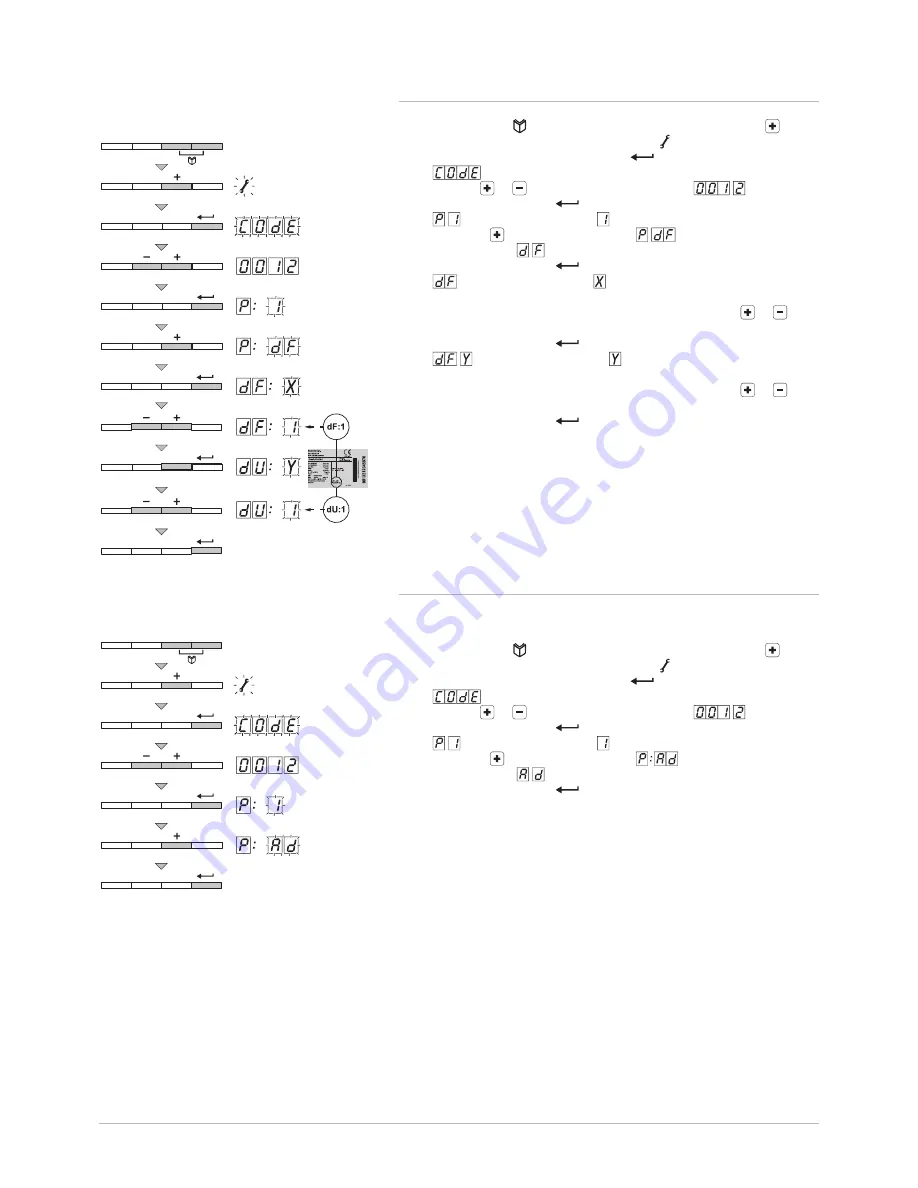
9.2.4 Return to the factory settings
1. Press the two keys at the same time and then press the key
until the symbol flashes in the menu bar.
2. Select the installer menu using the
key.
appears on the display.
3. Use the or keys to set the installer code
.
4. To confirm, press the
key.
: appears with a flashing .
5. Press the key several times until :
appears on the display
with a flashing .
6. To confirm, press the
key.
appears with a flashing . This is the current value of X for dF.
Check this against the value of X on the type plate.
7. Enter the value of X shown on the type plate using the or
keys.
8. To confirm, press the
key.
: appears with a flashing . This is the current value of Y for
dU. Check this against the value of Y on the type plate.
9. Enter the value of Y shown on the type plate using the or
keys.
10. To confirm, press the
key.
The factory settings are reset.
11. The display returns to the current operating mode.
9.2.5 Carrying out an auto-detect
After removing a PCB, an auto-detect must be carried out. Proceed as fol
lows:
1. Press the two keys at the same time and then press the key
until the symbol flashes in the menu bar.
2. Select the installer menu using the
key.
appears on the display.
3. Use the or keys to set the installer code
.
4. To confirm, press the
key.
: appears with a flashing .
5. Press the key several times until
appears on the display
with a flashing .
6. To confirm, press the
key.
Auto-detect is carried out.
7. The display returns to the current operating mode.
Fig.51 Resetting factory settings
AD-0000078-01
3x
...x
Fig.52 Carrying out an auto-detect
AD-0000079-01
3x
...x
9 Settings
123157 - v.06 - 24022015
51


