background image

5. Priority Delay.

Display will show, for example:

B/inking 

6. Enter a value 0, 1, 2 or 3. (See Table 2, page 7.)

Press 

ENTER to 

store 

Priority Delay 

in memory

and advance the display to 

Key Pad Beep.

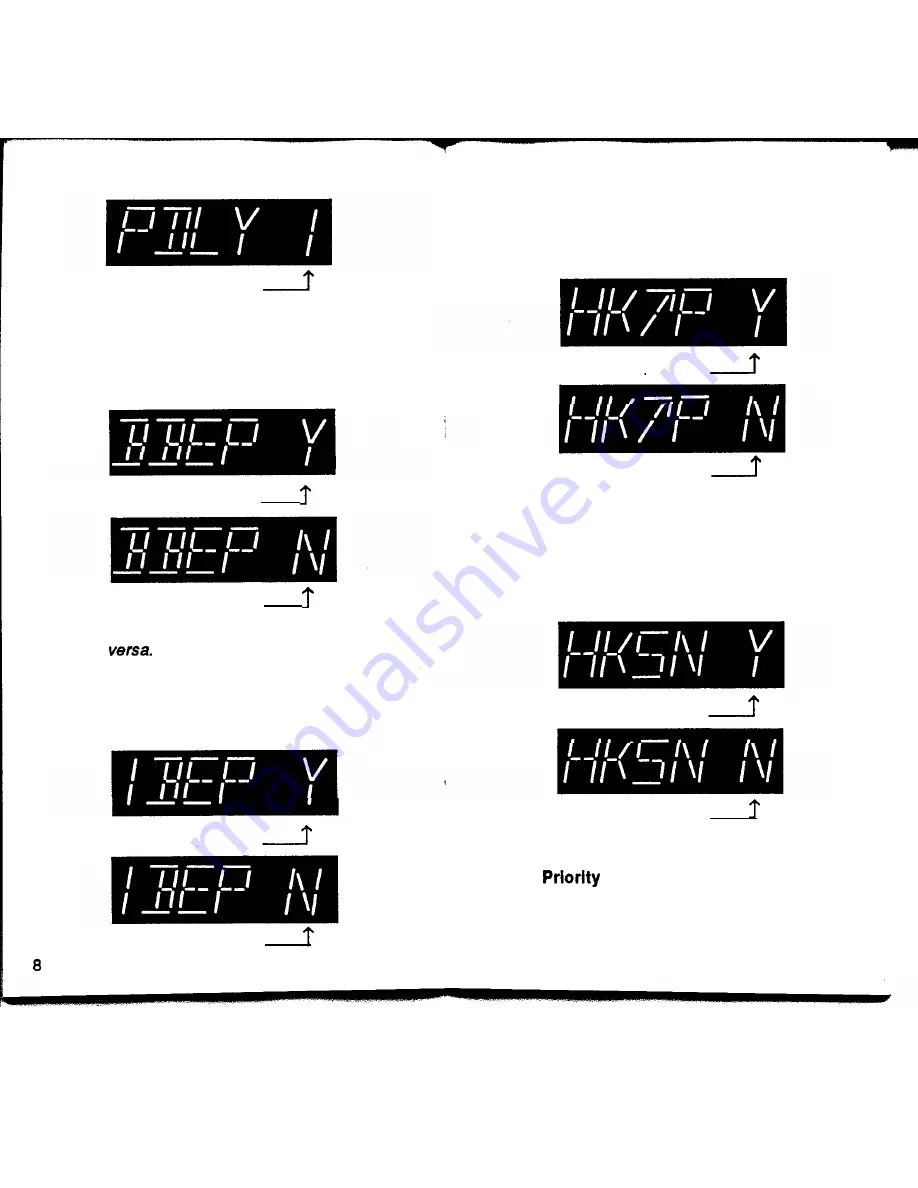
7. Key Pad Beep.

The display will show one of the following:

Blinking

Blinking

8. 

Press 

TOGGLE 

key to toggle Y (Yes) to N (No)

or 

vice 

Press 

ENTER 

to store in memory and advance the

display to 

Channel 1 Beep.

9. Channel 1 Beep.

The display will show one of the following:

Blinking 

Blinking

10. 

Press 

TOGGLE 

key to toggle Y (Yes) to N (No)

or 

vice versa.

Press 

ENTER 

to store in memory and advance

the display to Off 

Hook to Priority Channel.

11. 

Off Hook to Priority Channel.

The display will show one of the following:

Blinking 

Blinking 

12. Press 

TOGGLE 

key to toggle Y (Yes) to N (No)

or vice 

versa.

Press ENTER 

to store in memory 

and advance

the display to Off 

Hook Scan.

13. 

Off Hook Scan.

The display will show one of the following:

Blinking 

Blinking

14. Press 

TOGGLE 

key to toggle Y (Yes) to N (No)

or 

vice versa. 

If Yes is selected, the Off 

Hook

to 

 Channel 

(Step 11) Yes selection

is disregarded.
Press 

ENTER 

to store in memory and advance

the display to 

Power Up on Channel 1.

9

Summary of Contents for PM4500

Page 1: ...ansceivers RESTRICTED TO DEALER USE ONLY USE BY PERSONS OTHER THAN DEALERS IS 8NAUTHORlZED AND EXPRESSLY PROHIBITED ESCWE moQE OEUSE ENTER mmmm 001 l 641 905 6 93 Section V 4Copyright 1993 by RELM Communications Inc duplication strictly prohibited Printed in U S A ...

Page 2: ...ed a new name a name which bolsters our position as a communications company and symbolizes our steadfast commitment to the land mobile industry REJM COYYUNlCATtONS Our nationwide network of authorized dealers assures that you will receive prompt high quality service for all your RELM products For more information about our products or how we can meet your special applications please call us at l ...

Page 3: ...ode or External Decoder n Transmit Frequency n TX Tone DCS Code or External Encoder 3 Cloning n Transferring data from the Transceiver to the Programmer ReadOperation n Transferring data from the Programmer to the Transceiver Write Operation DCS stands for Digital Coded Squelch RX stands for Receive TX stands for Transmit The Programmer contains a keyboard see Figure below with 20 keys arranged in...

Page 4: ...e memory of the Transceiver and or to advance to the next para meter for a selected channel Also use this key for reviewing the Transceiver s channel data or Options Parameters In addition press this key to answer Yes to any prompt that is displayed as a question A Use this key to go to the next higherchannel The new channel s number will be displayed v Use this key to go to the next lower channel...

Page 5: ...ividual Channel Parameters OPTIONS PARAMETERS NOTES 1 These parameters pertain to the Unit as a whole not for a specific channel 2 If an error is made in entering the data press DELETE and start over 3 To REVIEW the Options repeatedly press OPTIONS OPTIONS Continued 1 Press OPTIONS The display will show the Transmit Time Out Timer For example Blinking T 2 Enter a value 0 7 see Table 1 below Press ...

Page 6: ... 10 Press TOGGLE key to toggle Y Yes to N No or vice versa Press ENTER to store in memory and advance the display to Off Hook to Priority Channel 11 Off Hook to Priority Channel The display will show one of the following Blinking 2 Blinking d 12 Press TOGGLE key to toggle Y Yes to N No or vice versa Press ENTER to store in memory and advance the display to Off Hook Scan 13 Off Hook Scan The displa...

Page 7: ...below TX Carrier Dleay is the amount of time the carrier no modulation is still present afferthe Pll switch is released Table 3 Delay Values mS Numeral 0 1 Delay 165 300 Numeral 2 3 Delay 400 500 Press ENTER to store in memory and advance the display to Message Annunciator 10 19 Message Annunciator The display will show one of the following 20 Press TOGGLE key to ON or OFF If ON is selected the Me...

Page 8: ... to be programmed again for its prooer receive and transmit frequency Table 4 Ranges REVIEWING PROGRAMMED DATA You may wish to review the Options Data you entered into the Unit After Step 23 on page 11 press OPTIONS in suc cession to step through the Options Parameters CHANNEL PARAMETERS NOTES 1 Programming steps should be performed in the following order as shown 2 It is recommended that Channel ...

Page 9: ...els one of the following f Blinking if previously programmed 14 Blinking or if none is programmed Blinking or if none is programmed 4 Key in the six digits of the desired RX frequency The valid frequency range is between 150 and 174 MHz for VHF models and between 450 and 482 MHz for UHF models Examples of keyed in frequencies 56045 158 045 MHz VHF models 167237 167 2375 MHz VHF models 470012 470 0...

Page 10: ...he following Blinking if previously programmed l Blinking or if none is programmed 1 6 t For UHF models the display will show one of the following T Blinking if previously programmed Blinking or if none is programmed a To program the channel for Receive Only Press DELETE The display will show the following Blinking Then press ENTER and go to Step 10 on page 18 to continue See page 24 for the displ...

Page 11: ...ugh the channel s parameters 2 Press CHANNEL and the desired channel s number Then press ENTER in succession to step through the desired channel s parameters NOTE See page 24 for a summary of display sequences during channel parameters programming Code TONE U W Code 000 No Tone 017 001 67 0 018 002 71 9 019 003 74 4 020 004 77 0 021 005 79 7 022 006 82 5 023 007 85 4 024 008 88 5 025 009 91 5 026 ...

Page 12: ...13 112 136 086 116 101 068 050 098 130 093 056 066 097 111 72 145 23 32 I52 054 086 071 072 073 074 114 115 116 122 125 131 132 134 143 145 152 155 156 162 165 172 174 205 212 I13 271 iii 508 174 712 152 754 225 365 364 546 223 412 261 263 265 Efi 732 205 156 454 065 145 071 664 423 526 465 455 zz 243 212 131 125 734 226 143 054 315 723 516 oii 098 099 100 076 063 146 118 134 128 125 135 139 089 2...

Page 13: ...6 INV code 057 E 099 107 i 106 145 080 065 120 092 105 108 073 147 142 iii 054 138 140 153 129 103 137 067 119 078 096 114 144 089 Table 7 PM4500 Codes vs External Decoder Delay Times I PM4500 Code 155 156 157 158 159 160 161 162 163 164 165 166 167 168 169 170 171 172 173 174 175 176 177 178 179 180 181 182 183 184 185 186 187 188 189 0 0 1 0 2 0 3 0 4 0 5 0 6 0 7 0 8 0 9 1 0 1 1 1 2 1 3 1 4 1 5 ...

Page 14: ...m transceiver This feature permits duplicating cloning the same programmed data into any number of transceivers Be sure to use the proper Start up see PRELIMI NARIES page 5 and Unit Turn Off procedures above when cloning NOTE The CLONE key toggles from the Read function to the Wrlte function or vice versa each time it is pressed If a Transceiver a ready contains the data to be cloned connect it to...

Page 15: ... other Transceiv ers to be cloned A detailed description of the CLONE READ and WRITE operations follows TRANSFERRING DATA MT0 THE PROGRAMMER READ OPERATION 1 Press CLONE Disolav will show 1 NOTE If not pr iztNE n 2 Press ENTER to answer Yes Processing will begin During data transfer the display will show 2 6 3 When transfer is complete the display will show m iibiw TRANSFERRING DATA NT0 THE TRANSC...

Page 16: ...terface Adapter required between the PC and an SM Series Transceiver A modular coupler can be used for connecting the Interface Adapter s cable to the PM4500 This coupler is stored in the Programmer s rear panel compartment Programming the Transceiver is accomplished through its microphone jack The software pro vides for a pre formatted print out of all informa tion programmed into the Transceiver...

Reviews: