18
Use a clean, slightly damp cloth to clean
the plastic parts of the machine. Do not use
solvents or similar products which could
damage the plastic parts.
WARNING:
Do not attempt to clean by
inserting pointed objects through openings in
the machines casings etc. The machines air
vents should be cleaned using compressed
dry air.
Excessive sparking may indicate the
presence of dirt in the motor or worn out
carbon brushes.
(6.2)
If this is suspected have the machine
serviced and the brushes replaced by a
qualified technician.
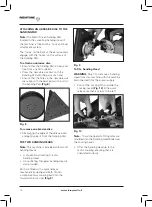
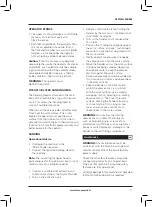
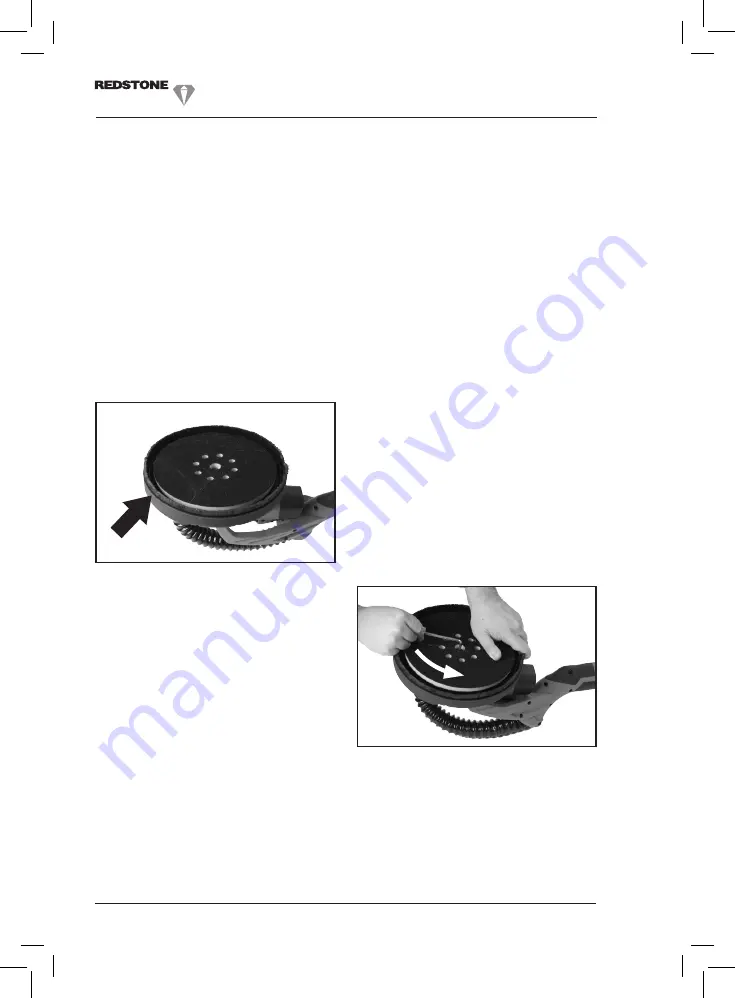
The Sanding Head Brush Skirt (Fig. 18)
The Brush Skirt surrounds the Sanding Pad
to which the abrasive discs are applied. The
Brush Skirt serves two (2) main purposes:
• It extends below the surface of the
abrasive discs so that it contacts the
work surface first, orientating the Sanding
Head. This helps prevent the rotating
abrasive disc from ‘gouging’ the work
surface on first contact.
• It helps contain the dust particles within
the swivelling Sanding Head until the
airflow from an attached extraction
machines sucks the dust away.
Over time, depending upon the frequency
of use and the type of material sanded,
the bristles on the Brush Skirt will become
degraded and worn. The bristles on the
Brush Skirt must be complete with no gaps
or portions missing.
A new Brush Skirt has a bristle length of
approximately 15mm. Replace the Brush
Skirt when the length of the bristles is
approximately 8mm, or when the bristles
no longer extend below the surface of an
installed sanding disc.
To replace the Brush Skirt
WARNING:
Only attempt this procedure
with the machine disconnected from the
mains power supply.
• Remove any attached abrasive disc to reveal
the Sanding Pad and the centrally located
Hex Headed Socket Screw that attaches
the Pad to the motors drive spindle.
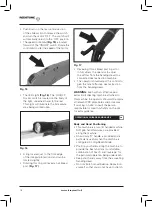
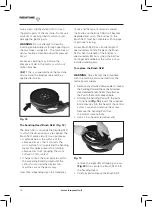
• Holding the Sanding Pad with the palm
of one hand
(Fig. 19),
insert the supplied
5mm Hex Key into the head of the central
screw. Loosen and remove the screw.
Remove the Sanding Pad from
the motors drive spindle.
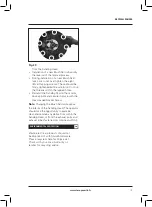
• Use a cross-head screwdriver and
remove the eight (8) self tapping screws
(Fig. 20)
that secure the Brush Skirt into
the Sanding Head.
• Carefully pull and ease the Brush Skirt
www.leroymerlin.fr
Fig. 19
Fig. 18


