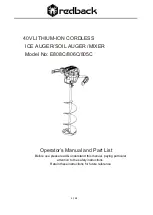


Original Instruction
10 / 13
4. Choose your position to drill. Ensure that you have a firm footing and place the point of the auger in the
center of your drilling position.
5. Ensure that the forward/reverse switch is in the
‘forward’ position.
6. Press the safety switch and pull the trigger switch. There will be a short delay before the blade starts to
turn. Keep your hands and feet away from the blade and make sure that loose clothing, hair or anything
else does not become entangled with moving parts.
7. This machine produces a low-speed, high torque output. Make sure that you have a firm footing and
hold the handgrips firmly.
7. Allow the blade to cut at its own speed into the ice. Do not push down on the auger. If the auger starts
to cut the ice more slowly, it may be time to sharpen the blades. We recommend the blades to be
sharpened annually, or when cutting performance deteriorates.
8. If the auger becomes stuck, release the trigger switch. Move the forward/reverse lever into ‘reverse’
and attempt to power the auger out. If this does not work, remove the battery and manually unwind the
auger from the ice or earth
9. When you have finished drilling, remove the battery from the machine and keep both the battery and
the machine away from the ice, water or other moisture.
USE OF THE MIXER
1. Follow the instructions below to charge the battery before use. Three different batteries are available
which give different run-times
2. Fit the mixer head to the machine. To do this put the head onto the output shaft on the machine. Align
the bolt holes and use the bolt supplied to lock it into place. Always check that this bolt is tight before
each use.
3. Fit the battery to the machine. Choose your position to mix. Ensure that you have a firm footing and
place the point of the mixer.
4 Ensure that the forward/reverse switch is in the
‘forward’ position.
5. Press the safety switch and pull the trigger switch. There will be a short delay before the tool starts to
turn.
6. This machine produces a low-speed, high torque output. Make sure that you have a firm footing and
hold the handgrips firmly.
7. If the mixer becomes stuc
k, release the trigger switch. Move the forward/reverse lever into ‘reverse’
and attempt to power the mixer out. If this does not work, remove the battery and manually unwind the
head.
8 When you have finished mixing, remove the battery from the machine and keep both the battery and
the machine away from the ice, water or other moisture.


