


Original Instruction
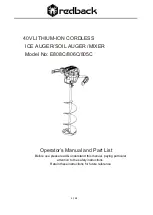
11 / 13
BATTERY CHARGER
WARNING: This charger can be used with an input voltage of 120V and an AC frequency of 60Hz.
To avoid the risk of damage and injury, only use the charger to recharge Redback 40V battery packs.
Never try to recharge non-rechargeable batteries.
WARNING: If the charger is plugged in and no LED lights are illuminated, unplug and check with your
nearest authorized service center. Do not attempt to use the charger.
Status indicator lights
The LED light indicates the operating status and the state of charge of the battery.
- LED steady red
– the charger is ready to charge, but no battery is connected
- LED flashes green. The battery is charging.
- LED steady green: The battery is fully charged and can be removed.
- LED flashes red: battery fault or overheat.
Charging the battery
- Plug the charger into an AC outlet 100-250V (normal household voltage).
- Insert the battery into the slots of the charger and slide into place until the battery locks into place
- The LED will flash green while the battery is charging
- Once the battery is fully charged, the LED indicator will show a steady green light.
- Remove the battery by pressing and holding the latch button and sliding out of the charger
Lithium-Ion batteries have no memory effect
– a partial charge will not damage your battery
Storage of the charger and battery
For long-term storage, it is preferable that the battery is fully charged and stored in a dry place at a
temperature between 10 -25 °C (50
– 68 °F)
- The charger should be stored in the same conditions as the battery, taking care that no foreign objects
such as metal chips enter through the ventilation slots of the charger or short out the connectors on the
battery
CAUTION: Only use the supplied charger and batteries with this tool
Battery
Charger
LED


