8
©2007 Recordex USA, Inc. All rights reserved.
Version: 1.1
User’s Guide
Recordex StudioJet
®
TM
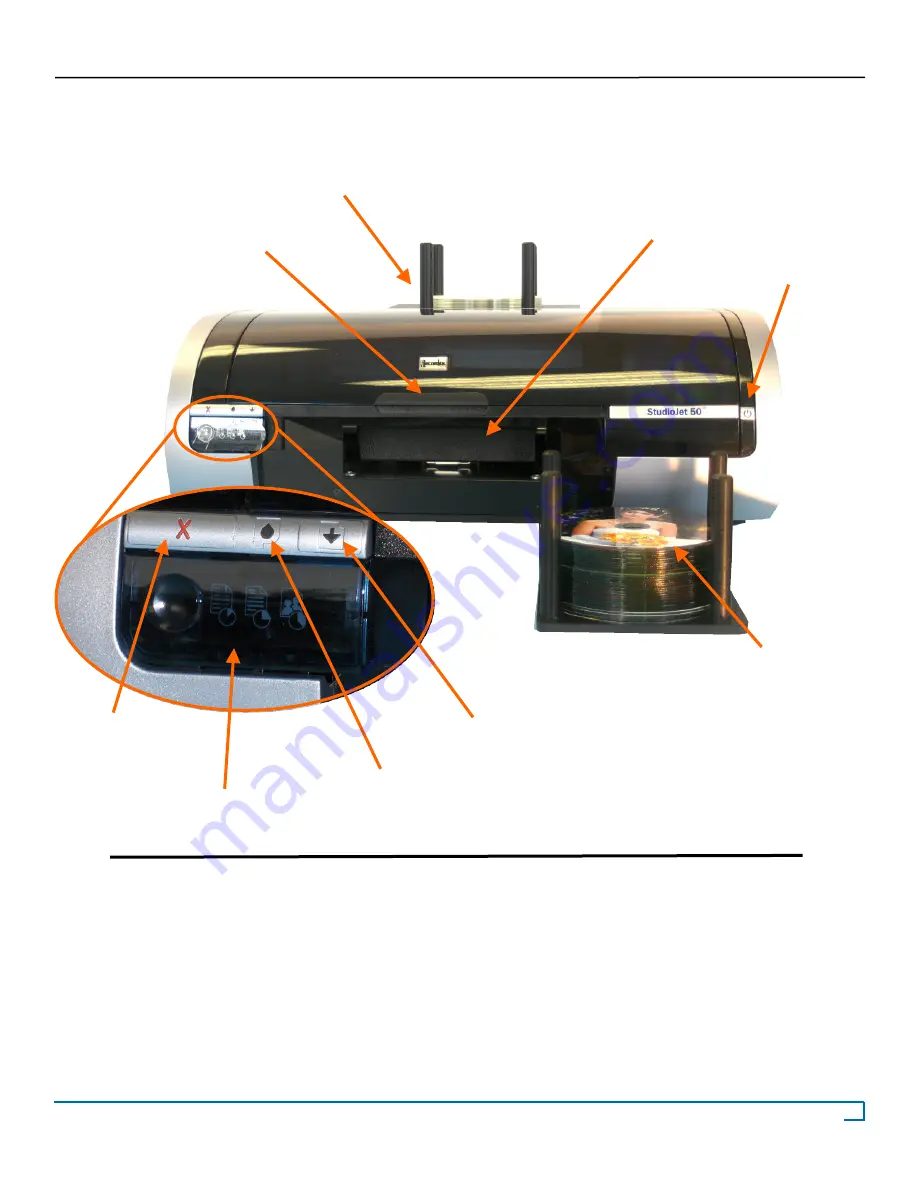
1- Printer Cover
2- Disc Input Bin
3- Disc Print Tray
4- Power Button
5- Disc Output Bin
6- Resume Button
7- Cartridge LED
8 - Tray Open/Close
9 - Cancel Print
1 - Printer Cover
2 - Disc Input Bin ( 50 Capacity) (StudioJet 100 equipped with 100 Capacity Input Spindles)
3 - Disc Print Tray
4 - Power Button (Power button LED will flash while printer is printing)
5 - Disc Output Bin (50 capacity) (StudioJet 100 equipped with 100 Capacity Output Bin)
6 - Resume Button (This LED will flash to indicate that action must be taken, I.e. Insert new disc, clear an
error from the print queue.) When no error is present pressing this button will simply load a disc into
the disc tray.
7 - Cartridge LED (This LED will flash when the ink cartridges are low. It will also alert you to improper
cartridge installation, or it will flash whenever the cover is open.)
8 - Tray Open/Close Button (pressing will open the disc tray)
9 - Cancel Print (pressing will cancel the current print job)
NOTE: StudioJet 50™ AutoPrinter Depicted. StudioJet 100™
AutoPrinters will include a larger 100 capacity output bin and
longer input spindles.


