11
©2007 Recordex USA, Inc. All rights reserved.
Version: 1.1
User’s Guide
Recordex StudioJet
®
TM
D. Installing the StudioJet Driver
NOTE: Make sure the printer is powered on.
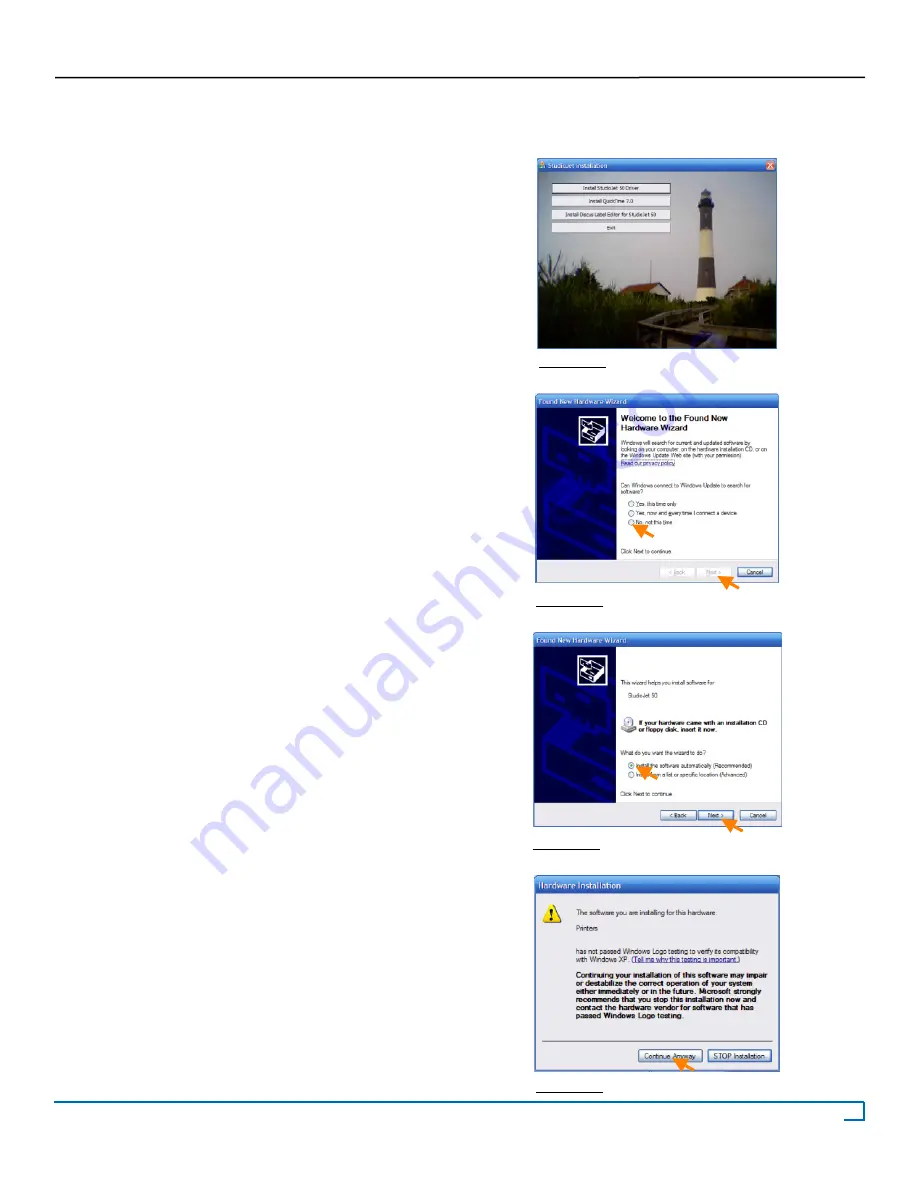
1. Insert the StudioJet™ driver disc into the CD drive of you
computer. Windows autorun should initiate the install pro-
gram after a few seconds (Figure 2.5).
Do not start the in-
stall. Simply move on to step 2.
NOTE: If the setup screen is not visible after a minute then au-
torun is likely disabled on your computer and you will need to
start the install program manually. To do this click Start -->
Run --> Browse --> then select “My Computer” and then your
CD drive. Locate setup.exe and double click to launch the
install program.
2. Connect the autoprinter to your PC running Windows XP
(SP2) or Windows Vista using the supplied USB 2.0 cable.
The USB connector is located on the right-rear side of the print-
er.
3. Your computer will report that it has found new hardware
and the Found New Hardware Wizard will start (Figure 2.6).
The Found New Hardware Wizard will ask if you want Win-
dows to search for a driver.
Select “No, Not this time.”
and
then click N
ext
.
4. The wizard will ask you where to look for the driver. Se-
lect
“Install the software automatically”
and then click
Next
(Figure 2.7). The wizard will pull the StudioJet driver from the
install CD and begin installing the driver.
5. This version of our printer driver has not yet been autho-
rized by the Windows Logo Testing lab. However, we guar-
antee that our printer driver is safe for installation. Simply
click
“Continue Anyway”
to complete the installation (Figure
2.8).
Figure 2.6
Figure 2.5
Figure 2.7
Figure 2.8


