


Recordex iMMCam LBX-500
Instruction Manual
Page 8
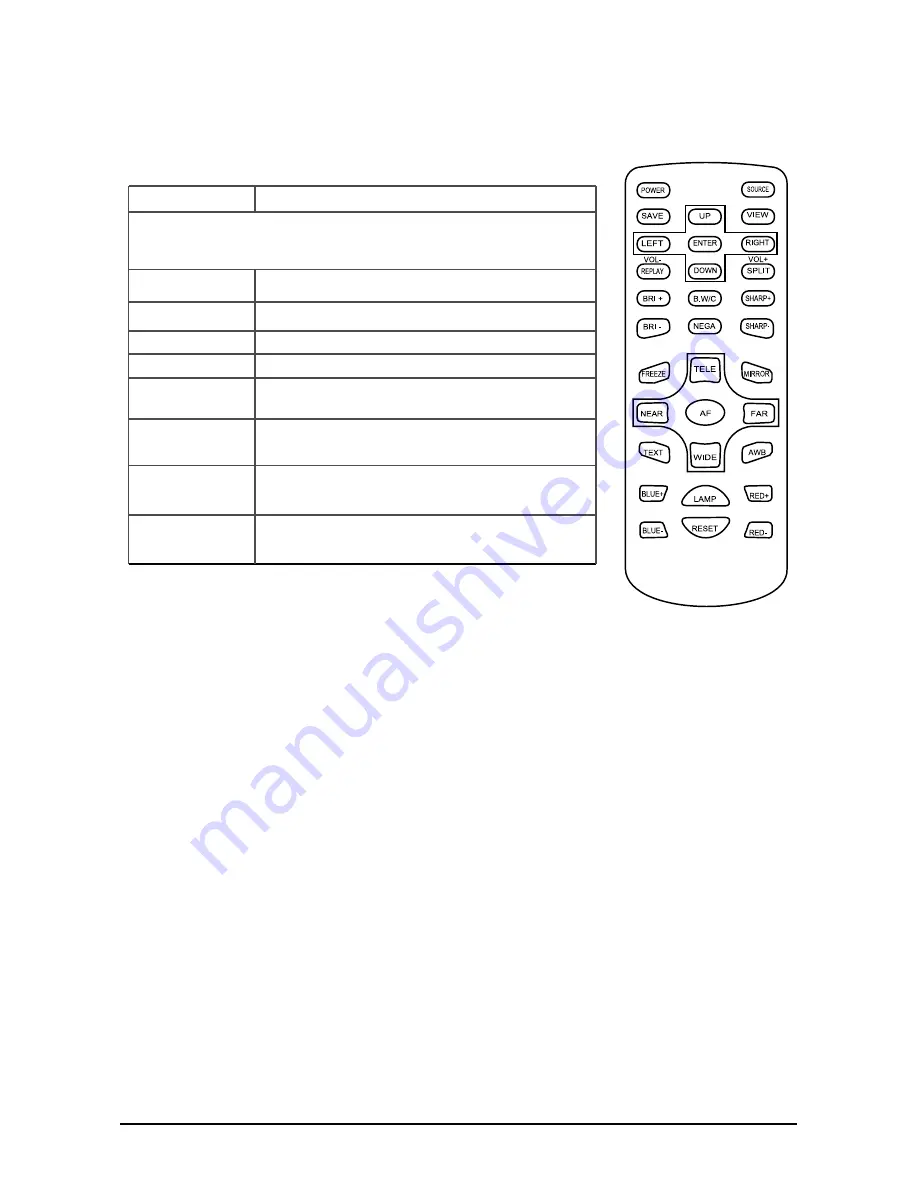
Label
Description
NOTE: most buttons are defined in the table on page 8. This table de-
fines function buttons that only appear on the remote control.
B.W/C
Switch between black and white or color viewing.
MIRROR
Displays mirror image of current presenter view.
NEAR
Small nudge adjustment to AutoFocus
FAR
Small nudge adjustment to AutoFocus
BLUE+
Increase blue color level (manual white balance,
remote control function only)
BLUE-
Decrease blue color level (manual white balance,
remote control function only)
RED+
Increase red color level (manual white balance,
remote control function only)
RED-
Decrease red color level (manual white balance,
remote control function only)
REMOTE CONTROL
Refer to the illustration below and the summary table for a description of the remote con-
trol function buttons.
SPECIAL FUNCTIONS
Changing VGA Output Resolution.
The default output resolution of the camera is SXGA
(1280x1024 @60Hz). The VGA output resolution can be changed to XGA (1024x768
@60Hz) or 1920x1080@60Hz. To do this press the F17 button (Reset) and hold it down for
three seconds. The newly set output resolution will appear in the On Screen Display OSD)
of the camera. Press and hold F17 for three seconds to cycle through each output resolu-
tion.
WARNING:
Changing the output resolution will delete any stored images that are saved to
the camera’s internal memory.
Deleting Saved Images.
To delete the images stored to the internal memory follow
these steps:
Ÿ
Press View (F3) and then select the image you wish to delete by using the Up (F2),
Down (F14), Left (F7) and Right (F9) buttons.
Ÿ
After the image is highlighted press the ENTER/DEL (F8) and hold it down for three
seconds.
Ÿ
NOTE: The images can only be deleted while in thumbnail view. Do not enlarge/view
and then try to delete. Highlight the image in the thumbnail view and then hold
down the ENTER/DEL button for three seconds
Summary of Contents for iMMCam LBX-500
Page 1: ...ENGLISH 500...