11
4. Assembly
Assembling the Optional Wheelkit
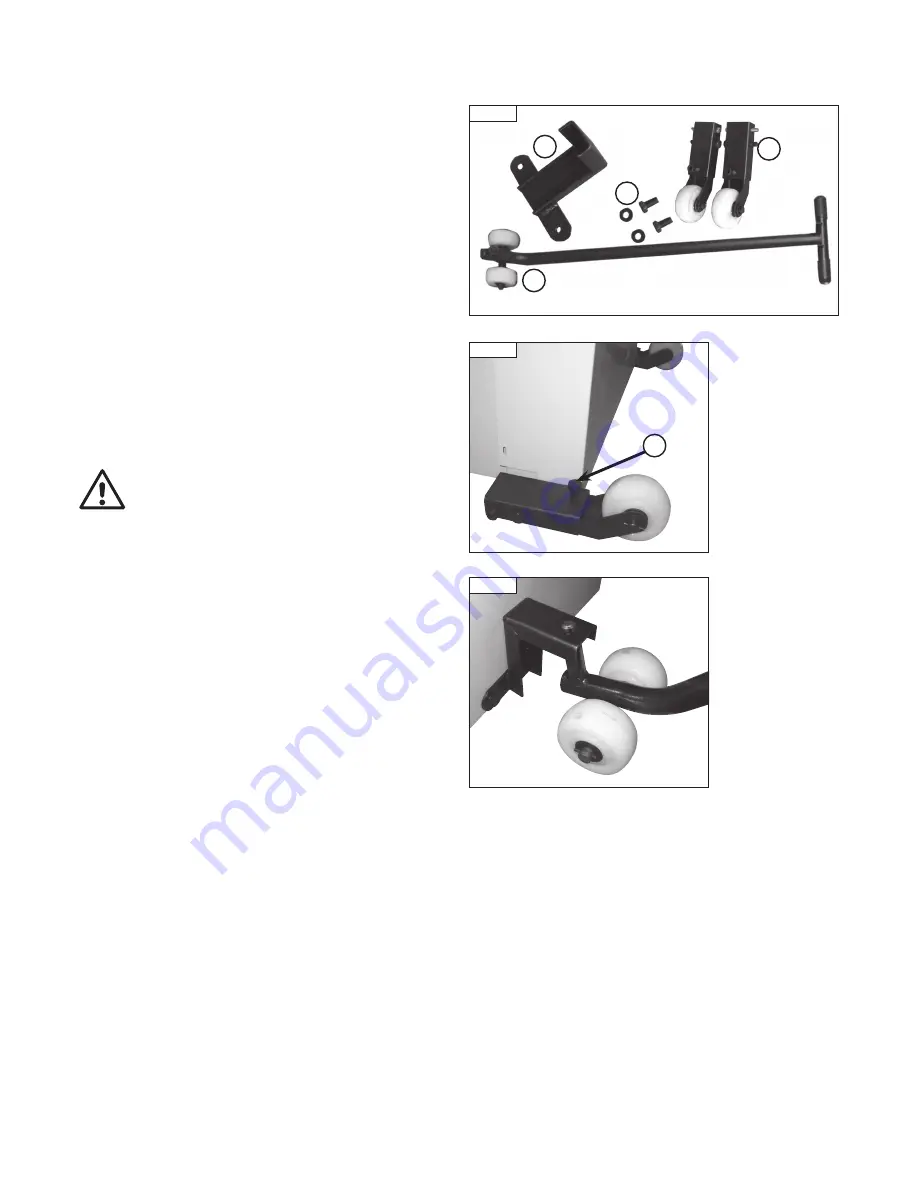
Items provided in the PT107 optional wheelkit (
Fig. 4.3
):
A
Lifting Bracket
B
Wheels
C
Hex nuts and bolts
D
Jockey bar with wheels
Simply attach the wheels (
Fig. 4.3, B
) to each corner at the back of the
machine as shown in
Fig. 4.4
.
These wheels are secured into place by two hex nuts being placed through
the pilot holes in the machine body and held in place with nuts.
The lifting bar is held in place at the front of the machine using a similar
process using two hex nuts being placed through the pilot holes in the
machine body and secured in place by two nuts,
Fig. 4.5
.
When the wheel kit is not in use, the wheels fitted to the main body of the
machine can be raised by unscrewing the adjusting screw
(Fig 4.4, A)
so
that they are clear of the surface of the floor.
The wheels should be lowered again before attempting to use the wheel kit.
Never attempt to move the machine with wheel kit whilst the planer tables
are in the raised position. The centre of gravity will be high making the
machine unstable. Always ensure that the tables are in the closed position
before attempting to move the machine.
Fig. 4.3
Fig. 4.5
A
B
C
D
i
Kg
Fig. 4.4
A
Summary of Contents for PT107
Page 29: ...29 10 Parts List Diagrams cont ...
Page 33: ...33 ...


