background image

EN

19

U.S. Limited Warranty

What your warranty covers:

• Defects in materials or workmanship.

For how long after your purchase:

• One year from date of purchase.
The warranty period for rental units begins with the first rental or 45 days from date of shipment to the
rental firm, whichever comes first.

What we will do:

• Provide you with a new, or at our option, a refurbished unit.  The exchange unit is under warranty for
the remainder of the original product’s warranty period.
• Proof of purchase in the form of a bill of sale or receipted invoice which is evidence that the product
is within the warranty period must be presented to obtain warranty service.  For rental firms, proof of
first rental is also required.

How to make a warranty claim:

• Properly pack your unit.  Include any cables, etc., which were originally provided with the product.
We recommend using the original carton and packing materials.
• Include evidence of purchase date such as the bill of sale.  Also print your name and address and a
description of the defect.  Send via standard UPS or its equivalent to:

Thomson Inc.
Product Exchange Center
11721 B Alameda Avenue
Socorro, Texas 79927

• Insure your shipment for of loss or damage.  Thomson accepts no liability in case of damage or loss en
route to Thomson.
• Pay any charges billed to you by the Exchange Center for service not covered by the warranty.
• A new or refurbished unit will be shipped to you freight prepaid.

What your warranty 

does not

 cover:

• Customer instruction. (Your Owner’s Manual provides information regarding operating Instructions
and user controls.  For additional information, ask your dealer.)
• Installation and set-up service adjustments.
• Batteries.
• Damage from misuse or neglect.
• Products which have been modified or incorporated into other products.
• Products purchased or serviced outside the USA.
• Acts of nature, such as but not limited to lightning damage.

Summary of Contents for RP3765

Page 1: ...e combined to make life a little bit easier They include Graduwake Ramp Up Alarm Nap Function Programmable Snooze Multi Color Backlit with 1 25 Blue Display Large backlit 1 25 display for easy readability Select backlit color from blue green amber or white High Performance Speaker System Gives the user the best possible high performance sound in a clock radio with bass reflex speakers Auto Brightn...

Page 2: ...olor Multi Color 4 Color Display Size 2 6 x 1 2 Backlight Display Yes Auto Brightness Control Yes AM PM Indicator Yes TV Indicator Yes Weather Indicator Yes Power Failure Indicator Yes Daylight Savings Indicator Yes Day of Week Indicator Independent Wake Mode Yes Nap Function Indicator Yes Weekend Alarm Cancel Indicator CD Track Number Yes TUNER Tuner Type Digital Programmable Stations 11 Presets ...

Page 3: ...S A WARNING SIGN ALERTING YOU OF I M P O R T A N T I N S T R U C T I O N S A C C O M PA N Y I N G T H E P R O D U C T T H E L I G H T N I N G FLASH AND ARROW HEAD WITHIN THE TRIANGLE IS A WA R N I N G S I G N ALERTING YOU OF D A N G E R O U S VOLTAGE INSIDE THE PRODUCT CAUTION TO REDUCE THE RISK OF ELECTRIC SHOCK DO NOT REMOVE COVER O R BAC K N O U S E R SERVICEABLE PARTS IN SIDE REFER SERVICING T...

Page 4: ...e from the U S Government Printing Office Washington DC 20402 Please specify stock number 004 000 00345 4 when ordering copies Service Information This product should be serviced only by those specially trained in appropriate servicing techniques For instructions on how to obtain service refer to the warranty included in this Guide CAUTION FOR CONTINUED PROTECTION AGAINST RISK OF FIRE REPLACE ONLY...

Page 5: ... to Alarm Tone 11 Turning off Alarm 11 Operating the Radio 12 Using the Weather Band 12 TV Band 12 Antennas 13 Tuning the Stations 13 Setting the Preset Radio Stations 14 Automatic Radio Station Search 14 Selecting the Preset Radio Stations 14 Overwriting the Preset Radio Stations 14 Deleting the Preset Radio Stations 14 Operating the CD Player 15 Listening to Compact Disc 15 Selecting Play Mode 1...

Page 6: ...arm settings programmed into memory When the battery backup functions the digital display will not light however the function of alarm still occurs during the power interruption if the remaining battery power is adequate Normal operation will resume after AC power is restored so you will not have to reset the time or the alarm Install batteries as follow 1 Unlock the battery compartment door locat...

Page 7: ...eset radio stations MEMO SET sets and stores preset memory in radio mode General Controls CD TRACK STATION OFF RECALL MEMO SET VOLUME RADIO ON BAND EASY SET CLOCK DIGITAL RADIO 3 DAYLIGHT SAVING TIME Front view Bottom view SNOOZE turns off the alarm momentarily VOLUME decreases volume VOLUME increases volume RADIO ON BAND turns on the radio changes radio band TIME ZONE 1 2 3 4 Slide to select diff...

Page 8: ...time Alarm tone only SLEEP activates SLEEP function S E NS O R OPEN CLOSE WAKE 1 CANCEL WAKE 2 NAP SLEEP REV SET FWD CLOCK WAKE I N S T A NT WEA T H E R COLOR SELECT AUTO BRIGHTNESS ON OFF Top view Back view SET CLOCK WAKE sets clock time and wake setting REV FWD change time radio frequency CD track INSTANT WEATHER recalls available weather stations COLOR SELECT Press to toggle among 4 backlight c...

Page 9: ...frequency unit In CD mode Repeats the current track Repeats the whole disc Plays tracks randomly Plays random track repeatedly In CD mode displays track number No disc detected In radio mode displays memory recall number Displays when the alarm radio station is set Daylight saving In wake 1 setting mode In wake 2 setting mode Wake 1 source Wake 2 source Wake to CD Wake to alarm tone Wake to radio ...

Page 10: ...G TIME at the bottom of the unit to turn on off the Daylight Saving function in areas observing not observing such time change WARNING Please avoid playing with these buttons after entering the Clock Alarm set mode Setting Time Zone Before plugging in for power follow the steps below to select time zone You may slide the time zone selector at the bottom of the clock to Eastern 1 Central 2 mountain...

Page 11: ...EN 7 Canadian Time Zone Figure 2 U S Time Zone Figure 1 Before You Begin ...

Page 12: ...g Time is adjusted before operating the clock 2 Press SET CLOCK WAKE repeatedly until the clock setting icon is dis played 3 Press REV or FWD to set the time Press and hold the respective buttons to fast reverse or fast forward clock time 4 Clock time will automatically be saved if no buttons are pressed after a few seconds You can also press SET CLOCK WAKE once to save your set ting and return to...

Page 13: ... backup mode all wake mode will be reverted to alarm tone Selecting Wake Mode To change to another wake mode e g from CD to radio simply press WAKE 1 or WAKE 2 repeatedly to scroll through wake options v v v Waking to CD When the waking to CD is selected icon will light 1 Press to turn on the CD 2 Set the wake time 3 Press WAKE 1 or WAKE 2 to select wak ing up by CD will light accord ingly 4 Press...

Page 14: ...lect the band 2 Press REV or FWD to tune to your de sired radio station 3 Press and hold WAKE UP CD TRACK STATION to store the current radio sta tion as the wake up radio station will show on the display Operating the Wake Timer Note Note Note Note Note AL refers to the Alarm Station If no WAKE STATION is set the wake up radio station will stay at your last listening radio station You can cancel y...

Page 15: ...FF and the alarm will be on again the following day at the same time 3 Disable the alarm permanently 1 Press CANCEL 2 The WAKE 1 or WAKE 2 icon will flash while it is flashing press WAKE 1 or WAKE 2 to cancel the alarm Corresponding WAKE indicator will disappear 3 To activate the alarm again press WAKE 1 or WAKE 2 and the WAKE indicator will appear the previous pre set time remains unchanged Wakin...

Page 16: ...ls to the unit 2 Press REV or FWD to select among the 7 weather channels 3 Wx will light and the channel number will show on the display IMPORTANT IMPORTANT IMPORTANT IMPORTANT IMPORTANT The listening range of NOAA weather stations varies from 10 miles up to a maximum of 40 miles from the station s transmitter In some areas of the United States weather transmissions cannot be monitored The effecti...

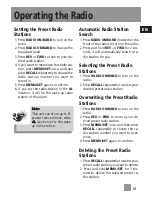
Page 17: ...ations 1 Press RADIO ON BAND located on the front of the radio to turn on the radio 2 Press RADIO ON BAND repeatedly to select the desired broadcast band 3 Press REV or FWD to tune to your desired radio station 4 Press VOLUME to adjust to your desired listening level Operating the Radio Tip Tip Tip Tip Tip UP will show briefly on the display when you press VOLUME VOLUME VOLUME VOLUME VOLUME When y...

Page 18: ... onds it will automatically search a ra dio station for you Selecting the Preset Radio Stations 1 Press RADIO ON BAND to turn on the radio 2 Press RECALL repeatedly to select your desired preset radio station Overwriting the Preset Radio Stations 1 Press RADIO ON BAND to turn on the radio 2 Press REV or FWD to tune to your de sired preset radio station 3 Press MEMO SET once and then press RECALL r...

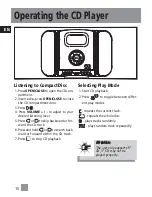
Page 19: ...k 6 Press and hold or to search back ward or forward within the CD track 7 Press to stop CD playback Selecting Play Mode 1 Start CD playback 2 Press to toggle between differ ent play modes repeats the current track repeats the whole disc plays tracks randomly plays random track repeatedly CD TRACK STATION OFF RECALL MEMO SET VOLUME RADIO ON BAND EASY SET CLOCK DIGITAL RADIO Attention Attention Att...

Page 20: ...be shown again will show on the display and the sleep time is set Sleep to Radio 1 Under sleep mode press RADIO ON BAND to turn on the radio 2 Sleep radio station will automatically switch to the current radio station you may select the radio station as usual 3 Once the sleep time is reached the ra dio will turn off automatically You can reset to sleep to a different radio station simply 1 Press R...

Page 21: ...function can be used repeatedly up to 2 hours After this the alarm will turn off until the next alarm conditions are met Set the quiet period as follow 1 While pressing SNOOZE press REV or FWD to set the quiet period the default time is 9 minutes from 1 minute to 30 minutes Release SNOOZE then the quiet period is set Auto Brightness Slide the AUTO BRIGHTNESS switch AUTO BRIGHTNESS ON OFF at the ba...

Page 22: ... the lens you will need to purchase a CD lens cleaner which can maintain the output sound quality For instructions on cleaning the CD lens refer to the ones accompanying the lens care Cleaning the Exterior Prior to cleaning the exterior be sure to unplug the power cord from the AC power outlet Wipe the exterior with a soft clean and slightly water dampened cloth Precautions Never open the cabinet ...

Page 23: ...ecommend using the original carton and packing materials Include evidence of purchase date such as the bill of sale Also print your name and address and a description of the defect Send via standard UPS or its equivalent to Thomson Inc Product Exchange Center 11721 B Alameda Avenue Socorro Texas 79927 Insure your shipment for of loss or damage Thomson accepts no liability in case of damage or loss...

Page 24: ...F ANY BREACH OF ANY EXPRESS OR IMPLIED WARRANTY ON THIS PRODUCT THIS DISCLAIMER OF WARRANTIES AND LIMITED WARRANTY ARE GOVERNED BY THE LAWS OF THE STATE OF INDIANA EXCEPT TO THE EXTENT PROHIBITED BY APPLICABLE LAW ANY IMPLIED WARRANTY OF MERCHANTABILITY OR FITNESS FOR A PARTICULAR PURPOSE ON THIS PRODUCT IS LIMITED TO THE APPLICABLE WARRANTY PERIOD SET FORTH ABOVE How state law relates to this war...

Page 25: ...with proof of purchase and insured to Thomson multimedia Ltd 6200 Edwards Blvd Mississauga Ontario L5T 2V7 Canada The provisions of this written warranty are in addition to and not a modification of or subtraction from the statutory warranties and other rights and remedies contained in any applicable legislation and to the extent that any such provisions purport to disclaim exclude or limit any su...

Reviews: