background image

Chapter 6

68

chapter 6

4.

Ship your defective unit back to us using the replacement unit’s carton.  Shipping instructions will be included on the
carton along with your SR number which will allow you to easily ship the unit back to us.  Make sure you insure your
shipment in case of damage or loss.  Include with the shipment:

Evidence of purchase date such as a bill of sale.

A brief note describing your unit’s problem.

Your name, address and phone number.

Option II:

1.

For a fee of $10.00, we will send a replacement unit to our exchange point.

2.

The exchange location will notify you of its arrival.

3.

Take your unit and evidence of purchase date, such as a bill of sale, to the exchange location and you will be provided
the new or refurbished unit.  Please retain all accessories such as the remote control hand unit.

4.

If the repairs are covered by your warranty, you will not be billed.

Thomson assumes no responsibility for warranty shipments from the customer to the factory if not shipped in the
manner prescribed by Thomson.

Return transportation, storage, handling and insurance costs are your responsibility.  We accept no responsibility
in case of damage or loss.

To receive a replacement unit after we have received your unit:

Write the SR number on the outside of the carton used to return the unit.  Make sure you insure your shipment in case of
damage or loss.

Carefully pack the unit using the original box and packing material if possible.  Please retain all accessories that were
included with your unit such as the remote control hand unit.

Include with the shipment:
1.

Evidence of purchase date, such as a bill of sale, to verify your unit’s warranty eligibility.

2.

A brief note describing your unit’s problem.

3.

Your name, address and phone number.

The representative will advise the address to mail a cashier’s check or money order for payment if there are any out of
warranty labor or parts charges, and you elect not to use your credit card.

After we receive your product, a new or refurbished unit will be shipped to you.

Summary of Contents for RC5400P

Page 1: ...Portable DVD Player User s Manual Changing Entertainment Again RC5400P ...

Page 2: ...ed and found to comply with the limits for a Class B digital device pursuant to Part 15 of the FCC rules These limits are designed to provide reasonable protection against harmful interference in a residential installation This equipment generates uses and can radiate radio frequency energy and if not installed and used in accordance with the instructions may cause harmful interference to radio co...

Page 3: ...he Region Management Information If the Region number of a DVD disc does not correspond to the Region number of this DVD player this DVD player cannot play the disc The Region number for this DVD player is Region No 1 Note This device is protected by U S patent numbers 4 631 603 and 4 577 216 and 4 819 098 and other intellectual property rights The use of Macrovision s copy protection technology i...

Page 4: ...This page intentionally left blank ...

Page 5: ...e Time Search feature lets you go to a point on a disc by entering the elapsed time in the on screen time display For example if your favorite scene in a movie is one hour and twelve minutes after the beginning of the movie you can enter 01 12 00 into the time display and go right to that point in the movie Ratings Limits Your DVD player allows you to set ratings limits and passwords For example y...

Page 6: ...onnection 8 Cables Needed to Connect Your DVD Player 9 Install Batteries in the Remote 13 Important Battery Information 13 Using the battery unit 14 A Quick Tour of The Remote 15 Adjusting the Color and Brightness of the Screen 18 Chapter 2 Playing DVDs Regional Coding 20 Using Different Menus 20 Loading and Playing Discs 20 To Load and Play a Disc 21 Adjusting the Color and Brightness of the Scre...

Page 7: ... 29 Chapter 3 Playing Audio CDs and MP3 Discs Loading and Playing an Audio CD 32 To Load and Play an Audio CD 32 Audio CD Playback Features 32 Skipping Tracks 32 Time Search 33 Using the Repeat Feature 34 A B repeat 35 Playing MP3 discs 36 Chapter 4 Playing Video CDs What is a Video CD 38 The Video CD Disc Menu 38 If the Video CD Has Playback Control 39 Bypassing Playback Control 39 Resuming Playb...

Page 8: ...9 The Sound Menu 50 Compression 50 Range 50 Mono Stereo 51 Speakers 52 Password Setup 53 Creating a Password 53 Changing the Password Mode 54 The Preferences Menu 55 Selecting the Audio Preference 55 Selecting the Subtitle Language 56 Changing the Disc Menu Language 57 Setting the Rating Limit 58 Defaults 58 Chapter Other Information Troubleshooting 60 Handling Cautions 65 Warranty 67 ...

Page 9: ...Connections Setup Chapter Overview Things to Consider Before You Connect Choose Your Connection Install Batteries in the Remote Charging the Batteries The Remote Control 5 Chapter 1 ...

Page 10: ...Arrange the components so that air can circulate freely Don t stack components When you place components in a stand make sure you allow adequate ventilation If you connect an audio receiver or amplifier place it on the top shelf so the heated air from it won t flow around other components Position Cables Properly to Avoid Audio Interference Insert each cable firmly into the designated jack If you ...

Page 11: ...ain picture and sound content The difference is the amount of information that can be stored on the disc CD R A disc that you can write information to once for example download MP3 files CD RW A re writable disc You can write information onto this type of disc more than once For example if you have previously downloaded MP3 files to a CD RW disc you can write information to the disc again but it w...

Page 12: ...connection is best for you Turn to the appropriate page and connect your DVD player TV DVD Components Cables Needed Connection Go to Title DC power cord DVD page 10 DC power cord Audio video S Video optional S Video adapter TV DVD Dolby Digital Receiver DVD TV DVD DC power cord Audio video S Video optional S Video adapter TV DVD page 11 page 12 ...

Page 13: ...Chapter 1 chapter 1 9 Cables Needed to Connect Your DVD Player The pictures below show the cables needed for the connections represented in this book DC Power cable Mini audio video cable S Video cable ...

Page 14: ...re that the AV adapter matches the local voltage 2 Plug the AV adapter into the DC IN jack on the side of the player 3 Plug the other end into an AC outlet GO TO PAGE 13 Connect Headphones to the DVD 1 Make sure power is turned off when inserting or removing headphones from the player 2 Insert headphones into the PHONES jack on the side of the player GO TO PAGE 13 ...

Page 15: ...eo cable yellow to the VIDEO OUT jack on the back of your DVD Player and to the Video Input jack on your TV OR S Video optional If your TV has an S Video Input jack connect the S Video adapter included to the S VIDEO OUT jack on the back of your DVD Player Connect one end of an S Video cable to the adapter and the other end to the S Video jack on your TV If your TV doesn t have S Video use the bas...

Page 16: ...the Video Input jack on your TV OR S Video optional If your TV has an S Video Input jack connect the S Video adapter included to the S VIDEO OUT jack on the back of your DVD Player Connect one end of an S Video cable to the adapter and the other end to the S Video jack on your TV If your TV doesn t have S Video use the basic video connection listed above GO TO PAGE 13 VO LU ME PH ON ES PO WER DC I...

Page 17: ...ectrolyte if mixed with a different battery type if inserted incorrectly if all batteries are not replaced at the same time if disposed of in fire or if an attempt is made to charge a battery not intended to be recharged Discard leaky batteries immediately Leaking batteries can cause skin burns or other personal injury Point the Remote in the Right Direction When you want the remote to operate the...

Page 18: ...ed the light will go off 5 Unplug the adapter and the charger Using the Battery 1 Make sure the battery unit is disconnected from the charger and the DVD player s lid is closed 2 Mount the battery to the rear of the player using the tabs on the back a Line up the mounting tabs on the battery with the rear of the player b Insert the tabs on the battery inot the corresponding slots on the rear of th...

Page 19: ...the arrow buttons left right up and down to move through the on screen menus You highlight a menu item by pressing the arrow buttons and select a highlighted item by pressing the OK button AUDIO Allows you to select a different language to play a DVD disc in provided the disc was authored with multiple languages CLEAR Clears on screen displays from screen forward Press this button during playback ...

Page 20: ... up the DVD player menu PLAY MODE Press this button to access the Play Mode info banner to set random and program playback play OK Begins disc play and selects menu items pause Press this button to pause disc play For DVD discs press again to play forward a frame at a time For audio CDs the second press resumes playback REPEAT Press this button to bring up the Repeat info banner You can repeat par...

Page 21: ...anner if the disc was created with subtitles TIME SEARCH Allows you to select a title or chapter and begin playback from that point ZOOM Zooms in on picture SETUP INFO CLEAR TIME SEARCH GUIDE PLAY MODE INDEX GO BACK ANGLE MENU RESUME REPEAT A B ZOOM AUDIO SUBTITLE 1 2 3 4 5 6 7 8 9 0 10 10 SOUND ...

Page 22: ...the buttons directly below the screen Color Push the Color button with the up arrow to add more color to the picture Push the Color button with the down arrow to reduce color in the picture Brightness Push the Brightness button with the up arrow to brighten the picture Push the Brightness button with the down arrow to darken the picture ...

Page 23: ...Playing DVDs Chapter Overview Regional Coding Using Different Menus Loading and Playing a Disc Using a Disc Menu Disc Playback Features 19 Chapter 2 Changing Entertainment Again ...

Page 24: ...cross the top of the screen when a disc is playing It can only be accessed while you are playing a disc It s turned on and off with the INFO button on the remote The DVD player menu The DVD player s menu system is accessed only when a disc isn t playing It appears automatically when the STOP button is pressed Remember that a feature will only work if the disc was programmed with that feature For e...

Page 25: ... The disc menu appears on the screen One of the options will start disc play Highlight that option and press OK on the DVD remote The DVD Player s main menu appears on the screen Highlight the Play option and press OK on the DVD remote When you stop playing a disc the DVD player remembers where you stopped When you start playing the disc again the player picks up where you left off unless the disc...

Page 26: ...change features such as language and playback settings Although the content and operation of disc menus vary from disc to disc the following example will give you an idea of what to expect 1 While the disc is playing press the MENU button on the remote The disc menu appears 2 Press the up down arrow buttons to highlight the section of the disc menu you want to choose and press OK on the remote In ...

Page 27: ...atures Fast Motion Playback Picture Scan You can search in forward or reverse mode 1 Press the reverse or forward button on the remote during playback to search through a disc 2 Press the button again on the remote to search at the next speed Picture Scan has 4 speeds With each consecutive press of the button the search speed increases If you press the button more than 5 times Picture Scan cycles ...

Page 28: ...to go to the next chapter and the button to go to the previous chapter Play Mode Random The Random option plays a disc s chapters in random order If there is more than one title the title with the most chapters is selected If there is more than one title and all titles have an equal amount of chapters the first title is selected If each title has only one chapter each the titles chapters will be p...

Page 29: ... playing press the TIME SEARCH button on the remote control to bring up the Info Display 2 Use the left right arrow keys to highlight the Title number Use the number buttons to enter the title you want to play Selecting a Chapter Number 1 Press the TIME SEARCH button on the remote control to bring up the Info Display 2 Use the left right arrow keys to highlight the Chapter number Use the number bu...

Page 30: ...ros For example to enter 01 21 36 press the 10 0 button then the 1 then the 2 etc The Index feature displays thumbnails of each chapter in the current title The Index Feature The index feature displays small pictures or thumbnails of each chapter on the disc 1 Press STOP twice 2 Press the INDEX button the index may take a moment to load 3 The screen displays thumbnails of the first nine chapters E...

Page 31: ...E button until subtitles are off Note If the disc does not contain this language the disc s default language is automatically selected When the SUBTITLES button is pressed the Info Display shows the number of available subtitles and the currently selected subtitle Changing the Audio Language When a DVD is recorded with multiple soundtracks you can use the Audio feature to temporarily change the au...

Page 32: ...will be displayed If multiple camera angles are available the ANGLE icon displays the current angle number and the number of angles available For example 1 4 indicates that angle one is being displayed and there are four different angles available 2 Press the ANGLE button again to go to the next camera angle 3 To resume normal playback press CLEAR Note This feature does not work when a DVD has not...

Page 33: ...A B Repeat lets you repeat a specific segment on the DVD that you define 1 At the start of the segment you want to repeat Press the A B button on the remote The Info Display shows OFF Press the A B button again to mark the start A point of the segment the on screen display will show REPEAT A 2 Allow the movie to play to the end of the segment you want to mark You must let the movie play in standar...

Page 34: ...This page intentionally left blank ...

Page 35: ...Chapter Overview Loading and Playing an Audio CD Audio CD Playback Features Playing MP3 discs Playing Audio CDs and MP3 discs 31 Chapter 3 Changing Entertainment Again ...

Page 36: ...ayer reads the disc s table of contents and displays the total number of tracks and the total playing time 4 Press play OK to begin playback 5 Press STOP to stop playback Audio CD Playback Features When playing audio CDs your DVD player has many of the same features that your CD player has including track skip repeat play and programmed playback Skipping Tracks The Info Display shows the current t...

Page 37: ... the 1 then the 3 then the 6 TRACK 03 GO TO 01 36 03 15 Use the Time Search feature to go to an elapsed time in a track Using the Repeat Feature There are three repeat options Disc repeats the entire disc Track repeats the track that is playing A B Repeat repeats a selected segment of the disc To Repeat a Track or Disc 1 While a disc is playing press REPEAT the repeat banner appears and displays R...

Page 38: ... turn off Repeat To turn off A B repeat press the A B button again until the on screen display shows REPEAT OFF Playing MP3 discs When you play a MP3 disc the MP3 menu will be displayed instead of the DVD player menu The DVD player menu is not available when playing MP 3 discs 1 Press the OPEN button on the front of the DVD player 2 Place a disc gently into the tray with the disc s label facing up...

Page 39: ... a MP3 disc press on the remote or the front of the player Press the button again to go to the beginning of the preceding song When skipping tracks the highlight moves from left to right across the columns so track 1 is the first track listed in column one track 2 is the first track listed in column 2 track 3 is the second song in column 1 etc To stop Random playback press STOP and RESUME to resum...

Page 40: ...PLAY MODE button until the Program option is displayed 4 Use the number buttons to enter the first track you want to play As soon as you enter a number The Info display shows the order number followed by a colon and the track number 5 Enter the remaining tracks in the order you want them to play 6 Press PLAY To stop Program playback press STOP and RESUME to resume normal playback or press PLAY MOD...

Page 41: ...Playing VCDs Chapter Overview What is a Video CD The Video CD Disc Menu If a Video CD has Playback Control 37 Chapter 4 Changing Entertainment Again ...

Page 42: ... information banners If the disc has a menu the menu will appear after the disc is loaded into the player The content and operation of disc menus varies from disc to disc Check the instructions that accompany the Video CD for more information on how to use the playback control functions for that specific disc If a disc menu appears 1 Use the number buttons on the remote to select a track similar t...

Page 43: ...ayback and return to the menu or press STOP to stop playback and remove the menu from the screen Bypassing Playback Control If a Video CD has playback control you can bypass the disc s menu by following these steps when you first load the discs 1 Press STOP to put the player in the stop mode 2 Use the number buttons on the remote to enter the desired track number and then press play OK When playba...

Page 44: ...u specified Note This feature does not work in Playback Control mode Use A B Repeat to repeat a segment for a track that you ve set A B Repeat A B Repeat lets you repeat a specific segment on the DVD that you define The segment will repeat until you turn it off 1 At the start of the segment you want to repeat Press the A B button on the remote The Info Display shows REPEAT A 2 Allow the movie to p...

Page 45: ...ons are numbered Use the number buttons on the remote to select an option Intro plays the first few seconds of the title Disc Index shows thumbnails of the titles available on the disc Track Index shows thumbnails of the tracks of the currently selected title Exit exits the Index 4 If you select Disc Index or Track Index the screen displays thumbnails of the available titles or chapters Up to nine...

Page 46: ...This page intentionally left blank ...

Page 47: ...Chapter Overview The Setup Menu The Display menu The Sound Menu Password Setup The Preferences Menu Using the DVD Menu System 43 Chapter 5 Changing Entertainment Again ...

Page 48: ...ns that let you customize your DVD player SETUP MENU DISPLAY SOUND PASSWORD PREFERENCES EXIT SETUP PRESS OK TO SELECT The Display Menu The Display Menu controls how the picture and other information appear on the screen IMAGE STANDARD ANGLE LANGUAGE DIGITAL OUT SUBTITLE MAIN MENU GO BACK TO MAIN MENU DISPLAY MENU ...

Page 49: ...o return to the main menu highlight the Main Menu option and press play OK 4 x 3 P S Choose this setting if you want the movie to fill the entire screen of your TV This might mean that parts of the picture the left and right edges won t be seen Most discs produced in a widescreen format can t be cropped in this fashion This means the black bars will appear at the top and the bottom of the screen 4...

Page 50: ...ss SETUP the main menu appears 2 Use the arrow buttons to highlight the Display option Press play OK to select The Display menu is displayed 3 Use the up down arrow buttons to highlight the Angle option The angle choices appear on the right 4 Press the right arrow button to move to the angle choices Use the up down arrow buttons to highlight the desired choice 5 Press play OK to select the choice ...

Page 51: ...he right 4 Press the right arrow button to move to the language choices Use the up down arrow buttons to highlight the desired language 5 Press play OK to select the language The menu will immediately change to the selected language 6 Press the left arrow button to return to the Display menu options on the left To return to the main menu highlight the Main Menu option and press play OK To exit the...

Page 52: ...the Display option Press play OK to select The Display menu is displayed 3 Use the up down arrow buttons to highlight the Digital Out option The digital output choices appear on the right 4 Press the right arrow button to move to the digital output choices Use the up down arrow buttons to highlight the desired choice When an option is highlighted the option description appears at the bottom of the...

Page 53: ... arrow buttons to highlight the desired choice When an choice is highlighted it s description appears at the bottom of the screen 5 Press play OK to select the choice 6 Press the left arrow button to return to the Display menu options on the left To return to the main menu highlight the Main Menu option and press play OK To exit the menu system completely press SETUP Note If the disc is playing yo...

Page 54: ...h no disc playing press SETUP the main menu appears 2 Use the arrow buttons to highlight the Sound option and press play OK to select it the Sound menu is displayed 3 Highlight the Range option and press play OK to select it 4 A slider bar appears Press the right arrow button to move to the slider bar Use the up down arrow buttons to adjust the range 5 When the range is adjusted press the left arr...

Page 55: ...reo choices appear on the right 4 Press the right arrow button to move to the mono stereo choices Use the up down arrow buttons to highlight the desired choice When a choice is highlighted it s description appears at the bottom of the screen 5 Press play OK to select the choice 6 Press the left arrow button to return to the Display menu options on the left To return to the main menu highlight the ...

Page 56: ...elect The Sound menu is displayed 3 Use the up down arrow buttons to highlight the Speaker option The speaker choices appear on the right 4 Press the right arrow button to move to the speaker choices Use the up down arrow buttons to highlight the desired choice When an choice is highlighted it s description appears at the bottom of the screen 5 Press play OK to select the choice 6 Press the left a...

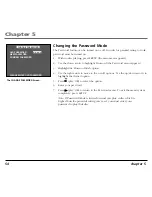
Page 57: ... old password The first time you use the password feature you will need to enter the default password which is 99999 6 You will be prompted for a new password Enter a 5 digit number this is your password 7 To confirm the new password re enter it If you ve re entered the new password incorrectly the message New password not confirmed appears at the bottom of the screen Re enter the new password 8 P...

Page 58: ... Use the right arrow to move to the on off options Use the up down arrows to highlight the desired option 5 Press play OK to select the option 6 Enter your password 7 Press play OK to return to the Password menu To exit the menu system completely press SETUP Note If Password Mode is turned on and you play a disc which is higher than the parental rating you ve set you must enter your password to pl...

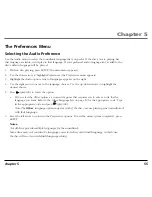
Page 59: ...e language choices Use the up down arrows to highlight the desired choice 5 Press play OK to select the option If you select the Other option a screen will appear that requires you to enter a code for the language you want Refer to the Other Language List on page 59 for the appropriate code Type in the appropriate code and press play OK Note The Other language option may not work if the disc you a...

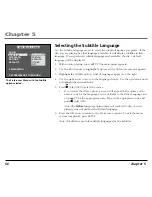
Page 60: ...es Use the up down arrows to highlight the desired choice 5 Press play OK to select the choice If you select the Other option a screen will appear that requires you to enter a code for the language you want Refer to the Other Language List on page 59 for the appropriate code Type in the appropriate code and press play OK Note The Other language option may not work if the disc you are playing was n...

Page 61: ...4 Use the right arrow to move to the language choices Use the up down arrows to highlight the desired choice 5 Press play OK to select the choice If you select the Other option a screen will appear that requires you to enter a code for the language you want Refer to the Other Language List on page 59 for the appropriate code Type in the appropriate code and press play OK Note The Other language op...

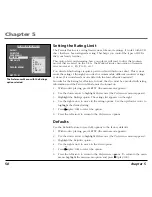
Page 62: ... press SETUP the main menu appears 2 Use the down arrow to highlight Preferences the Preferences menu appears 3 Highlight the Ratings option The ratings list appears on the right 4 Use the right arrow to move to the rating options Use the up down arrows to highlight the desired rating 5 Press play OK to select the option 6 Press the left arrow to return to the Preferences options Defaults Use the ...

Page 63: ... Kinyarwanda 8287 Kirghiz 7589 Kirundi 8278 Korean 7579 Kurdish 7585 Laothian 7679 Latin 7665 Latvian Lettish 7686 Lingala 7678 Lithuanian 7684 Macedonian 7775 Malagsy 7771 Malay 7783 Malayalam 7776 Maltese 7784 Maori 7773 Marathi 7782 Moldavian 7779 Mongolian 7778 Naru 7865 Nepali 7869 Norwegian 7879 Occitan 7967 Oriya 7982 Oromo Afan 7977 Panjabi 8065 Pashto Pushto 8083 Persian 7065 Polish 8076 ...

Page 64: ...This page intentionally left blank ...

Page 65: ...Other Information 61 Changing Entertainment Again Chapter 6 Chapter Overview Troubleshooting Care and Maintenance Limited Warranty ...

Page 66: ...the disc is a DTS music CD it requires a DTS decoder Both the player and the disc are coded by region If the regional codes don t match the disc can t be played This player is Region No 1 Play starts but then stops immediately The disc is dirty Clean it Condensation has formed Allow player to dry out No picture Turn your TV to its Video Input Channel see chapter 1 Turn on the TV Make sure your pla...

Page 67: ...ed at this time because 1 The disc s software restricts it 2 The disc s software doesn t support that feature e g angles 3 The feature is not available at the moment 4 You ve requested a title or chapter number that is out of range The picture is distorted You may need to adjust the image setting Check to see that the setting in the disc menu and the setting in the player Display menu use the Imag...

Page 68: ...tle on the disc exceeds the rating limit set in the Ratings Limits when you press PLAY Unlock the player or change the rating limit in those menus No forward or reverse scan Some discs have sections that prohibit rapid scanning or title and chapter skip If you re trying to skip through the warning information and credits at the beginning of a movie you won t be able to This part of the movie is of...

Page 69: ...the case be sure to disconnect the AC power cord from the AC outlet Do not use benzene thinner or other solvents for cleaning Wipe the case with a soft cloth Formation of Condensation Due to sharp changes in temperature and humidity condensation may form if warm air comes in contact with any cold parts inside the player When condensation forms inside the player the player may not operate correctly...

Page 70: ...the inner edge toward the outer perimeter If a disc becomes very dirty wet a soft cloth in water wring it out well Wipe the dirt away gently and remove any water drops with a dry cloth Do not use record cleaning sprays or anti static agents on discs Also never clean the discs with benzene thinner or other volatile solvents which may cause damage to the disc surface ...

Page 71: ...el serial number ready The model serial number information is on the back of your unit A representative will troubleshoot your problem over the phone If the representative determines that you should receive a replacement unit you will be provided with a Service Request SR number and the location of a nearby exchange point if one exists No returns will be accepted without the SR number To receive a...

Page 72: ...lity for warranty shipments from the customer to the factory if not shipped in the manner prescribed by Thomson Return transportation storage handling and insurance costs are your responsibility We accept no responsibility in case of damage or loss To receive a replacement unit after we have received your unit Write the SR number on the outside of the carton used to return the unit Make sure you i...

Page 73: ...rescribed by Thomson Storage fees may be charged by the exchange point if you fail to pickup the replacement unit in a timely manner Product Registration Please complete and mail the Product Registration Card packed with your DVD product It will make it easier to contact you should it ever be necessary The return of the card is not required for warranty coverage How state law relates to warranty T...

Page 74: ...lay 7 13 21 Display Menu 44 Angle 46 Digital Output 48 Image 45 Language 47 Standard 46 Subtitle 49 DVD playback features 23 F Fast motion playback 23 Frame Advance 23 Freeze frame pause 23 H Handling cautions 64 discs 65 DVD Player 64 Headphones connecting 10 I Image 45 Installing batteries 13 L Language Changing the Audio 27 47 Loading a disc audio CD 32 DVD VCD M Maintenance 64 Menu Display 44 ...

Page 75: ...tteries 13 pointing 13 Repeat A B 29 35 chapter 29 34 title 29 34 REPEAT button 16 29 34 Repeat play 29 34 REVERSE button 23 S Search fast motion playback 23 Selecting Chapter number 25 Title number 25 Skipping chapters 24 Slow motion playback 24 Sound Menu 50 Compression 50 Mono Stereo 51 Range 50 Speakers 52 Standard 46 SUBTITLE button 17 Subtitles 27 49 T Time search 33 Title repeating 29 34 Ti...

Page 76: ...This page intentionally left blank ...

Page 77: ......

Page 78: ...er Electronics Inc Trademark s Registered Marca s Registrada s Printed in China TOCOM 15634570 Please do not send any products to the Indianapolis address listed in this manual or on the carton This will only add delays in service for your product Thomson multimedia Inc ...

Reviews: