9
Setup and Connections
Tip
You may want to use a piece of clear
plastic tape to temporarily affix the
controller’s node until you have completed
the interactive setup. That way you can
easily move it if you have not placed it
exactly over the sensor.
Step 3: Connect the IR Controller
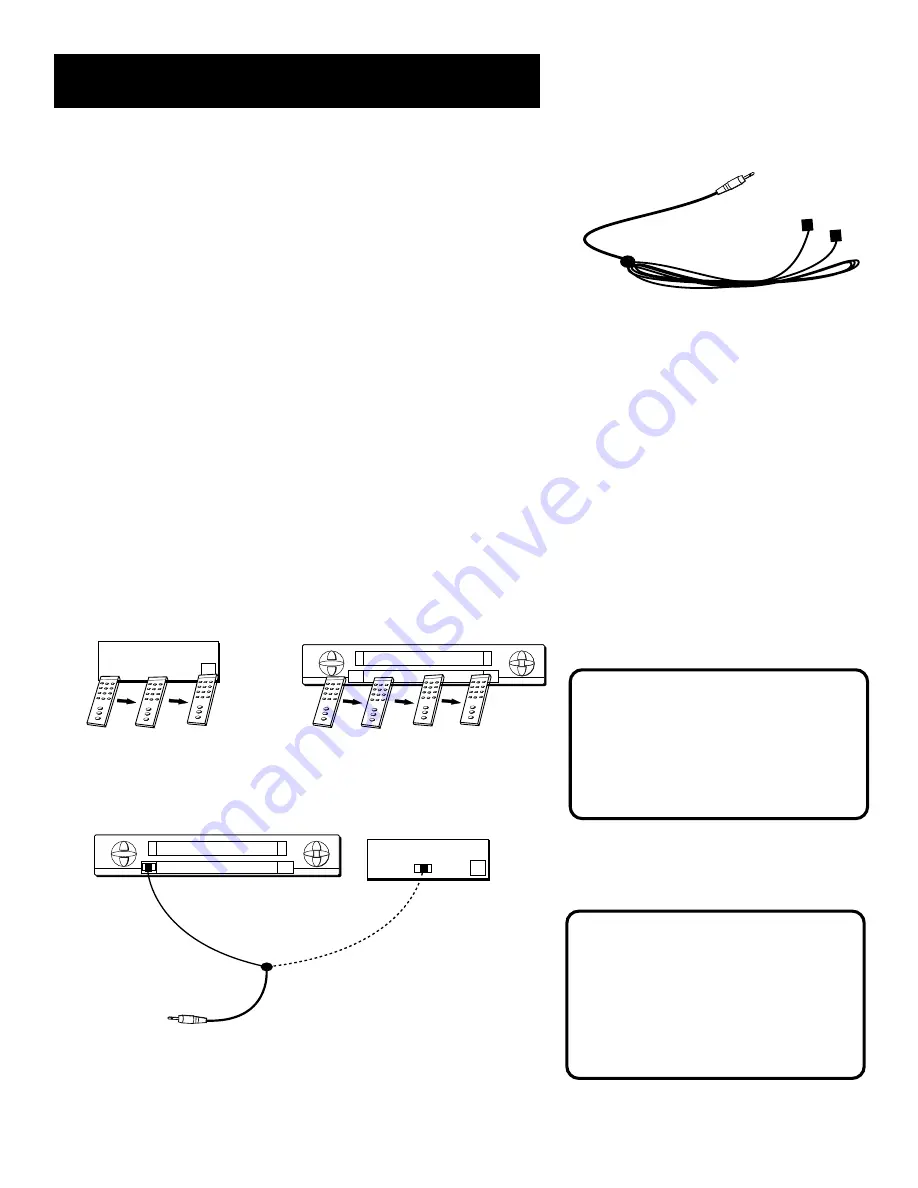
The IR (Infrared) Controller enables the GUIDE Plus+ system to control
your VCR and cable box (if necessary) so you can tune to television
channels and even start recording a program from the GUIDE Plus+
system.
After you have affixed the ends of the controller to the necessary
components (VCR, or Cable box), you will use the on-screen interactive
setup routine for the GUIDE Plus+ system to test the connected
components.
Attaching the IR Controller
Some components label the infrared remote sensor, and others do not. If
your component is labeled, affix the IR controller directly over the
sensor. If the IR location is not labeled on your component, you need to
use to use the component’s remote control to locate the sensor.
1.
Hold the component’s remote control (not the remote that came
with your TV) so that it is touching the front of the component.
2.
Slowly move the remote over the front of the component while
pressing the remote power button on and off. (Be sure to press and
release the power button each time you move the remote. Holding
the button may not work.)
VCR
03
CHANNEL
Cable Box
The IR Controller is used to send commands
to your VCR and/or cable box.
3.
When the component turns off or on, you’ve located the sensor.
4.
Affix the controller’s node directly to the remote sensor.
SENSOR
VCR
03
CHANNEL
SENSOR
Connect to the TV
Attach to the VCR
Attach to the cable box. If you do not
have a cable box, just leave it unattached.
Note
Since the adhesive is lo-tack, it will not
mar the finish of VCRs, cable boxes, or
other products, but the adhesive will
wear down if removed and applied
many times.


