background image

40

Chapitre 6

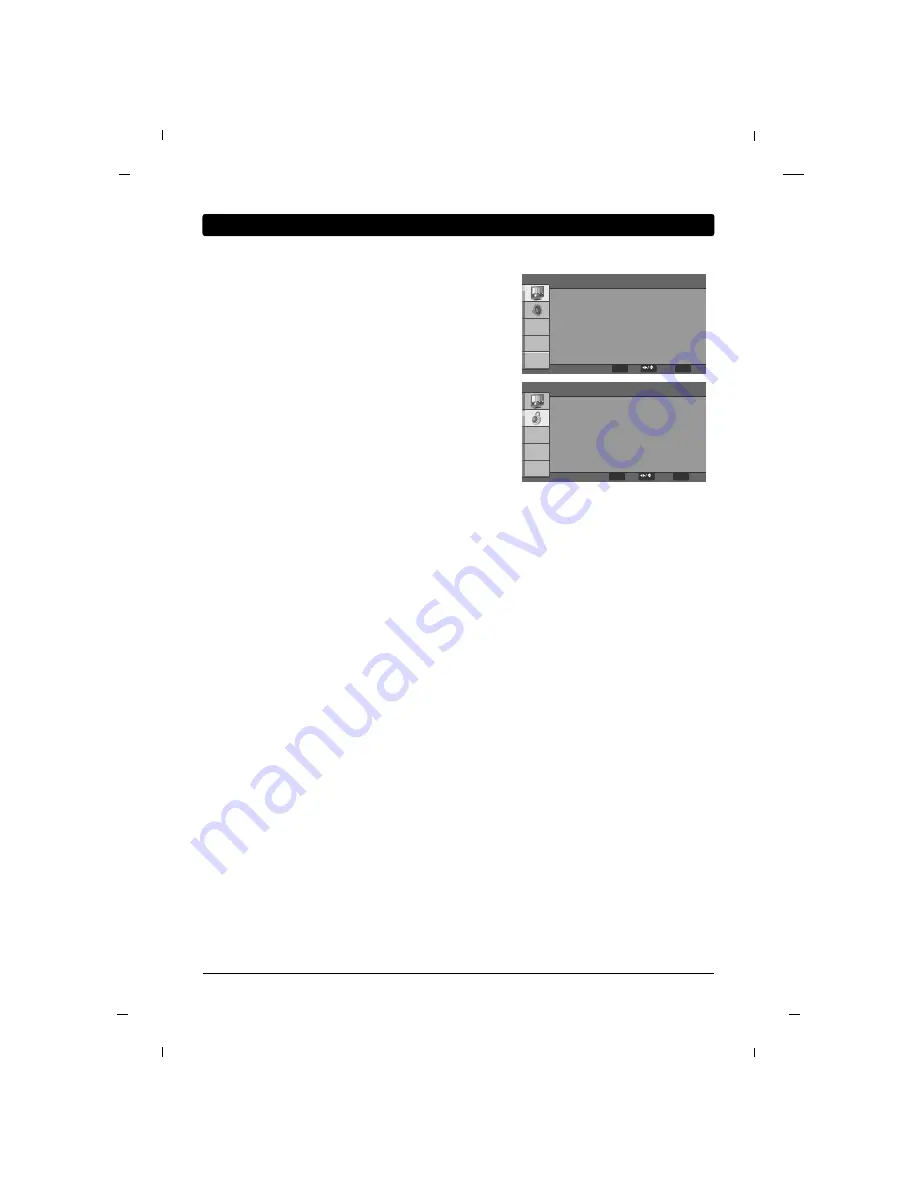
Chapitre 6: Opérations utilisateur

Mode image

Différents modes vous permettent de régler l’affichage
selon vos préférences.

Mode son

L’option Sound Mode vous permet de régler le son selon
vos préférences.

MTS

Ce téléviser peut traiter les programmes en stéréo MTS et
les programmes SAP (Secondary Audio Program).
Le téléviseur passe automatiquement en mono si la
chaîne est diffusée dans ce mode.

Langue audio

D’autres langues peuvent être disponibles si un signal
numérique est transmis par la station de diffusion.

Langue d'affichage à l'écran (OSD)

Permet de sélectionner la langue OSD (surl’écran d’af-
fichage).

Source d'entrée

Permet de sélectionner la source d’entrée.

Mode écran

Sous-titrage

La fonction de sous-titrage analogique est utilisée pour
les canaux analogiques.

Code parental

Permet de définir les paramètres du contrôle parental de
la puce-v.

MENU

User

Off

Stereo

English
English

TV

Normal

F

 G

G

F

 G

G

F

 G

G

F

 G

G

F

 G

G

F

 G

G

F

 G

G

G

G

Picture Mode
Sound Mode
MTS
Audio Language
OSD Language
Input Source
Screen Mode
Caption

MENU

Exit

ENTER

OK

Select

Parental

Program Block

Change Password

Clean All

G

G

G

G

G

G

ENTER

OK

MENU

Exit

Select

Permet de modifier le format des images affichées à
l’écran.
La sélection de la résolution de l’écran dépend du type
d’entrée vidéo.

Summary of Contents for J22CE820

Page 1: ...LED Television User s Guide Commercial Television J22CE820 J26CE820 J32CE720 J42CE820 Made for Today ...

Page 2: ...ODUCT TO RAIN OR MOISTURE WARNING Please fill out the product registration card packed separately and return it immediately For US customers Your RCA Consumer Electronics product may also be registered at http www rcacommercialtv com Registering this product allows us to contact you if needed Product Registration This reminder is provided to call the CATV system installer s attention to Article 82...

Page 3: ...IED TO DO SO CAUTION Apparatus shall not be exposed to dripping or splashing and no objects filled with liquids such as vases should be placed on the apparatus WARNING When used outside of U S other power supply cords may be used if the cord is approved by the local regu lating agency CAUTION Clean the exterior of this television by removing dust with a lint free cloth CAUTION To avoid damage to t...

Page 4: ...quipment has been tested and found to comply with the limits for a Class B digital device pursuant to Part 15 of the FCC Rules These limits are designed to provide reasonable protection against harmful interference when the equipment is operated in a residential installation This equipment generates uses and can radiate radio frequency energy and if not installed and used in accordance with the in...

Page 5: ...2 Use only with the cart stand tri pod bracket or table specified by the manufacturer or sold with the apparatus When a cart is used use caution when moving the cart apparatus combination to avoid injury from tip over 13 Unplug this apparatus during lightning storms or when unused for long periods of time 14 Refer all servicing to qualified service personnel Servicing is required when the apparatu...

Page 6: ...6 Language Selection 36 Chapter 5 Commercial Interface Menus Chapter 6 User Operations Chapter 7 Using the TV s Features On Screen Menus 41 Setting up the TV Channel List 42 Auto Scan 42 Add Delete a Channel 43 Picture Controls 44 Adjusting The Picture Controls 44 Manual Picture Controls 45 Adaptive Back Light 46 Reset Picture Mode 46 Advanced Video 47 Dynamic Noise Reduction 47 Adaptive Luma Cont...

Page 7: ...e firmly into the designated jack If you place devices above the TV route all cables down the side of the back of the TV instead of straight down the middle If your antenna uses 300 ohm twin lead cables do not coil the cables Also keep the twin lead cables away from audio video cables Use shielded interface cables with ferrite cores to maintain compliance for this product Position Cables Properly ...

Page 8: ... CH CH Select a channel and menu settings 3 SOURCE Selects the TV AV AV1 Side AV AV2 S Video YPBPR VGA HDMI1 HDMI2 or USB mode 4 MENU Display on screen menus 5 POWER Switches the set on or off 6 Power Indicator Illuminates to bright blue when the TV is on When the TV is powered off this LED is also off Remote control sensor Accepts the IR signal of remote controller Chapter 1 ...

Page 9: ...he audio output jack on your PC 5 RGB IN PC Connect to the video output jack on your PC 6 COMPONENT IN YPbPr Video Audio inputs for Component 7 AV IN 1 Connects to your Audio Video devices using a composite Yellow Red White cable 8 S VIDEO IN Connects to your video devices using an S Video cable 9 AUDIO OUT Connect analog audio to various types of equip ment 10 SERVICE RS232 This port is used for ...

Page 10: ... CH CH Select a channel and menu settings 3 SOURCE Selects the TV AV AV1 Side AV AV2 S Video YPBPR VGA HDMI1 HDMI2 or USB mode 4 MENU Display on screen menus 5 POWER Switches the set on or off 6 Power Indicator Illuminates to bright blue when the TV is on When the TV is powered off this LED is also off Remote control sensor Accepts the IR signal of remote controller Chapter 1 ...

Page 11: ...he audio output jack on your PC 5 RGB IN PC Connect to the video output jack on your PC 6 COMPONENT IN YPbPr Video Audio inputs for Component 7 AV IN 1 Connects to your Audio Video devices using a composite Yellow Red White cable 8 S VIDEO IN Connects to your video devices using an S Video cable 9 AUDIO OUT Connect analog audio to various types of equip ment 10 SERVICE RS232 This port is used for ...

Page 12: ...settings 2 CH CH Select a channel and menu settings 3 SOURCE Selects the TV AV AV1 Side AV AV2 S Video YPBPR VGA HDMI1 HDMI2 or USB mode 4 MENU Display on screen menus 5 POWER Switches the set on or off 6 Power Indicator Illuminates to bright blue when the TV is on When the TV is powered off this LED is also off Remote control sensor Accepts the IR signal of remote controller Chapter 1 ...

Page 13: ...he audio output jack on your PC 5 RGB IN PC Connect to the video output jack on your PC 6 COMPONENT IN YPbPr Video Audio inputs for Component 7 AV IN 1 Connects to your Audio Video devices using a composite Yellow Red White cable 8 S VIDEO IN Connects to your video devices using an S Video cable 9 AUDIO OUT Connect analog audio to various types of equip ment 10 SERVICE RS232 This port is used for ...

Page 14: ... CH CH Select a channel and menu settings 3 SOURCE Selects the TV AV AV1 Side AV AV2 S Video YPBPR VGA HDMI1 HDMI2 or USB mode 4 MENU Display on screen menus 5 POWER Switches the set on or off 6 Power Indicator Illuminates to bright blue when the TV is on When the TV is powered off this LED is also off Remote control sensor Accepts the IR signal of remote controller Chapter 1 ...

Page 15: ...he audio output jack on your PC 5 RGB IN PC Connect to the video output jack on your PC 6 COMPONENT IN YPbPr Video Audio inputs for Component 7 AV IN 1 Connects to your Audio Video devices using a composite Yellow Red White cable 8 S VIDEO IN Connects to your video devices using an S Video cable 9 AUDIO OUT Connect analog audio to various types of equip ment 10 SERVICE RS232 This port is used for ...

Page 16: ...d on a wall as shown above For proper ventilation allow a clearance of 4 inches on all four sides from the wall Detailed instructions are available from your dealer refer to the optional Wall Mounting Bracket Installation and Setup Guide Wall Mount Sold Separately Note This Television should be installed by a Qualified Service Personnel ...

Page 17: ...igned so that the wiring is threaded through the stand itself or a loopthrough style clamp so that the wiring is neat ly bunched and not strung in such a way as to cre ate a potential hazard to the user Some stands are portable and can be moved from one location to another Be sure all safety consid erations are followed Pedestal Mounts and Stands Typical Wall Standard Type Mount with Swivel Bracke...

Page 18: ...amples are VESA Standard wall mounts Since there are numerous types of stands and mounts available only a few are shown here Refer to the instructions provided with the TV stand that will be used to mount the TV Note Image shown may differ from your TV Screw length needed depends on the wall mount used For further information refer to the VESA Wall Mounting Instruction Guide B A Caution Tightening...

Page 19: ...perly contact your dealer for assistance Rear panel of the set Multi family Dwellings Apartments Connect to wall antenna socket Single family Dwellings Houses Connect to wall jack for outdoor antenna Wall Antenna Socket Outdoor Antenna RF Coaxial Wire 75 ohm Turn clockwise to tighten Be careful not to bend the bronze wire when connecting to an antenna port Separately purchase a RF Coaxial Wire 75 ...

Page 20: ...anel of the set To avoid picture noise interference leave an adequate distance between the TV and the VCR Chapter 1 A A When connecting with an RCA cable ANT IN ANT OUT S VIDEO IN OUT L AUDIO R VIDEO OUTPUT SWITCH 1 Connect the AUDIO VIDEO jacks between TV and VCR Match the jack colors Video yellow Audio Left white and Audio Right red 2 Insert a video tape into the VCR and press PLAY on the VCR 3 ...

Page 21: ... output of the VCR to the S VIDEO input on the set 2 Connect the audio outputs of the VCR to the AV AUDIO input jacks on the set 3 Insert a video tape into the VCR and press PLAY on the VCR 4 Select the S VIDEO input source using the INPUT button on the remote control 5 Refer to the VCR manual for operating instruc tions VCR Rear panel of the set Chapter 1 ...

Page 22: ...ert a DVD 4 Select YPbPr source using the INPUT button on the remote control 5 Refer to the DVD player s manual for operating instructions DVD Rear panel of the set DVD Connection A A When connecting with a HDMI cable HDMI DVD OUTPUT 1 Connect the HDMI output of the DVD to the HDMI DVI IN 1 or HDMI IN 2 jack on the set 2 Select HDMI1 or HDMI2 input source using the INPUT button on the remote contr...

Page 23: ...O output of the DVD to the S VIDEO input on the set 2 Connect the audio outputs of the DVD to the AV AUDIO input jacks on the set 3 Turn on the DVD player insert a DVD 4 Select the S VIDEO input source using the INPUT button on the remote control 5 Refer to the DVD player s manual for operating instructions DVD Rear panel of the set ...

Page 24: ...I jack on the set 3 Turn on the digital set top box 4 Select VGA input source using the INPUT button on the remote control 5 Refer to the digital set top box manual for oper ating instructions Digital Set top Box Rear panel of the set A A When connecting with a HDMI to DVI cable DVI DTV OUTPUT R AUDIO L 1 Connect the DVI output of the digital set top box to the HDMI DVI IN 1 jack on the set 2 Conn...

Page 25: ...t YPbPr source using the INPUT button on the remote control 5 Refer to the digital set top box manual for oper ating instructions Digital Set top Box Rear panel of the set A A When connecting with a HDMI cable HDMI DTV OUTPUT 1 Connect the HDMI output of the digital set top box to the HDMI DVI IN 1 or HDMI IN 2 jack on the set 2 Turn on the digital set top box 3 Select HDMI1 or HDMI2 input source ...

Page 26: ...ideo yellow Audio Left white and Audio Right red 2 Select the AV1 or AV2 input source using the INPUT button on the remote control 3 Operate the corresponding external equipment 4 Refer to the external equipment manual for oper ating instructions Camcorder Video game set Rear panel of the set External A V Source Side panel of the set Chapter 1 ...

Page 27: ...A input source on your TV by press ing either the INPUT buttons on the remote con trol PC Rear panel of the set PC Connection A A When connecting with a HDMI to DVI cable DVI OUTPUT AUDIO OUT 1 Connect the DVI Output on the PC to the HDMI DVI IN 1 Input jack on the TV 2 Connect the PC Audio Output to the AUDIO IN RGB DVI jack on the TV using a male to male 3 5mm mini jack 3 Turn on both the PC and...

Page 28: ...P Resolution A A HDMI Resolution Note a The synchronization input form is separate b If the resolution is not supported Not Support message will be displayed 1 Connect the USB device to the USB IN jack on the set 2 Select the USB input source using the INPUT button on the remote control 3 Follow the on screen display to access the USB functions USB Memory Side panel of the set USB Port Chapter 1 C...

Page 29: ...fined mode 4 SLEEP Sets the sleep timer 5 SYSTEM Configures the remote preamble Bed 1 Bed 2 Bed 3 for use with multi TVs in 1 room Press and hold SYSTEM and 1 key to set the remote for Bed1 TV1 Press and hold SYSTEM and 2 key to set the remote for Bed2 TV2 Press and hold SYSTEM and 3 key to set the remote for Bed3 TV3 Refer to Key Management RCU type in Chapter 4 6 RATIO Selects your desired pictu...

Page 30: ...e displays a basic user menu when the menu key is pressed KM38R01 installer Remote This remote displays an installer menu when the menu key is pressed 16 GUIDE Displays Channel List menu 17 CC Selects the Caption menu directly 18 INPUT Selects the TV AV AV1 Side AV AV2 S Video YPBPR VGA HDMI1 HDMI2 or USB mode 19 Navigational Controls Navigates menu items 20 MUTE Switches the sound on or off 21 CL...

Page 31: ...o set the remote for Bed2 TV2 Press and hold SYSTEM and 3 key to set the remote for Bed3 TV3 Refer to Key Management RCU type in Chapter 4 6 RATIO Selects your desired picture aspect ratio 7 SAP Selects MTS sound audio language 8 INFO Displays the current channel information 9 RESET Not Used 10 NUMBER BUTTONS Selects channel numbers 11 Hyphen Used when entering a digital channel ex 10 2 3 6 7 10 1...

Page 32: ...the menu key is pressed 16 GUIDE Displays Channel List menu 17 CC Selects the Caption menu directly 18 INPUT Selects the TV AV AV1 Side AV AV2 S Video YPBPR VGA HDMI1 HDMI2 or USB mode 19 Navigational Controls Navigates menu items 20 MUTE Switches the sound on or off 21 CLEAR Exit from any OSD 12 14 18 21 17 13 15 19 20 16 Remove the battery compartment cover from the back of the remote by pushing...

Page 33: ...emory stick To learn the settings out of your television you will need a USB Memory Stick that contains a list file for the settings data be stored Follow these steps to configure your USB memory stick If you purchased a USB memory stick from RCA Commercial distribution these files have already been set up Proceed to the next section Learning settings from TV 1 Insert a blank USB memory stick into...

Page 34: ... 3 Select Clone Management to enter the Clone Management sub menu 4 Select Clone to TV to enter the clone to TV sub menu 5 Select the desired lst file and press the OK button to start the teaching process Commercial Interface Copy To USB Clone To TV G G G G MENU Back ENTER OK Select Commercial Interface On Commercial Interface Clone Management Channel OSD Source Volume Pillow Speaker Power Managem...

Page 35: ...he remote control Turn on the TV This function automatically finds all channels available through the Antenna or Cable and stores them in memory on the channel list Channel Scans can only be performed using a Master remote Channel Scan You can select a channel number with the CH CH button or NUMBER buttons Channel Selection Press the VOL VOL button to adjust the sound level Volume Adjustment Press...

Page 36: ... Press the OK button and then press the Down or Up button to select OSD Language 3 Press the Left or Right button to select your desired language Select between English Español Français Language Selection OSD Language Input Source Screen Mode Caption Time Setup Reset Default English TV Normal F F G G F F G G F F G G G G G G G G Setup MENU Back Select Note If you want to select directly the Input S...

Page 37: ... OK Select F F G G G G G G G G G G G G G G G G G G G G Commercial Interface On 60Sec Off Channel Banner OSD Timer Clear V Chip Power On CC MENU Back Select F F G G F F G G F F G G Channel Banner If this function is off then channel banner will not appear when channel is changed OSD Timer Use this setting to configure the menu OSD time out Clear V Chip This function can be used to Clear V Chip pass...

Page 38: ...ion Map DVD Buttons Analog PS Mode Auto Side AV MENU Back Select G G G G F F G G G G F F G G F F G G Commercial Interface TV AV1 AV2 S Video YPBPR VGA HDMI1 HDMI2 USB 1 2 3 4 5 6 7 8 9 MENU Back Select Input Block Use this setting to configure which inputs are available to the user through the input button Source Commercial Interface Off Off Off Input Block AUX Inputs RS232 Function Map DVD Button...

Page 39: ...EM and 1 keys for 5 seconds to set it to TV1 Press and hold SYSTEM and 2 keys for 5 seconds to set it to TV2 Press and hold SYS TEM and 3 keys for 5 seconds to set it to TV3 Guest Menu Lock Enables Disables the guest menu Key Management Commercial Interface On TV1 Off Key Lock IR RCU Type Guest Menu Lock MENU Back Select F F G G F F G G F F G G Auto Power On This function sets the power state when...

Page 40: ...le if a digital signal is provided by the broadcasting station OSD Language Selects the OSD on screen display language Input Source Selects the input source Screen Mode Changes the screen picture format Screen size selection depends on the type of video input Caption The Analog Caption function operates when watching a regular analog channel Parental Adjusts the v chip parental control settings ME...

Page 41: ...ns to navigate to the available menus On Screen Menus Video MENU Audio MENU Parental MENU Setup MENU TV MENU Tuner Mode Channel Scan Channel Skip Cable F F G G G G G G TV MENU Exit ENTER OK Select MENU Exit ENTER OK Select Audio Balance Bass Treble Sound Surround Sound Mode MTS Audio Language Speaker Type 0 40 40 F F G G F F G G F F G G F F G G F F G G On Off Stereo English Built In MENU Exit ENTE...

Page 42: ...4 Press the Down or Up button to select Channel Scan 5 Press the OK button to start the auto search The TV will begin memorizing all of the available channels 6 Press the MENU button at any time to exit the chan nel scan process 7 Once the channel scan is complete the channels found and recognized by the TV will be available for viewing TV Tuner Mode Channel Scan Channel Skip Cable F F G G G G G G...

Page 43: ...r Up button to select Channel Skip 3 Press the OK button and then press the Down or Up button to select channel you want to add or delete If you want to skip the selected channel press the OK button to check your selection 4 All channels that have a check will be added to your viewing selection 5 Press the MENU button to return to the previous menu Channel Skip 1 Analog 2 Analog 3 Analog 4 Analog ...

Page 44: ...Up button to select Picture Mode 3 Press the Left or Right button to select between Cinema Sport Vivid Home or User Picture Modes 4 Press the MENU button to return to the previous menu The various Picture Modes allow you to adjust the display to your viewing preference Picture Controls Video F F G G 45 50 50 0 10 F F G G 100 G G G G Picture Mode Brightness Contrast Saturation HUE Sharpness Adaptiv...

Page 45: ... the MENU button to return to the previous menu You can adjust picture Brightness Contrast Saturation HUE and Sharpness to the levels you prefer Brightness Increases or decreases amount of white in the your picture Contrast Adjusts the difference between the light and dark levels in the picture Saturation Adjusts intensity of all colors HUE Adjusts the balance between red and green levels Sharpnes...

Page 46: ...ls and results in a higher power consumption Back Light 100 Video F F G G 45 50 50 0 10 F F G G 100 G G G G Picture Mode Brightness Contrast Saturation HUE Sharpness Adaptive Back Light Back Light Advanced Video Reset Picture Mode User Off MENU Back Select Video F F G G 45 50 50 0 10 F F G G 100 G G G G Picture Mode Brightness Contrast Saturation HUE Sharpness Adaptive Back Light Back Light Advanc...

Page 47: ...the Down or Up button to select DNR 4 Press the Left or Right button to select between Off Low Medium or Strong 5 Press the MENU button to return to the previous menu Use this feature to reduce the amount of noise or film grain that may be present in the picture Advanced Video Off Turns the screen noise reduction function off Low Reduces screen noise at a low level Medium Reduces screen noise at a...

Page 48: ...menu and then press either the Down or Up button to select the Video sub menu 2 Press the OK button to enter the sub menu and then press either the Down or Up button to select Advanced Video 3 Press the OK button and then press the Down or Up button to select Flesh Tone 4 Press the Left or Right button to select Off Low Medium or High 5 Press the MENU button to return to the previous menu In some ...

Page 49: ...ess either the Down or Up button to select the Video sub menu 2 Press the OK button to enter the sub menu and then press either the Down or Up button to select Advanced Video 3 Press the OK button and then press the Down or Up button to select Blue Stretch 4 Press the Left or Right button to select On or Off 5 Press the MENU button to return to the previous menu This is the function to make the wh...

Page 50: ... sub menu and then press either the Down or Up button to select Advanced Video 3 Press the OK button to enter the sub menu and then press either the Down or Up button to select Gamma 4 Press the Left or Right button to select between Dark Middle or Bright 5 Press the MENU button to return to the previous menu This feature will allow you to adjust the brightness curve for the display Chapter 7 Usin...

Page 51: ...l allow you to adjust the lighting in the display to compliment your view ing preference The Cool setting will add more Blues and Greens into the image to give it a cooler feeling The Warm setting will add more Reds and Yellows into the image to give it a warmer feeling The Standard setting will be a more natural feeling and will fall between the Cool and Warm settings Color Temperature Color Temp...

Page 52: ...izontally in nonlinear proportion to fill the entire screen Just Scan This mode is 0 overscan mode for 720p 1080i 1080p source when input source is HDMI Screen Mode 1 Press the MENU button to enter the on screen menu and then press either the Down or Up button in order to select the Setup sub menu 2 Press the OK button and then press the Down or Up button to select Screen Mode 3 Press the Left or ...

Page 53: ...or Up button to select Sound Mode 3 Press the Left or Right button to select between Off Rock Techno Pop Live Dance or Classic Modes 4 Press the MENU button to return to the previous menu The Sound Mode preset selection will allow you to adjust the sound to your listening preference Sound Controls Audio Balance Bass Treble Sound Surround Sound Mode MTS Audio Language Speaker Type 0 40 40 F F G G F...

Page 54: ...ppropriate adjustments 4 Press the MENU button to return to the previous menu This function allows you to manually adjust the individual audio settings to your preferred levels Balance Adjusts the left to right sound balance between the built in speakers Bass This adjusts the presence of the lower frequency audio Treble This adjusts the presence of the higher frequency audio Balance 0 Audio Balanc...

Page 55: ...s transmitted in Mono Audio Balance Bass Treble Sound Surround Sound Mode MTS Audio Language Speaker Type 0 40 40 F F G G F F G G F F G G F F G G F F G G On Off Stereo English Built In MENU Back Select Sound Surround 1 Press the MENU button to enter the on screen menu and then press either the Down or Up button to select the Audio sub menu 2 Press the OK button to enter the sub menu and then press...

Page 56: ... F G G F F G G F F G G F F G G On Off Stereo English Built In MENU Back Select Speaker Type 1 Press the MENU button to enter the on screen menu and then press either the Down or Up button to select the Audio sub menu 2 Press the OK button to enter the sub menu and then press either the Down or Up button to select Speaker Type 3 Press the Left or Right button to select between Off Bult In or Bed Sp...

Page 57: ...menu The Analog Caption function operates when watching a regular analog channel Captions Caption The term for the words that scroll across the botto mof the TV screen usually the audio portion of the program provided for the hearing impaired TEXT The term for the words that appear in a large black frame and almost cover the entire screen usually messages provided by the broadcaster Note If you wa...

Page 58: ...d Caption 4 Press the Left or Right button to select between Off Service1 Service2 Service3 Service4 Service5 or Service6 5 Press the MENU button to return to the previous menu The Digital Caption function only operates on digital channels Analog Closed Caption Digital Closed Caption Digital Caption Style Off Off F F G G F F G G G G Caption MENU Back Select OSD Language Input Source Screen Mode Ca...

Page 59: ...ur screen Font Size Set the size in which the captions will appear in Font Style Select a typeface for the words Font Color Set the color in which the captions will appear in Font Opacity Select the transparency for the captions Background Color Select a background color for the captions Background Opacity Select the transparency for the background Window Color Select a color for the edges Window ...

Page 60: ...select your viewing area s time zone Select between Eastern Time Indiana Central Time Mountain Time Arizona Pacific Time Alaska Hawaii 5 Press the MENU button to return to the previous menu This mode allows you to set the Time Zone for your local area Time Zone Time Sleep Timer Off G G G G F F G G Time Setup ENTER OK MENU Back Select Time Setup ENTER OK MENU Back Select Time Zone Central Time F F ...

Page 61: ...urn to the previous menu The Auto Time Setting receives the current time from an available digital channel The digital channel signal includes information for the current time provided by the broadcasting station Note If Auto Synchronization is On the Date and Time menus cannot be adjusted Set the time manually if the current time is incorrect using the Auto Synchronization function Time Zone Time...

Page 62: ...Use the Left or Right button to select the variable that you want to change and use number buttons to enter the date or time 8 Press the MENU button to return to the previous menu If the current time setting is wrong when using the Auto Synchronization function this setting allows you to set the clock manually Time Zone Time Sleep Timer Eastern Time Off F F G G G G F F G G Time Setup Time Auto Syn...

Page 63: ...adjusted 6 Press the Down or Up button to select Power On Timer or Power Off Timer 7 Press the Left or Right button to move to the desired variable and use number buttons to set time 8 Press the MENU button to return to the previous menu The timer function will only operate when the current time has been set This function automatically turns the TV On and Off at the specific time you designate Tim...

Page 64: ...the unit to standby when the time runs out 5 Press the MENU button to return to the previous menu The sleep timer automatically switches the set to standby after the preset time elapses Note If you want to select directly select the sleep timer without entering the menus press the SLEEP button on the remote control Every time you press the button it will switch between Off 10 20 30 40 50 60 90 and...

Page 65: ...Left or Right button to highlight the OK button 4 Press the OK button on the remote control to reset all settings 5 Press the MENU button to return to the previous menu This function returns all of the menu selections back to their original factory preset values This function removes all TV channels from memory Channels must be scanned for again after resetting to the unit to factory defaults Rese...

Page 66: ...ange Password 2 Press the OK button and then select any 4 digits for your new password and enter them in the New Password section 3 As soon as the 4 digits are entered re enter the same 4 digits on the Confirm Password to finalize your selection 4 Your new password has now been memorized 5 Press the MENU button to return to the previous menu This option will allow you to input a new password of yo...

Page 67: ...r Off When you select On the Program Block options are enabled 4 Press the MENU button to return to the previous menu or scroll down to edit a Program Block option Enables or disables a parental blocking scheme Parental Program Block Change Password Clean All G G G G G G Program Block On Off F F G G G G G G G G G G G G F F G G Rating Enable U S TV Ratings U S Movie Ratings Canadian English Ratings...

Page 68: ... return to the previous menu This rating system has been established to help you monitor and block the types of programs viewed on TV Ratings with a lock next to them will be blocked from being viewed Parental Program Block Change Password Clean All G G G G G G Program Block On Off F F G G G G G G G G G G G G F F G G Rating Enable U S TV Ratings U S Movie Ratings Canadian English Ratings Canadian ...

Page 69: ...ted violence some suggestive sexual dialog and situations TV G General audience This contains little or no violence no strong lan guage and little or no sexual dialog or situations TV Y7 Directed for older children Themes and elements in this program may include mild physical or comedic violence or may frighten children under the age of seven TV Y All children The themes and elements in this progr...

Page 70: ... broadcasted on TV and allows you to select which ratings you want blocked The MPAA Rating System Movies G General Audience PG Parental guidance suggested PG 13 Parents strongly cautioned R Restricted NC 17 No one 17 and under admitted X Adults only Note If you block PG 13 G and PG movies will be available PG 13 R NC 17 and X will be blocked U S Movie Ratings G PG PG 13 R NC 17 X Allowed Rating Bl...

Page 71: ... has been established to help you monitor and block the types of programs viewed on TV Ratings with a lock next to them will be blocked from being viewed Canadian English Ratings C Children C8 Children eight years and older G General programming suitable for all audiences PG Parental Guidance 14 Viewers 14 years and older 18 Adult programming Canadian English Ratings C C8 G PG 14 18 Allowed Rating...

Page 72: ...ewed on TV Ratings with a lock next to them will be blocked from being viewed Canadian French Ratings G General 8 ans General Not convenient for little children 13 ans Not convenient for children of 13 years and younger 16 ans Not convenient for children of 16 years and younger 18 ans This programs is only for adult Canadian French Ratings G 8 ans 13 ans 16 ans 18 ans Allowed Rating Blocked Rating...

Page 73: ...ious menu Your TV s OSD On Screen Display may differ slightly from what is shown in this manual Note This function may become available in the future and will be available only for digital channel signal This function operates only when TV has received Region5 Rating data Open V Chip G G U S 50 States Possessions ENTER OK MENU Back Select Program Block On Off F F G G G G G G G G G G G G F F G G Ra...

Page 74: ...ack Select Block Unrated 1 After entering the Parental sub menu press the Down or Up button to choose Program Block 2 Press the OK button and then press the Down or Up button to select Block Unrated 3 Press the Left or Right button to select On or Off 4 Press the MENU button to return to the previous menu Block Unrated can be used to block unrated channels ratings and other viewing sources Parenta...

Page 75: ...ult of the automatic adjustment is not correct you can manually adjust the settings to fit your viewing preference See the next page for manual adjustment settings This function automatically adjusts the screen position clock phase and scale in pc mode The displayed image will disappear for a few seconds while the auto configuration is in progress If the result of the automatic adjustment is not c...

Page 76: ...stments 5 Press the MENU button to return to the previous menu If the result of the automatic adjustment is not correct you can manually adjust the settings to fit your view ing preference Horizontal Position This function is to adjust horizontal position of screen Vertical Position This function is to adjust vertical position of screen Phase This function allows you to remove any horizontal noise...

Page 77: ...t Shuffle Duration Effect Show Info 01 mp3 00 03 04 04 128kbps 44kHZ Play Repeat Shuffle Off Show Info Show Spectrum Audio Only When a directory is displayed Press the CC key when the directory is dis played to change the file settings Media type menu selects between Photo or Music files When a picture is displayed Press the CC key when a picture is displayed to change the picture settings When mu...

Page 78: ...odels J22CE820 AC IN HDMI DVI IN1 HDMI IN2 AUDIO IN RGB DVI RGB IN PC COMPONENT IN AV IN 1 S VIDEO IN AUDIO OUT SERVICE RS232 ANTENNA CABLE IN AV IN 2 USB IN Power Cord Owner s Manual Master and Guest Remote Optional Composite Gender Cable Component Gender Cable Dimension Width x Height x Depth Weight kg lbs 534 8mm x 358 9mm x 47 5mm 21 06 x 14 13 x 1 87 inches 3 6 kg 7 94 lbs 300 cd m2 1366 H x ...

Page 79: ...ENT IN AV IN 1 S VIDEO IN AUDIO OUT SERVICE RS232 ANTENNA CABLE IN AV IN 2 USB IN Power Cord Owner s Manual Master and Guest Remote Optional Composite Gender Cable Component Gender Cable Dimension Width x Height x Depth Weight kg lbs 648 2mm x 415 5mm x 45 9mm 25 52 x 16 36 x 1 81 inches 5 1 kg 11 24 lbs 350 cd m2 1366 H x 768 V AC115V 60Hz 42W Under 0 5W 3W 3W 10 000 1 The Specification shown abo...

Page 80: ... PC COMPONENT IN AV IN 1 S VIDEO IN AUDIO OUT SERVICE RS232 ANTENNA CABLE IN AV IN 2 USB IN Power Cord Owner s Manual Master and Guest Remote Optional Composite Gender Cable Component Gender Cable Dimension Width x Height x Depth Weight kg lbs 794 5mm x 512 0mm x 99 5mm 31 28 x 20 16 x 3 92 inches 11 0 kg 24 25 lbs 300 cd m2 1366 H x 768 V AC115V 60Hz 52W Under 0 5W 3W 3W 10 000 1 The Specificatio...

Page 81: ...PC COMPONENT IN AV IN 1 S VIDEO IN AUDIO OUT SERVICE RS232 ANTENNA CABLE IN AV IN 2 USB IN Power Cord Owner s Manual Master and Guest Remote Optional Composite Gender Cable Component Gender Cable Dimension Width x Height x Depth Weight kg lbs 1017 0mm x 638 5mm x 47 2mm 40 04 x 25 14 x 1 86 inches 13 2 kg 29 10 lbs 300 cd m2 1920 H x 1080 V AC115V 60Hz 80W Under 0 5W 5W 5W 10 000 1 The Specificati...

Page 82: ...e set Please contact your service center if the picture has not appeared after five minutes Select color in the Picture menu and press the Left or Right button Check for local interference such as a nearby electrical appliance or power tool A change in ambient humidity or temperature may result in an unusual noise at the time of switching off or on of the set and does not indicate a fault with the...

Page 83: ...L OR PUNITIVE DAMAGES OF ANY NATURE INCLUDING WITH OUT LIMITATION LOST PROFITS LOST OR CORRUPTED PROGRAMMING OR DATA OR ANY OTHER DAMAGE WHETHER BASED IN CONTRACT TORT OR OTHERWISE Some states do not allow the exclusion or limitation of incidental or consequential damages or limitations on how long an implied warranty lasts so the above exclusion or limitation may not apply to you This warranty gi...

Page 84: ...nal injury due to misuse abuse negligence improper maintenance or storage or to acts of nature or other causes beyond our control Causes beyond our control include but are not limited to lightning strike power surges power outages and water dam age Image burn in Repair or replacement of warranted parts by anyone other than an authorized service centers Units purchased or serviced outside of the co...

Page 85: ......

Page 86: ...altv com Please do not send any products to the Indianapolis address listed in this manual or on the carton This will only add delays in service for your product DTI Services LLC 5350 Lakeview Parkway S Dr Indianapolis In 46268 1 800 RCA 2161 DTI ...

Page 87: ...Téléviseur LED Guide de l utilisateur Téléviseur à usage commercial J22CE820 J26CE820 J32CE720 J42CE820 Fabriqué pour aujourd hui ...

Page 88: ...istrement du produit emballée séparément et renvoyez la immédiatement Clients américains votre produit RCA Consumer Electronics peut également être enregistré sur http www rca commercialtv com En enregistrant ce produit vous nous autorisez à vous contacter en cas de besoin Enregistrement du produit Ce rappel à l intention de l installateur de câblodistribution concerne l Article 820 40 du National...

Page 89: ...n cas du liquide ne doit goutter ou éclabousser l appareil De même aucun récipient contenant un liquide tel qu un vase ne doit être posé sur l appareil AVERTISSEMENTS Pour toute utilisation hors des États Unis il est possible d utiliser un autre cordon d alimentation dès lors qu il est homologué dans le pays concerné PRÉCAUTIONS Nettoyez et dépoussiérez l extérieur de ce téléviseur à l aide d un c...

Page 90: ...ctions Si l appareil produit des interférences nuisibles nous vous recommandons d effectuer une ou plusieurs des interventions suivantes pour réduire ou éliminer le problème Modifiez la position ou l orientation de l antenne de réception Augmentez la distance entre l appareil et l antenne de réception Branchez l appareil et l antenne de réception à des prises différentes Demandez conseil à un expe...

Page 91: ...13 Veuillez débrancher cet appareil pendant les orages électriques ou lorsqu il n est pas utilisé pendant une période prolongée 14 Faites effectuer les réparations par du personnel qualifié Vous devez faire réparer l appareil lorsqu il a été endommagé d une quelconque manière par exemple lorsque le cordon d ali mentation a été endommagé qu un liquide a été introduit dans l appareil que celui ci a ...

Page 92: ...ard Menus d interface standard 37 Chapitre 6 Opérations utilisateur Chapitre 7 Utilisation des fonctions du téléviseur Panneaux de commande à l écran 41 Configuration de la liste des chaînes de télévision 42 Balayage automatique 42 Ajouter supprimer des postes 43 Réglages de l image 45 Réglage de l image 44 Réglage manuel de l image 45 Lumière à contre jour adaptative 46 Réinitialisation du mode d...

Page 93: ...ffe Insérez chaque câble fermement dans la prise jack désignée Si vous placez des appareils au dessus du téléviseur faites descendre les câbles par l arrière de celui ci plutôt que directement au milieu Si votre antenne nécessite un double câble de dérivation de 300 ohms ne le torsadez pas De même le double câble de dérivation doit être éloigné des câbles audio vidéo Positionnez les câbles correct...

Page 94: ...e AV AV2 S Video YPBPR VGA HDMI1 HDMI2 ou USB 4 MENU Afficher le panneau de commande à l écran 5 POWER Allumer ou éteindre le téléviseur 6 Témoin lumineux Bleu lumineux lorsque le téléviseur est allumé Cette diode est également éteinte lorsque le téléviseur est mis hors tension Capteur de la télécommande Recevoir le signal infrarouge de la télécommande VOL SOURCE MENU CH 1 2 3 4 5 6 Nota Image non...

Page 95: ... votre PC 6 COMPONENT IN YPbPr Entrées video audio à composantes 7 AV1 Se connecte à vos appareils audio vidéo au moyen d un câble composite jaune rouge blanc 8 S VIDEO IN Se connecte à vos appareils vidéo au moyen d un câble S Video 9 AUDIO OUT Connectez le matériel audio analogique sur dif férents types d équipements 10 SERVICE RS232 Utilisé par le dispositif cloneur afin d apprendre les réglage...

Page 96: ... Sélectionner un poste 3 SOURCE Choisir le mode TV AV AV1 Side AV AV2 S Video YPBPR VGA HDMI1 HDMI2 ou USB 4 MENU Afficher le panneau de commande à l écran 5 POWER Allumer ou éteindre le téléviseur 6 Témoin lumineux Bleu lumineux lorsque le téléviseur est allumé Cette diode est également éteinte lorsque le téléviseur est mis hors tension Capteur de la télécommande Recevoir le signal infrarouge de ...

Page 97: ... votre PC 6 COMPONENT IN YPbPr Entrées video audio à composantes 7 AV1 Se connecte à vos appareils audio vidéo au moyen d un câble composite jaune rouge blanc 8 S VIDEO IN Se connecte à vos appareils vidéo au moyen d un câble S Video 9 AUDIO OUT Connectez le matériel audio analogique sur dif férents types d équipements 10 SERVICE RS232 Utilisé par le dispositif cloneur afin d apprendre les réglage...

Page 98: ...u 2 CH CH Sélectionner un poste 3 SOURCE Choisir le mode TV AV AV1 Side AV AV2 S Video YPBPR VGA HDMI1 HDMI2 ou USB 4 MENU Afficher le panneau de commande à l écran 5 POWER Allumer ou éteindre le téléviseur 6 Témoin lumineux Bleu lumineux lorsque le téléviseur est allumé Cette diode est également éteinte lorsque le téléviseur est mis hors tension Capteur de la télécommande Recevoir le signal infra...

Page 99: ... votre PC 6 COMPONENT IN YPbPr Entrées video audio à composantes 7 AV1 Se connecte à vos appareils audio vidéo au moyen d un câble composite jaune rouge blanc 8 S VIDEO IN Se connecte à vos appareils vidéo au moyen d un câble S Video 9 AUDIO OUT Connectez le matériel audio analogique sur dif férents types d équipements 10 SERVICE RS232 Utilisé par le dispositif cloneur afin d apprendre les réglage...

Page 100: ... Sélectionner un poste 3 SOURCE Choisir le mode TV AV AV1 Side AV AV2 S Video YPBPR VGA HDMI1 HDMI2 ou USB 4 MENU Afficher le panneau de commande à l écran 5 POWER Allumer ou éteindre le téléviseur 6 Témoin lumineux Bleu lumineux lorsque le téléviseur est allumé Cette diode est également éteinte lorsque le téléviseur est mis hors tension Capteur de la télécommande Recevoir le signal infrarouge de ...

Page 101: ... audio d un PC 5 RGB IN PC Branchement à la sortie vidéo de votre PC 6 COMPONENT IN YPbPr Entrées video audio à composantes 7 AV1 Se connecte à vos appareils audio vidéo au moyen d un câble composite jaune rouge blanc 8 S VIDEO IN Se connecte à vos appareils vidéo au moyen d un câble S Video 9 AUDIO OUT Connectez le matériel audio analogique sur dif férents types d équipements 10 SERVICE RS232 Uti...

Page 102: ... installé au mur comme illustré Prévoyez un dégagement de 10 cm sur les quatre côtés pour garantir une ventilation adéquate Votre détaillant peut vous fournir des instructions détaillées Consultez le guide d installation du support mural optionnel vendu séparément Nota L installation de ce téléviseur doit être confiée à un personnel qualifié ...

Page 103: ...utilisateur ne risque pas de s y accrocher Certains pieds sont transportables Veillez à ce que toutes les consignes de sécurité soient respec tées Pieds et supports Fixation murale typique avec support pivotant Pied typique avec support pivotant PRÉCAUTION Des serrages des vis de fixation murale qui sont trop longues peuvent causer des dommages aux composants internes de cette télévision Utilisez ...

Page 104: ...orts disponibles nous n en montrons ici que quelques uns Reportez vous aux instructions fournies avec le socle de votre téléviseur Nota Image non contractuelle La longueur des vis varie selon la fixation murale utilisée Pour plus d informations reportez vous au guide de pose de support mural VESA B A PRÉCAUTION Des serrages des vis de fixation murale qui sont trop longues peuvent causer des dommag...

Page 105: ... adéquatement communiquez avec votre revendeur pour obtenir de l aide Résidences Appartements Connexion à la prise d antenne murale Logements individuels Maisons Connexion à la prise murale reliée à l antenne extérieure Prise d antenne murale Antenne extérieure Câble coaxial RF 75 ohm THF UHF Tournez dans le sens des aiguilles d une montre pour serrer Veillez à ne pas tordre la fiche en bronze en ...

Page 106: ...on VCR Arrière de l appareil A A Branchement avec un câble RCA 1 Reliez les prises AUDIO et VIDÉO du magnéto scope et du téléviseur Faites correspondre le code de couleurs vidéo jaune audio gauche blanc et audio droit rouge 2 Insérez une cassette dans le magnétoscope et appuyez sur PLAY 3 Sélectionnez la source AV1 ou AV2 au moyen du bouton INPUT de la télécommande 4 Consultez le Guide du magnétos...

Page 107: ... magnétoscope aux entrées S VIDEO du téléviseur 2 Reliez les sorties audio du magnétoscope aux entrées AV AUDIO du téléviseur 3 Insérez une cassette dans le magnétoscope et appuyez sur PLAY 4 Sélectionnez la source S VIDEO au moyen du bouton INPUT de la télécommande 5 Consultez le Guide du magnétoscope pour de plus amples renseignements sur son utilisation VCR Arrière de l appareil ...

Page 108: ...sez la source YPbPr à l aide de la fonction INPUT de la télécommande 5 Consultez le Guide du DVD pour de plus amples renseignements sur son utilisation DVD Arrière de l appareil Branchement d un lecteur DVD A A Branchement à l aide d un câble HDMI HDMI DVD OUTPUT 1 Reliez la sortie HDMI du DVD à l entrée HDMI DVI IN 1 ou HDMI IN 2 du téléviseur 2 Sélectionnez la source HDMI1 ou HDMI2 au moyen du b...

Page 109: ...S VIDEO du DVD aux entrées S VIDEO du téléviseur 2 Reliez les sorties audio du DVD aux entrées AV AUDIO du téléviseur 3 Allumez le DVD et insérez un disque 4 Sélectionnez la source S VIDEO au moyen du bouton INPUT de la télécommande 5 Consultez le Guide du DVD pour de plus amples renseignements sur son utilisation DVD Arrière de l appareil ...

Page 110: ... téléviseur 3 Allumez le convertisseur 4 Choisissez la source VGA à l aide de la fonction INPUT de la télécommande 5 Consultez le Guide du convertisseur pour de plus amples renseignements sur son utilisation Convertisseur numérique Arrière de l appareil A A Branchement à l aide d un câble HDMI à DVI DVI DTV OUTPUT R AUDIO L 1 Reliez la sortie DVI du convertisseur à l entrée HDMI DVI IN 1 du télévi...

Page 111: ...nction INPUT de la télécommande 5 Consultez le Guide du convertisseur pour de plus amples renseignements sur son utilisation Convertisseur numérique Arrière de l appareil A A Branchement à l aide d un câble HDMI HDMI DTV OUTPUT 1 Reliez la sortie HDMI du convertisseur numérique à la prise HDMI DVI IN 1 ou HDMI IN 2 du téléviseur 2 Allumez le convertisseur 3 Choisissez la source HDMI1 ou HDMI2 à l ...

Page 112: ...jaune Audio gauche blanc et Audio droit rouge 2 Sélectionnez la source AV1 ou AV2 au moyen du bouton INPUT de la télécommande 3 Faites fonctionner l appareil externe 4 Consultez le Guide de l appareil externe pour de plus amples renseignements sur son utilisation Source A V externe L AUDIO R VIDEO OUT Caméscope Console de jeux Arrière de l appareil Panneau latéral de l appareil ...

Page 113: ...GA sur votre téléviseur en appuyant sur l un ou l autre des boutons INPUT de la télécommande PC Arrière de l appareil Branchement d un PC A A Branchement à l aide d un câble HDMI à DVI DVI OUTPUT AUDIO OUT 1 Reliez la sortie DVI du PC à la prise HDMI DVI IN 1 du téléviseur 2 Branchez la sortie audio du PC à la prise jack AUDIO IN RGB DVI du téléviseur au moyen d un mini Jack mâle de 3 5 mm 3 Allum...

Page 114: ...fonctions USB Port USB Mémoire USB Panneau latéral de l appareil 31 47 35 16 37 88 48 36 59 94 56 25 60 32 60 00 Fréquence horizontale kHz Fréquence verticale Hz 640 x 480 800 x 600 1024 x 768 Résolution A A PC 60 000 60 000 60 000 60 000 Fréquence verticale Hz 480 60P 720 60P 1080 60I 1080 60P Résolution A A HDMI Résolutions Nota a Les signaux de synchronisation sont séparés b Le message Not supp...

Page 115: ...lécommande Bed1 Bed2 Bed3 pour l utilisation de plusieurs téléviseurs dans une même chambre Maintenez la touche SYSTEM enfoncée et appuyez sur 1 pour régler la télécommande sur Bed1 TV1 Maintenez la touche SYSTEM enfoncée et appuyez sur 2 pour régler la télécommande sur Bed2 TV2 Maintenez la touche SYSTEM enfoncée et appuyez sur 3 pour régler la télécommande sur Bed3 TV3 Reportez vous aux sections...

Page 116: ...lécom mande affiche un menu simple lorsque l utilisateur appuie sur la touche du menu KM38R01 Télécommande d installateur Cette télécom mande affiche un menu installateur lorsque celui ci appuie sur la touche du menu 16 GUIDE Non utilisé 17 CC Passer directement au menu Sous titrage 18 INPUT Choisir le mode TV AV1 AV2 COMPONENT HDMI1 HDMI2 ou PC 19 Contrôles de navigation Navigue éléments de menu ...

Page 117: ...d3 pour l utilisation de plusieurs téléviseurs dans une même chambre Maintenez la touche SYSTEM enfoncée et appuyez sur 1 pour régler la télécommande sur Bed1 TV1 Maintenez la touche SYSTEM enfoncée et appuyez sur 2 pour régler la télécommande sur Bed2 TV2 Maintenez la touche SYSTEM enfoncée et appuyez sur 3 pour régler la télécommande sur Bed3 TV3 Reportez vous aux sections Key Management et RCU ...

Page 118: ... MENU Affiche Basic sur le menu à l écran Ce téléviseur est fourni avec 2 télécommandes KM38R02 Télécommande utilisateur Cette télécom mande affiche un menu simple lorsque l utilisateur appuie sur la touche du menu KM38R01 Télécommande d installateur Cette télécom mande affiche un menu installateur lorsque celui ci appuie sur la touche du menu 16 GUIDE Non utilisé 17 CC Passer directement au menu ...

Page 119: ...ick avec l extension nom du fichier lst Remarque vous pouvez utiliser n importe quel nom comme nom du fichier La partie la plus importante est l extension LST Maîtrise des paramètres à partir du téléviseur 1 Connectez le USB memory stick sur le port USB de votre téléviseur 2 A l aide d une Télécommande principale KM38R01 appuyez sur le Menu 9 6 3 2 pour accéder au menu commercial 3 Sélectionnez Cl...

Page 120: ...Sélectionnez Clone to TV Cloner vers TV pour accéder au sous menu Cloner vers TV 5 Sélectionnez le fichier lst souhaité et appuyez sur le bouton OK pour démarrer le processus d instruction Copy To USB 1 12345678 lst 2 J22H760 lst 3 J12H770 lst 4 2345678 lst MENU Back ENTER Set Select Commercial Interface Copy To USB Clone To TV G G G G MENU Back ENTER OK Select Commercial Interface On Commercial I...

Page 121: ...fonction trouve automatiquement toutes les chaînes disponibles sur le réseau hertzien ou câblé puis les mémorise dans la liste Le balayage des chaînes ne peut être effectué qu au moyen d une télécommande principale Balayage des chaînes Vous pouvez changer le poste à l aide des boutons CH CH ou des boutons numérotés Sélection d un poste Utilisez les boutons VOL VOL pour ajuster le niveau sonore Rég...

Page 122: ... Reset Default English TV Normal F F G G F F G G F F G G G G G G G G Setup MENU Back Select Nota Pour sélectionner directement Input Source appuyez sur le bouton INPUT de la télécommande OSD Language Input Source Screen Mode Caption Time Setup Reset Default English TV Normal F F G G F F G G F F G G G G G G G G Setup MENU Back Select 1 Appuyez sur MENU puis sur les boutons de naviga tion Bas ou Hau...

Page 123: ...e Tuner Mode Power On Major Channel Power On Minor Channel Channel Hold Merge Channel MENU Back Select F F G G F F G G F F G G F F G G 2 0 F F G G F F G G Commercial Interface On Commercial Interface Clone Management Channel OSD Source Volume Pillow Speaker Power Management Key Management Reset Commercial Interface MENU Back ENTER OK Select F F G G G G G G G G G G G G G G G G G G G G Commercial In...

Page 124: ...tion Map DVD Buttons Analog PS Mode Auto Side AV MENU Back Select G G G G F F G G G G F F G G F F G G Commercial Interface TV AV1 AV2 S Video YPBPR VGA HDMI1 HDMI2 USB 1 2 3 4 5 6 7 8 9 MENU Back Select ENTER Set Commercial Interface Off Off Off Input Block AUX Inputs RS232 Function Map DVD Buttons Analog PS Mode Auto Side AV MENU Back Select G G G G F F G G G G F F G G F F G G Commercial Interfac...

Page 125: ...temps un téléviseur inactif restera allumé Elle permet de faire des économies d énergie Power Always On Le téléviseur ne peut pas être éteint No Signal Power Off S il n y a pas de signal sur la TV pendant 5 minutes ou plus cette fonction éteint automatiquement la TV Commercial Interface On Commercial Interface Clone Management Channel OSD Source Volume Pillow Speaker Power Management Key Managemen...

Page 126: ...an OSD Permet de sélectionner la langue OSD surl écran d af fichage Source d entrée Permet de sélectionner la source d entrée Mode écran Sous titrage La fonction de sous titrage analogique est utilisée pour les canaux analogiques Code parental Permet de définir les paramètres du contrôle parental de la puce v MENU User Off Stereo English English TV Normal F F G G F F G G F F G G F F G G F F G G F ...

Page 127: ...s Adaptive Back Light Back Light Advanced Video Reset Picture Mode User Off Menu Video Menu Audio Menu Parental Menu Setup Menu TV Tuner Mode Channel Scan Channel Skip Cable F F G G G G G G TV MENU Exit ENTER OK Select MENU Exit ENTER OK Select Audio Balance Bass Treble Sound Surround Sound Mode MTS Audio Language Speaker Type 0 40 40 F F G G F F G G F F G G F F G G F F G G On Off Stereo English B...

Page 128: ... Cable 4 Appuyez sur Bas ou Haut pour sélectionner Channel Scan 5 Appuyez sur OK pour commencer le balayage Le téléviser mémorisera tous les canaux trouvés sur le signal fourni 6 Vous pouvez appuyer sur le bouton MENU à tout moment pour sortir du mode balayage des chaînes 7 Une fois le balayage des chaînes terminé l utilisa teur peut regarder les chaînes reconnues par le téléviseur TV Tuner Mode C...

Page 129: ...u sous menu puis sur la touche Bas ou Haut pour sélectionner Channel Skip 3 Appuyez sur OK puis sur Bas ou Haut pour choisir le poste que vous désirez ajouter ou supprimer Si vous souhaitez sauter la chaîne sélectionnée appuyez sur OK pour la désélectionner 4 Toutes les chaînes cochées sont ajoutées à votre sélection 5 Appuyez sur MENU pour revenir au menu précé dent Channel Skip 1 Analog 2 Analog...

Page 130: ...he Bas ou Haut pour sélectionner Picture Mode 3 Appuyez sur la touche Gauche ou Droit pour sélec tionner Cinema Sport Vivid Home ou User 4 Appuyez sur MENU pour revenir au menu précé dent Différents modes vous permettent de régler l affichage selon vos préférences Réglages de l image Video F F G G 45 50 50 0 10 F F G G 100 G G G G Picture Mode Brightness Contrast Saturation HUE Sharpness Adaptive ...

Page 131: ...érences 4 Appuyez sur MENU pour revenir au menu précé dent Vous pouvez ajuster les paramètres Brightness Contrast Saturation HUE et Sharpness selon votre préférence Brightness Augmente ou diminue la clarté générale de l image Contrast Ajuste la différence entre les zones claires et les zones sombres de l image Saturation Modifie l intensité des couleurs HUE Modifie l équilibre entre les tons verts...

Page 132: ...ces 6 Appuyez sur MENU pour revenir au menu précé dent Back Light 100 Video F F G G 45 50 50 0 10 F F G G 100 G G G G Picture Mode Brightness Contrast Saturation HUE Sharpness Adaptive Back Light Back Light Advanced Video Reset Picture Mode User Off MENU Back Select Video F F G G 45 50 50 0 10 F F G G 100 G G G G Picture Mode Brightness Contrast Saturation HUE Sharpness Adaptive Back Light Back Li...

Page 133: ...tion vous permet de réduire le bruit ou grain de l image Configuration avancée du signal vidéo Off Désactive la fonction de réduction de bruit Low Réduit légèrement le niveau de bruit Medium Réduit le niveau de bruit au niveau moyen Strong Réduit le niveau de bruit de façon importante Video F F G G 45 50 50 0 10 F F G G 100 G G G G Picture Mode Brightness Contrast Saturation HUE Sharpness Adaptive...

Page 134: ... sur OK puis sur Bas ou Haut pour sélec tionner l option Flesh Tone 4 Appuyez sur Gauche ou Droit pour sélectionner Off Low Medium ou High 5 Appuyez sur MENU pour revenir au menu précé dent Dans certains cas l activation de cette fonction permet un affichage plus agréable des ciels et des tons chair Advanced Video DNR MPEG NR Adaptive Luma Control Flesh Tone DI Film Mode Blue Stretch Game Mode Blu...

Page 135: ...e Stretch 4 Appuyez sur Gauche ou Droit pour sélectionner On ou Off 5 Appuyez sur MENU pour revenir au menu précé dent Il s agit de la fonction qui donne un aspect bleuté à la couleur blanche Advanced Video DNR MPEG NR Adaptive Luma Control Flesh Tone DI Film Mode Blue Stretch Game Mode Blue Mute Gamma Color Temperature Medium Low Off Off Auto Off Off On Middle F F G G F F G G F F G G F F G G F F ...

Page 136: ...Gauche ou Droit pour sélec tionner Dark Middle ou Bright 5 Appuyez sur MENU pour revenir au menu précé dent Cette fonction vous permet de régler la courbe de luminosité de l écran Advanced Video DNR MPEG NR Adaptive Luma Control Flesh Tone DI Film Mode Blue Stretch Game Mode Blue Mute Gamma Color Temperature Medium Low Off Off Auto Off Off On Middle F F G G F F G G F F G G F F G G F F G G F F G G ...

Page 137: ...mpérature de couleur permet d affiner le réglage de l affichage Le réglage froid ajoute davantage de bleu et de vert pour lui donner un aspect plus froid Le réglage chaud ajoute davantage de rouge et de jaune pour lui donner un aspect plus chaud Le réglage standard à mi chemin entre les réglages froid et chaud offre une restitution de l image plus naturelle Nota Pour régler manuellement l option C...

Page 138: ...tte option est sélectionnée elleva ajuster l im age sur un plan horizontal dans une proportion non linéaire pour occuperla totalité de l écran Just Scan Il s agit d un mode de surbalayage à 0 pour une source 720p 1080i 1080p si la source d entrée est HDMI Mode écran 1 Appuyez sur le bouton MENU pour accéder au menu à l écran puis appuyez sur la touche Bas ou Haut pour sélectionner le sous menu Set...

Page 139: ...a touche Bas ou Haut pour sélectionner le sous menu Sound Mode 3 Appuyez sur Gauche ou Droit pour sélectionner Off Rock Techno ou Classic Modes 4 Appuyez sur MENU pour revenir au menu précédent L option Sound Mode vous permet de régler le son selon vos préférences Contrôle du niveau sonore Audio Balance Bass Treble Sound Surround Sound Mode MTS Audio Language Speaker Type 0 40 40 F F G G F F G G F...

Page 140: ...haitez modifier puis appuyez sur la touche Gauche ou Droit pour effectuer le réglage proprement dit 4 Appuyez sur MENU pour revenir au menu précédent Cette fonction vous permet de régler manuellement chaque paramètre audio selon vos préférences Balance Pur ajuster l équilibrage gauche droit dans les hautsparleurs intégrés Bass Cela permet de régler les sons graves Treble Cela permet de régler les ...

Page 141: ... dans ce mode Son panoramique 1 Appuyez sur le bouton MENU pour accéder au menu à l écran puis appuyez sur la touche Bas ou Haut pour sélectionner le sous menu Audio 2 Appuyez sur OK pour accéder au sous menu puis sur la touche Bas ou Haut pour sélectionner le sous menu Sound Surround 3 Appuyez sur Gauche ou Droit pour sélectionner On ou Off 4 Appuyez sur MENU pour revenir au menu précédent L effe...

Page 142: ...pour sélectionner le sous menu Audio 2 Appuyez sur OK pour accéder au sous menu puis sur la touche Bas ou Haut pour sélectionner le sous menu Speaker Type 3 Appuyez sur Gauche ou Droit pour sélectionner Off Bult In ou Bed Speaker 4 Appuyez sur MENU pour revenir au menu précédent Le type de haut parleur peut être activé Off Bult In ou Bed Speaker en utilisant ce paramètre Utiliser ce paramètre lors...

Page 143: ... menu précé dent La fonction de sous titrage analogique est utilisée pour les canaux analogiques Sous titrage Caption Texte qui défile au bas de l écran et qui représente généralement la partie dialogue d une émission pour le bénéfice des malentendants TEXT Texte qui apparaît dans un grand cadre noir cou vrant une grande partie de l écran habituellement un mesage provenant du diffuseur Nota Pour s...

Page 144: ...as ou Haut pour sélec tionner l option Digital Closed Caption 4 Appuyez sur Gauche ou Droit pour sélectionner Off Service1 Service2 Service3 Service4 Service5 ou Service6 5 Appuyez sur MENU pour revenir au menu précé dent Le sous titrage numérique ne fonctionne que sur les postes numériques Analog Closed Caption Digital Closed Caption Digital Caption Style Off Off F F G G F F G G G G Caption MENU ...

Page 145: ...te fonction permet de personnaliser le sous titrage DTV Font Size Définit la taille d affichage des sous titres Font Color Définit la couleur d affichage des sous titres Font Opacity Définit la transparence des sous titres Background Color Sélectionne une couleur de fond pour les sous titres Background Opacity Définit la transparence du fond Window Color Personnalisation de la couleur du cadre Win...

Page 146: ...ionner l option Time Zone 4 Appuyez sur Gauche ou Droit pour sélectionner votre fuseau horaire Sélectionnez Eastern Time Indiana Central Time Mountain Time Arizona Pacific Time Alaska Hawaii 5 Appuyez sur MENU pour revenir au menu précé dent Ce mode vous permet de régler le fuseau horaire pour votre région Time Zone Time Sleep Timer Off G G G G F F G G Time Setup ENTER OK MENU Back Select Time Set...

Page 147: ... au menu précé dent Le paramètre Auto Time Setting permet de recevoir l heure transmise par un canal numérique Le canal numérique comporte dans son signal la mention de l heure courante fournie par le diffuseur Nota Si Auto Synchronization est sur On les menus Date et Time ne sont pas accessibles Réglez l heure manuellement si l heure affichée par la fonction de synchronisation automatique est inc...

Page 148: ...r Bas ou Haut pour sélectionner Date ou Time 7 Appuyez sur la touche Gauche ou Droit pour sélec tionner la variable que vous souhaitez modifier et sur les touches numériques pour saisir la date ou l heure 8 Appuyez sur MENU pour revenir au menu précé dent Si l heure affichée par la fonction de synchronisation automatique est incorrecte cette option vous permet de la régler manuellement Time Zone T...

Page 149: ...ont pas accessi bles 6 Appuyez sur Bas ou Haut pour sélectionner Power On Timer ou Power Off Timer 7 Appuyez sur la touche Gauche ou Droit pour accéder au paramètre de votre choix puis réglez l heure avec les touches numériques 8 Appuyez sur MENU pour revenir au menu précé dent La temporisation ne fonctionne que si l heure a été réglée Cette fonction permet d allumer et d éteindre le téléviseur au...

Page 150: ... minutes que vous avez sélectionné à la fin il fait basculer le téléviseur en mode veille 5 Appuyez sur MENU pour revenir au menu précé dent La fonction d extinction automatique met le téléviseur en mode Attente après le délai choisi Nota Si vous souhaitez sélectionner directement le mode veille sans entrer dans les menus appuyez sur le bou ton SLEEP de la télécommande À chaque fois que vous appuy...

Page 151: ...auche ou Droit pour mettre le bouton OK en surbrillance 4 Appuyez sur le bouton OK de la télécommande pour remettre tous les réglages à zéro 5 Appuyez sur MENU pour revenir au menu précé dent Cette fonction restaure tous les réglages usine des sélections de menu Cette fonction efface toutes les chaînes de télévision de la mémoire Après avoir restauré les réglages usine vous devez procéder à un nou...

Page 152: ...urer le code d accès 1 Après avoir accédé au sous menu du contrôle parental appuyez sur la touche Bas ou Haut pour sélectionner Change Password 2 Appuyez sur OK puis saisissez les 4 chiffres de votre nouveau mot de passe dans la section New Password 3 Ensuite saisissez les de nouveau dans le menu Confirm Password pour confirmer votre sélection 4 Votre nouveau mot de passe est alors mémorisé 5 Appu...

Page 153: ...Gauche ou Droit pour sélectionner On ou Off Lorsque vous sélectionnez On les options Program Block sont activées 4 Appuyez sur MENU pour revenir au menu précédent ou parcourez les options vers le bas pour modifier une option Program Block Active ou désactive le contrôle parental Parental Program Block Change Password Clean All G G G G G G Program Block On Off F F G G G G G G G G G G G G F F G G Ra...

Page 154: ...vous à la description du système de notation sur la page suivante 5 Appuyez sur MENU pour revenir au menu précé dent Ce système de notation a été mis en place pour vous aider à surveiller et le cas échéant à bloquer les programmes sur votre téléviseur Les chaînes en regard desquelles figure le pictogramme d un cadenas sont bloquées Parental Program Block Change Password Clean All G G G G G G Progr...

Page 155: ...ir quelques situations de violence et des dialogue sexuel modérés ainsi qu un langage offensant TV G Auditoire général Ces programmes contiennent peu ou pas de vio lence pas de langage offensant et peu ou pas de dialogue ou situation à caractère sexuel TV Y7 Programme à l intention des enfants plus âgés Ces programmes peut comporter des scènes de violence légère ou imaginaire ou peut effrayer des ...

Page 156: ...ler et le cas échéant à bloquer les films sur votre téléviseur Ces notations s appliquent aux films diffusés à la télévision et permettent de sélectionner ceux que vous souhaitez bloquer Classement MPAA films G Aucune restriction PG Supervision parentale recommandée PG 13 Sévère avertissement aux parents R Restrictions NC 17 Pour les téléspectateurs de 17 ans et plus X Adultes seulement Nota Si vo...

Page 157: ... dent Ce système de notation a été mis en place pour vous aider à surveiller et le cas échéant à bloquer les pro grammes sur votre téléviseur Les chaînes en regard desquelles figure le pictogramme d un cadenas sont bloquées Classement pour le Canada anglais C Enfants C8 Enfants de 8 ans et plus G Classement général adéquat pour tous les audi toires PG Accompagnement parental recommandé 14 À l inte...

Page 158: ...e système de notation a été mis en place pour vous aider à surveiller et le cas échéant à bloquer les pro grammes sur votre téléviseur Les chaînes en regard desquelles figure le pictogramme d un cadenas sont bloquées Classement pour le Canada français G Classement général 8 ans Général Ne convient pas aux jeunes enfants 13 ans Ne convient pas aux enfants de 13 ans et moins 16 ans Ne convient pas a...

Page 159: ...enu précé dent Votre système de configuration à l écran peut différer de celui décrit dans ce Guide Nota Cette fonction pourrait être disponible dans le futur mais seulement pour les canaux numériques Cete fonction n est opérationnelle que lorsque le téléviseur reçoit des données de classement pour la Région 5 Open V Chip G G U S 50 States Possessions ENTER OK MENU Back Select Program Block On Off...

Page 160: ...ssword Clean All G G G G G G ENTER OK MENU Back Select Block Unrated bloquer les chaînes hors notation 1 Après avoir accéder au sous menu du contrôle parental appuyez sur la touche Bas ou Haut pour sélectionner Program Block 2 Appuyez sur OK puis sur Bas ou Haut pour sélec tionner l option Block Unrated 3 Appuyez sur Gauche ou Droit pour sélectionner On ou Off 4 Appuyez sur MENU pour revenir au me...

Page 161: ...toma tique 5 Si le résultat est insatisfaisant vous pouvez effectuer les réglages manuellement Pour savoir comment effectuer les réglages manuellement reportez vous à la page suivante En mode PC cette fonction règle automatiquement la position de l image l horloge la phase et l échelle L image disparaît quelques secondes pendant le processus de configuration automatique Si le résultat est insatisf...

Page 162: ...Gauche ou Droit pour effectuer les ajustements désirés 5 Appuyez sur MENU pour revenir au menu précé dent Si le résultat est insatisfaisant vous pouvez effectuer les réglages manuellement Horizontal Position Permet d ajuster la position horizontale de l image Vertical Position Permet d ajuster la position verticale de l image Phase Permet d éliminer le bruit horizontal et d aug menter la clarté du...

Page 163: ...es dufichier Le menu Type de médias permet de sélec tionner les photos ou les fichiers de musique Lorsqu une image s affiche appuyez sur la touche CC lorsque qu une image s affiche pour modifier les paramètres de cette image Lorsque la lecture d un fichier de musique est en cours Appuyez sur le bouton CC lorsque la lec turede la musique est en cours pour chang er les paramètres de la musique Le té...

Page 164: ...cessoires Modèle J22CE820 AC IN HDMI DVI IN1 HDMI IN2 AUDIO IN RGB DVI RGB IN PC COMPONENT IN AV IN 1 S VIDEO IN AUDIO OUT SERVICE RS232 ANTENNA CABLE IN AV IN 2 USB IN Cordon d alimentation Guide d utilisation Maître et invité à ditance En option Câble de type Composite Câble de type Component Poids kg lbs 534 8mm x 358 9mm x 47 5mm 21 06 x 14 13 x 1 87 pouces 3 6 kg 7 94 lbs 300 cd m2 1366 H x 7...

Page 165: ...res Modèle J26CE820 AC IN HDMI DVI IN1 HDMI IN2 AUDIO IN RGB DVI RGB IN PC COMPONENT IN AV IN 1 S VIDEO IN AUDIO OUT SERVICE RS232 ANTENNA CABLE IN AV IN 2 USB IN Cordon d alimentation Guide d utilisation Maître et invité à ditance En option Câble de type Composite Câble de type Component Poids kg lbs 648 2mm x 415 5mm x 45 9mm 25 52 x 16 36 x 1 81 pouces 5 1 kg 11 24 lbs 350 cd m2 1366 H x 768 V ...

Page 166: ...es Modèle J32CE720 AC IN HDMI DVI IN1 HDMI IN2 AUDIO IN RGB DVI RGB IN PC COMPONENT IN AV IN 1 S VIDEO IN AUDIO OUT SERVICE RS232 ANTENNA CABLE IN AV IN 2 USB IN Cordon d alimentation Guide d utilisation Maître et invité à ditance En option Câble de type Composite Câble de type Component Poids kg lbs 794 5mm x 512 0mm x 99 5mm 31 28 x 20 16 x 3 92 pouces 11 0 kg 24 25 lbs 300 cd m2 1366 H x 768 V ...

Page 167: ...s Modèle J42CE820 AC IN HDMI DVI IN1 HDMI IN2 AUDIO IN RGB DVI RGB IN PC COMPONENT IN AV IN 1 S VIDEO IN AUDIO OUT SERVICE RS232 ANTENNA CABLE IN AV IN 2 USB IN Cordon d alimentation Guide d utilisation Maître et invité à ditance En option Câble de type Composite Câble de type Component Poids kg lbs 1017 0mm x 638 5mm x 47 2mm 40 04 x 25 14 x 1 86 pouces 13 2 kg 29 10 lbs 300 cd m2 1920 H x 1080 V...

Page 168: ...ge Communiquez avec le service de soutien si l image n apparaît pas après cinq minutes Choisissez la fonction Color and le menu Picture et appuyez sur les boutons Gauche ou Droit Vérifiez les sources d interférences comme les appareils de chauffage ou les outils électriques Un changement du taux d humidité ou de température peut provoquer des sons inhabituels au moment du démarrage et ceci ne cons...

Page 169: ... INDIRECT SPÉCIAL OU PUNITIF DE QUELQUE NATURE QUE CE SOIT CELA INCLUT ENTRE AUTRES LE MANQUE À GAGNER LA PERTE OU L ALTÉRATION DE PROGRAMMES OU DE DONNÉES OU TOUT AUTRE PRÉJUDICE D ORDRE CONTRACTUEL DÉLICTUEL OU AUTRE Certains états n autorisent pas l exclusion ou la limitation des préjudices accidentels ou induits ou les limita tions de la durée d une garantie implicite dans ce cas vous n êtes p...

Page 170: ...e mauvaise utilisation un abus une négligence un mauvais entretien ou des conditions d entreposage inadéquates ou à des cata strophes naturelles et tout cas de force majeure Les cas de force majeure désignent entre autres la foudre les pics de tension les pannes de courant et les inondations Rémanence de l image Réparation ou remplacement des pièces sous garantie par un tiers autre qu un centre de...

Page 171: ......

Page 172: ...N envoyez pas de produits à l adresse à Indianapolis indiquée dans ce manuel ou sur l emballage Cela ne ferait que retarder la réparation de votre produit DTI Services LLC 5350 Lakeview Parkway S Dr Indianapolis In 46268 1 800 RCA 2161 P NO 3350GDKM0139A GPN12MA013B DTI ...

Reviews: