background image

Using the TV’s Features

Chapter 3

43

V-Chip Movie Rating Limit

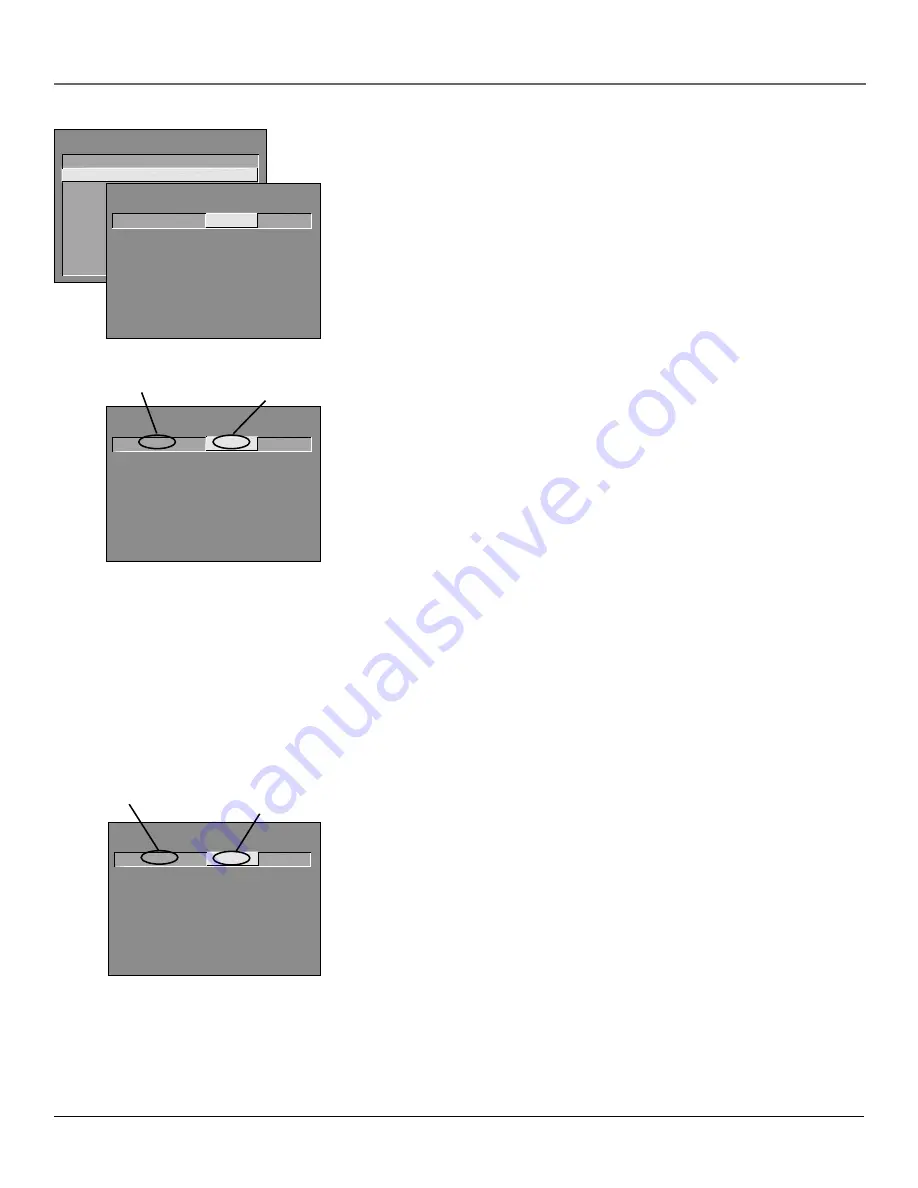
You set movie rating limits by blocking movies rated above a specified level.
How to block movie ratings and view movie ratings is explained in the next two
sections.

To access the 

V-CHIP MOVIE RATING LIMIT

 menu:

1.

Press MENU on the remote control (the 

TV MAIN MENU 

appears).

2.

Select 

Parental Controls

 (press 6).

3.

Select 

V-Chip Movie Rating Limit

 (press 2).

PARENTAL CONTROLS

1 V-Chip TV Rating Limit

2 V-Chip Movie Rating Limit

3


V-Chip Unrated Program Block

4 Channel Block
5 Front Panel Block
6 Lock Parental Controls
0


Exit

V-CHIP MOVIE RATING LIMIT

Rating

Status

PG-13

Block

^

RATING

STATUS

NR

Block

X

Block

NC-17

Block

R

Block

PG-13

Block

PG

View

G

View

Press ^/v to view programs with 
this rating. Press MENU to exit.

Blocking Movie Ratings

If you only want your child to watch movies that have a PG rating and lower
(in other words, movies rated PG and G), then you could automatically block
out all other movies with higher ratings.

To block movies:

1.

Highlight the 

Rating 

field and press the up and down arrow buttons to find

the rating that is the lowest rating you don’t want the child to watch.  (In
the example above, you would highlight the rating status button
corresponding to PG-13, since the highest rating you want the child to
watch is PG.)

2.

Press the right arrow button to highlight the rating 

Status

 field. Press the up

and down arrow buttons to change the button from 

View 

to 

Block

. All

higher ratings automatically change to 

Block

.

3.

Press OK to return to the menu or exit the screen.

4.

If Parental Controls are not locked, you must lock them so the movie rating
limits will take effect.

Note:

 Some movies may be given a Not Rated (NR) rating. After blocking

movie ratings, you must set NR to View separately to view NR movies.

Viewing Movie Ratings

After you block movie ratings, you have the option of changing some of the
rating status buttons back to 

View

:

1.

Highlight the 

Rating

 field and press the up and down arrow buttons to find

the rating you want to view.

2.

Press the right arrow button to highlight the rating 

Status

 field. Press the up

and down arrows to change the button from 

Block 

 to 

View

.

For example, if movies with a rating of PG-13 and higher are blocked, you can
change the rating status corresponding with NC-17. Your child would then be
able to watch all movies with a G, PG, and NC-17 Rating.

3.

Press OK to exit the screen, and be sure parental controls are locked.

V-CHIP MOVIE RATING LIMIT

Rating

Status

PG-13

Block

^

RATING

STATUS

NR

Block

X

Block

NC-17

Block

R

Block

PG-13

Block

PG

View

G

View

Press ^/v to view programs with 
this rating. Press MENU to exit.

Rating
status field

Rating field

V-CHIP MOVIE RATING LIMIT

Rating

Status

NC-17

View

^

RATING

STATUS

NR

Block

X

Block

NC-17

View

R

Block

PG-13

Block

PG

View

G

View

Press ^/v to block programs with 
this rating. Press MENU to exit.

Rating field

Rating
status field

Summary of Contents for F31317

Page 1: ...Television User s Guide Changing Entertainment Again ...

Page 2: ...r its proper operating voltage FCC Regulations state that unauthorized changes or modifications to this equipment may void the user s authority to operate it If fixed non moving images are left on the screen for long periods they may be permanently imprinted on the picture tube Such images include network logos phone numbers and video games This damage is not covered by your warranty Extended view...

Page 3: ... Touch VCR Recording You must connect the G LINK cable to the TV and place one of the wands in front of the remote sensor on the VCR If you have a cable box connect the G LINK cable to the TV and place one of the wands in front of the remote sensor on the cable box V Chip Parental Controls Description You can block programs and movies by content age based ratings and or movie ratings Requirements ...

Page 4: ...2 Introduction This page intentionally left blank ...

Page 5: ... TV 12 Why You Should Connect This G LINK Cable 13 Placing the G LINK Wands 13 How to Find the Remote Sensor 13 Complete the Interactive Setup 15 Set the Menu Language 15 Complete Auto Channel Search 15 The GUIDE Plus System Setup 15 What to Expect 20 Next Steps 20 Chapter 2 Using the Remote Control The Buttons on the Remote Control 22 Using the WHO INPUT Button 23 Programming the Remote to Operat...

Page 6: ...ing Limit 39 Blocking Specific Content Themes 41 Viewing Specific Content Themes 42 V Chip Movie Rating Limit 43 V Chip Unrated Program Block 44 Channel Block 44 Front Panel Block 44 Lock Unlock Parental Controls 44 Chapter 4 Using the TV s Menu System How to Use Your TV s Menu System 46 Audio Menu 46 Picture Quality Menu 47 Screen Menu 48 Using Closed Captioning 48 Channel Menu 49 Time Menu 50 Ch...

Page 7: ...onnection Connections Jacks on the Back of Your TV Why You Should Connect This G LINK Cable Plug in the TV Put Batteries in the Remote How to Use the Remote Control to Complete the Interactive Setup Turn on the TV Complete the Interactive Setup 5 5 Chapter 1 Changing Entertainment Again ...

Page 8: ...back of the TV If your antenna uses 300 ohm twin lead cables do not coil the cables Also keep the twin lead cables away from audio video cables Important Stand and Base Safety Information Choose the location for your TV carefully Place the TV on a stand or base that is of adequate size and strength to prevent the TV from being accidentally tipped over pushed off or pulled off This could cause pers...

Page 9: ...termine which connection is best for you Proceed to the appropriate page and connect your TV Cables Needed to Connect Components to Your TV The pictures below show the cables needed for the connections represented in this book Notes Audio Video cables A V cables for short are usually sold as a bundled set but the connection pictures in this book show each cable separately for better visibility Ple...

Page 10: ...V R and L MONO and to the Audio Output Jacks on the VCR sometimes labeled OUT R L C Connect the video cable yellow to the VIDEO IN jack on the back of the TV and to the Video Output Jack on the VCR 2 Connect cable or antenna to your VCR Connect the coaxial cable from your cable outlet cable box or antenna to the Input Jack on your VCR sometimes labeled IN FROM ANTENNA or IN FROM ANT 3 Connect the ...

Page 11: ...Connect the coaxial cable from your cable or antenna to the CABLE ANTENNA jack on the back of your TV Go to page 14 2 If you re connecting a cable box connect the G LINK cable A If you haven t already done so remove the Demo Pin from the G LINK jack B Connect the G LINK cable to the G LINK jack on the TV Next step place the wands of the G LINK cable to the cable box instructions are on p 13 Go to ...

Page 12: ...O L R VIDEO OUT IN FROM ANT OUT TO TV SATELLITE IN IN FROM ANT OUT TO TV CH3 CH4 VCR VIDEO OUT L R AUDIO IN L R TV back panel CABLE ANTENNA VIDEO R L MONO S VIDEO AUDIO R L IN OUT G LINK From Cable or Antenna Satellite Signal TV VCR Satellite 4 3B 2B 1A 1B 1C 2A 3A ...

Page 13: ...lite Receiver A Connect the coaxial cable from your cable outlet cable box or antenna to the Input Jack on your satellite receiver sometimes labeled IN FROM ANT B Connect the coaxial cable from your satellite dish antenna to the Input Jack on your satellite receiver sometimes labeled SATELLITE IN 3 Connect the Satellite Receiver to the VCR and to the TV A Connect a coaxial cable to the Output Jack...

Page 14: ...net Access Device To watch the content from the component that s connected to the VIDEO Input Jack press the WHO INPUT button on the remote the TV switches to the correct channel G LINK Jack Connect the end of the G LINK cable provided to this jack The G LINK cable enables the TV s Guide Plus system to interact with the cable box and or the VCR A picture of the G LINK cable is on page 7 S VIDEO Ja...

Page 15: ...rogram listings for your area and to tune directly to a channel when the program guide is on your TV screen VCR If your TV is connected to a VCR and you don t connect the G LINK cable one touch VCR recording won t work The other features of the guide will work properly How to Find the Remote Sensor You have to place the G LINK wands in front of the remote sensor on the VCR and or cable box Some ca...

Page 16: ...ow buttons on the remote to highlight one of the items listed on the screen Use the up or down arrow button to move up or down Use the right or left arrow button to move right or left To select the item that you ve highlighted press OK Note Highlighted means that the menu item stands out from other menu items on the list appears darker brighter or a different color Turn on the TV Press the TV butt...

Page 17: ...that language Complete Auto Channel Search The next part of the SETUP asks you if you want the TV to search for all channels viewable through your antenna or cable TV system This is sometimes called auto programming 1 Press OK to tell the TV to begin searching for channels A progress report appears on the screen 2 When the screen on the TV tells you the search is complete press OK the first GUIDE ...

Page 18: ...ow button to go to the next space The left arrow button moves you to the left Step 2 Configuring for Cable The next series of screens asks you about your cable setup To supply your TV with the correct TV program listings the GUIDE Plus system needs to know if your TV is connected to cable 1 If your TV is connected to cable highlight Yes and press OK If your TV isn t connected to cable highlight No...

Page 19: ... progress don t touch your TV VCR cable box or any of the remote controls for these products 6 Look at your cable box If it is still on and changed to channel 09 the test was successful Highlight Yes and press OK STEP 3 Configuring for a VCR appears If your cable box didn t change to channel 09 or turned itself off you have two choices No and Test this code again Test this code again If you think ...

Page 20: ...ing is in progress don t touch your TV VCR or any of the remote controls for these products 4 Look at the front display of your VCR If your VCR turned on automatically and changed to channel 09 the test was successful Highlight Yes and press OK If your VCR didn t change to channel 09 you can either choose No or Test this code again If you think your TV or remotes might have been touched during the...

Page 21: ... won t be able to automatically schedule programs to record on your VCR Step 4 Confirming Your Settings 1 Check to make sure all settings are complete and correct If all settings are complete highlight Yes end setup and press OK If your cable box and or VCR code testing failed you should see INCOMPLETE where the cable box and VCR codes are listed Once setup is complete additional screens appear If...

Page 22: ...appear on the screen Program information is usually sent to your TV at night If the TV detected that you have multiple cable companies in your area STEP 5 Choosing Your Channel Lineup appears Features of the GUIDE Plus system are explained in Chapter 3 To clear the guide from your screen press CLEAR or GUIDE on the remote control Next Steps Now that you ve finished the Interactive Setup you re rea...

Page 23: ...te Control Chapter Overview The Buttons on the Remote Control Programming the Remote to Operate Other Components How To Use the Remote After You ve Programmed It Code List 21 21 Chapter 2 Changing Entertainment Again ...

Page 24: ...y tunes the TV to the correct channel CH up and down buttons Scan up or down through the current channel list Press once to change the channel up or down press and hold to continue changing channels CLEAR Removes any menu or display from the screen and returns you to TV viewing DVD Puts the remote in DVD mode If you set up the Auto Tuning feature Chapter 3 pressing the DVD button automatically tun...

Page 25: ... before you change the channel the TV waits 60 seconds and automatically turns back to the original channel SOUND Displays the AUDIO PROCESSOR menu STOP If you re operating a VCR or DVD Player stops playing the disc or videotape TV Turns on the TV and puts the remote in TV mode Also displays channel information VCR1 Puts the remote in VCR mode If you set up the Auto Tuning feature Chapter 3 pressi...

Page 26: ...grammed How to Program the Remote There are two ways to program the remote control automatic code search and direct entry Instructions for both ways follow Using Automatic Code Search 1 Turn on the component you want the remote to operate VCR DVD Player etc 2 Press and hold the component button on the remote control that corresponds to the component you want the remote to operate VCR1 DVD etc Whil...

Page 27: ...ton and then ON OFF again 7 If you get no response repeat these steps using the next code listed for your brand until the component responds to the remote commands How to Use the Remote After You ve Programmed It Once the remote has been programmed successfully you are ready to use it to control your components To operate the component 1 Press the component button TV VCR1 VCR2 DVD AUX or SAT CABLE...

Page 28: ...1 2003 2013 2021 2055 2056 2082 2083 2084 2085 2086 2087 2088 2089 2090 2091 2107 2115 2120 2125 Radioshack Realistic 2002 2011 2013 2014 2021 2022 2023 2026 2029 2049 2050 2096 2131 Radix 2014 Randex 2014 Ricoh 2128 Runco 2104 Samsung 2005 2013 2015 2033 2053 2112 Sanky 2131 2104 Sansui 2010 2092 2111 2123 Sanyo 2011 2013 2023 Scott 2012 2015 2025 2032 2035 2038 2065 2093 2116 Sears 2011 2014 202...

Page 29: ...Using the TV s Features Chapter Overview All About the GUIDE Plus System The Channel Banner Auto Tuning Parental Controls and V Chip 27 27 Chapter 3 Changing Entertainment Again ...

Page 30: ... a host channel that carries GUIDE Plus system data containing program schedule and channel lineup information A channel lineup is the list of stations and their respective channels To ensure that your first download of data is complete you should leave your TV off overnight Downloads occur several times a day The TV must be turned off for GUIDE Plus system data to download If the TV loses power o...

Page 31: ...o access the GUIDE Plus system 2 Press MENU or use the up and down arrow buttons to select the Menu bar the Grid Guide appears by default 3 Use the left and right arrow buttons to access other menus 4 Press OK or MENU or use the down arrow button to see the menu options Grid Guide The Grid Guide appears each time you enter the GUIDE Plus system It displays the current programming for each channel ...

Page 32: ...ng If you have a cable box changing channels on the TV will not cause the cable box channel to change while recording Record will only appear if you have set up the GUIDE Plus system and specified your VCR type The program information window will display a confirmation when you have successfully scheduled a program to watch or record Note If you have selected two programs to watch or record which ...

Page 33: ...GUIDE or CLEAR to exit the GUIDE Plus system Then use the Sort Menu Action Buttons as described next Sort Menu Action Buttons When viewing the results of a Sort the following Action buttons appear Watch Press 1 on the remote to place a timer in the Schedule and then follow the on line help for further options Placing a timer in the Schedule will cause the TV to turn on and tune to the program high...

Page 34: ...her viewing or recording programs The GUIDE Plus system allows one touch VCR recording if you have connected the G LINK cable to your VCR See Chapter 1 for more details on connecting the G LINK cable To schedule a program to watch or record 1 If the GUIDE Plus system isn t on your screen press GUIDE on your remote control 2 Press MENU on the remote to select the Menu bar 3 Highlight a program with...

Page 35: ... only on that day WEEKLY records the program each week at the same time Messages Occasionally you will receive messages regarding your GUIDE Plus system as well as special programming information You can access these messages from the Messages menu on the Menu bar To read messages 1 If the GUIDE Plus system isn t on your screen press GUIDE on your remote control 2 Press MENU on the remote to selec...

Page 36: ...e remote to toggle the state of the channel between On and Off Setup The Setup menu allows you to access the GUIDE Plus system setup information To access the Setup option 1 If the Guide Plus system isn t on your screen press GUIDE on your remote control 2 Press MENU to select the Menu Bar 3 Use the right arrow to highlight the Setup menu selection 4 Use the up and down arrows to select Change sys...

Page 37: ...s the GUIDE Plus system setup screen Change system settings Confirms the settings you completed in the GUIDE Plus system setup are correct Review options Displays GUIDE Plus system auto display options View demo Runs the GUIDE Plus system demonstration GUIDE Plus Label Displays the GUIDE Plus label menu On Displays the station name when you change channels Off The station name isn t displayed when...

Page 38: ...r has been set 00 00 Displayed to count down time left on the commercial skip SKIP timer Why You Should Use the Auto Tuning Feature The auto tuning feature automatically tunes the TV to the correct channel for different components you have connected to your TV like a VCR DVD Player etc When you set up auto tuning in the menu system you don t have to remember to change your TV to channel 3 for exam...

Page 39: ... on the back of the TV and you want the TV to tune to channel 2 when you press the SAT CABLE button on the remote Reminder make sure the component s Channel 2 3 4 switch is set to channel 2 Usually this switch is on the back of the component Channel 3 Component is connected to the CABLE ANTENNA jack on the back of the TV and you want the TV to tune to channel 3 when you press the corresponding but...

Page 40: ...h programs That code tells the software the program s age based rating TV MA TV 14 etc and content themes Violence V Adult Language L etc If you have blocked the rating and or content themes that the program contains you will receive the message This channel is not approved for viewing when you tune to that particular channel Broadcasters are not required to provide content themes so programs rece...

Page 41: ...terial that parents may find unsuitable for younger children Many parents may want to watch it with their younger children The program contains one or more of the following content themes some suggestive dialogue D infrequent coarse language L some sexual situations S or moderate violence V General Audience Most parents would find this program suitable for all ages It contains little or no sexual ...

Page 42: ...V G Tip When you change the status of a rating to Block the system will automatically block higher ratings and all corresponding content themes Content V CHIP TV RATING LIMIT Rating Status TV MA VIEW D L S V FV V V V RATING STATUS TV MA View TV 14 View TV PG View TV G View TV Y7 View TV Y View D L S V FV V V V V V V V V V V V V Press v to select rating Press MENU to exit Rating Settings Area Lets ...

Page 43: ...light to the rating status field 4 Press the up button to select View Note The content status fields corresponding to the unblocked rating become View as well They and the age based rating status are the only fields that automatically change back to View when you complete this process Note You must remember to lock Parental Controls for rating limits to take effect Blocking Specific Content Themes...

Page 44: ... scroll through the age based ratings until the rating whose content theme you want to change to View appears 3 Press the right arrow button to move the yellow highlight to a particular content theme status such as the B under language L corresponding with TV 14 4 Press the up or down arrow button to change its status back to V Your child would then be able to watch programs with TV 14 adult langu...

Page 45: ...ight the rating Status field Press the up and down arrow buttons to change the button from View to Block All higher ratings automatically change to Block 3 Press OK to return to the menu or exit the screen 4 If Parental Controls are not locked you must lock them so the movie rating limits will take effect Note Some movies may be given a Not Rated NR rating After blocking movie ratings you must set...

Page 46: ...ontrol method you should remove access to any remote that is capable of operating the television while you have the front panel blocked Don t forget to lock parental controls after you change the status If you do not the front panel block will not take effect Lock Unlock Parental Controls Selecting this option lets you lock and unlock parental controls settings using a password If you do not lock ...

Page 47: ...Using the TV s Menu System Chapter Overview How to Use the Different Types of Menus Audio Menu Picture Quality Menu Screen Menu Channel Menu Time Menu 45 45 Chapter 4 Changing Entertainment Again ...

Page 48: ...e you to another menu or a control panel There are two ways to select a choice in a menu Use your arrow buttons on your remote control to highlight your choice and press OK Press a number button on the remote For example in the Main menu press 3 to go straight to the Screen menu Exiting a menu There are three ways to exit a menu Highlight Exit and press OK Press 0 on the remote Press CLEAR The on ...

Page 49: ...tting turns the TV s speakers off and allows variable output from the TV s audio output jacks Fixed Output Speakers Off This setting turns the TV s speakers off and allows fixed output from the TV s audio output jacks to an external component such as a surround sound amplifier With Fixed Output On the TV s volume control tone controls and mute are disabled Picture Quality Menu Basic Picture Contro...

Page 50: ...ose the way closed captioning information is shown on the screen Off always No captioning information is displayed On always Captioning information is shown always when available On when sound is muted Captioning information is shown when available whenever the TV s sound is muted To mute the sound press the MUTE button The captioning information is not displayed when the sound is not muted Closed...

Page 51: ... back to the Screen menu Channel Menu Signal Type Displays a choice list that lets you select the current antenna type This option does not appear when the GUIDE Plus system is set up UHF VHF Antenna Choose this if you are currently using an off air antenna for TV signals Cable TV Choose this if you are currently using cable or a cable box for TV signals Auto Channel Search Tells the TV to search ...

Page 52: ...characters The TV can store up to 27 labels in memory Auto Tuning Displays a choice list that lets you set up the TV to automatically tune to the correct input channel when you press a component button VCR1 DVD VCR2 or SAT CABLE on the remote Go to Chapter 3 for details about the Auto Tuning feature Video Input Source Lets you select whether or not you have used the S Video jack to connect a compo...

Page 53: ...Other Information Chapter Overview Troubleshooting Care and Cleaning Front Panel Buttons Limited Warranty Accessory Order Form Index 51 51 Chapter 5 Changing Entertainment Again ...

Page 54: ... for instructions Electronic protection circuit may have been activated because of a power surge Wait 30 seconds and then turn the TV on again If this happens frequently the voltage in your house may be abnormally high or low TV turns on unexpectedly Scheduled On or Watch from the GUIDE Plus system may have been activated Go to p 50 for instructions Blank screen Make sure the component connected t...

Page 55: ... front of components remote sensors GUIDE Plus system control of cable box is slower than direct control of the box itself Keep this in mind when changing channels You may have an incorrect GUIDE Plus Channel Lineup The guide may get out of sync with the cable provider Use the GUIDE Plus Setup in the GUIDE Plus Menu to change the zip code to 99999 Turn the TV off for 10 minutes Use Setup again to ...

Page 56: ...en Parental Controls simply unlock and you can re enter a password via Lock Parental Controls The V Chip won t let me watch a program even though it s not rated as violent Maybe the movie was given an NR Not Rated status After you block movie ratings you must set NR to View separately in order to view movies with an NR rating Care and Cleaning CAUTION Turn OFF your TV before cleaning You can clean...

Page 57: ...arges One year for parts Two years for the picture tubes The warranty period for rental units begins with the first rental or 45 days from date of shipment to the rental firm whichever comes first What we will do Pay any Authorized RCA Television Service Center the labor charges to repair your television Pay any Authorized RCA Television Service Center for the new or at our option refurbished repl...

Page 58: ... institutional or other commercial purposes A television purchased or serviced outside the U S A Acts of God such as but not limited to lightning damage Product registration Please complete and mail the Product Registration Card packed with your TV It will make it easier to contact you should it ever be necessary The return of the card is not required for warranty coverage How state law relates to...

Page 59: ...plified Antenna ANT200 49 95 Antenna Mixer not shown 193984 11 15 Remote Control CRK76TE1 242524 30 35 Audio Video Adapter not shown 228449 4 45 Accessory Order Form Detach Here VH81 3 ft VH82 6 ft VH89 6 ft Gold Tipped cable VH83 6 ft Gold Tipped cable VH84 6 ft VH976 6 ft VH913 12 ft S Video Cable has multi pin connectors on each end for connecting S Video components to your TV Screw on Cable at...

Page 60: ...edit card order will not be processed without signature Name Street Apt City State Zip Print or type your name and address clearly Please make sure that both sides of this form have been filled out completely Allow 4 weeks for delivery All accessories are subject to availability Prices are subject to change A complete and correct order will save you days of waiting IMPORTANT Copy complete account ...

Page 61: ...2 L L E D button 22 L MONO jack 12 Labels 50 Language 48 Languages Selecting 15 Locating remote sensor 13 Lock Parental Controls 44 M Memory 50 Menu Audio 46 Channel 49 Channels 34 Grid Guide 29 Language 48 Messages 33 News 32 Picture Quality 47 Schedule 32 Screen 48 Setup 34 Sort 31 Time 50 MENU button 22 Menus GUIDE Plus System setup 15 Messages menu 33 Mono 46 Mute 46 MUTE button 22 N News menu...

Page 62: ......

Page 63: ......

Page 64: ...ion Please do not send any products to the Indianapolis address listed in this manual or on the carton This will only add delays in service for your product 60 RECYCLED PAPER MINIMUM 20 POST CONSUMER 2000 Thomson Consumer Electronics Inc Trademark s Registered Marca s Registrada s Printed in USA TOCOM 15491880 ...

Reviews: