background image

Graphics contained within this publication are for representation only.

3

DVD Recorder

STO

P

CH+

/SK

IP+

CH-/

SKIP

-

FWD

REV

PLA

Y/PA

USE

OPE

N/C

LOS

E

REC

ORD

INP

UT

Chapter 1: Connections and Setup

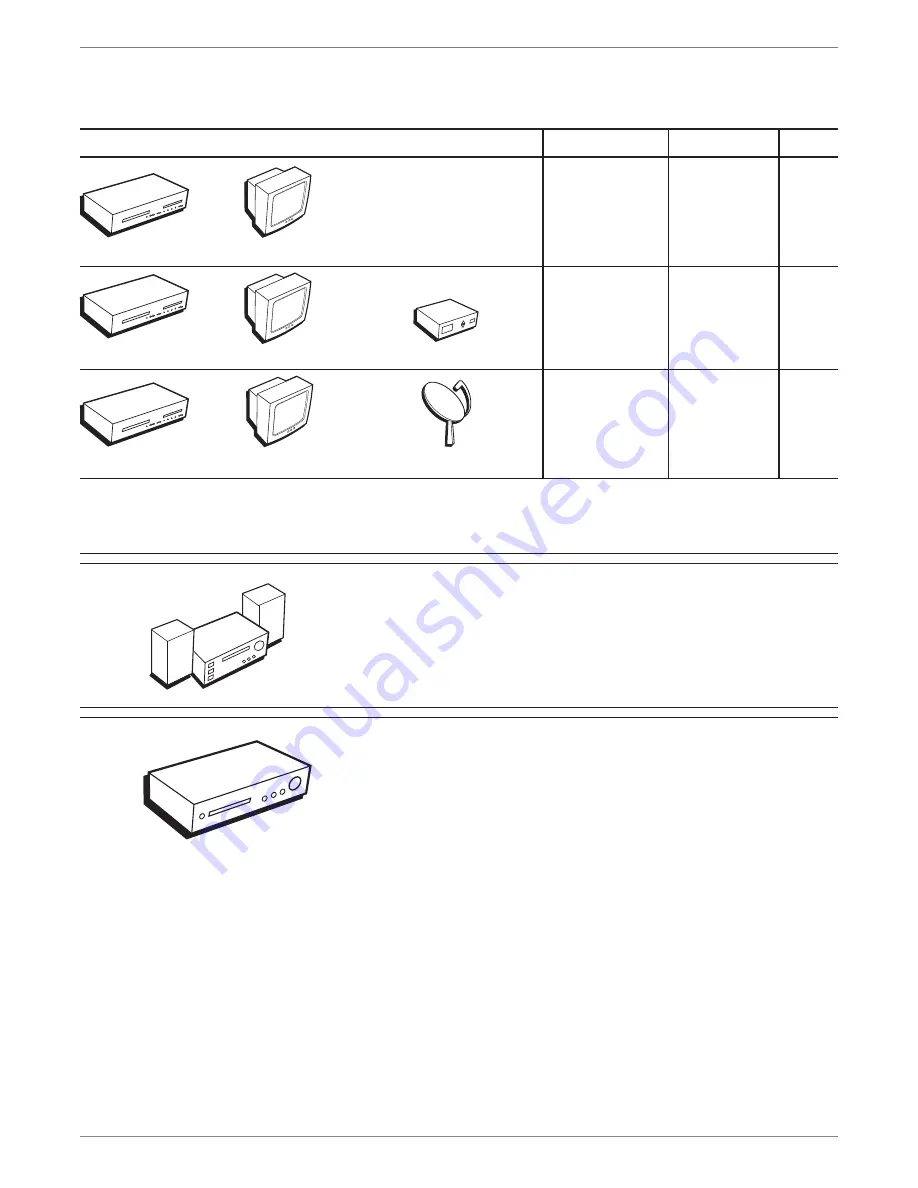
Choose Your Connection

There are several ways to connect your DVD recorder. Please use the following chart to determine which connection is best for you. Turn to the appropriate page for 
specifi c instructions.

To achieve enhanced picture quality, use the S-Video 
Cable (supplied) to connect your DVD recorder to your TV 
if your TV has an S-Video jack available.

Connecting an optional audio receiver:

After you connect the DVD recorder to your TV (choose 
an option above), go to page 14 for general information 
about connecting an audio/video receiver.

• Coaxial 
• Audio/video
• S-Video


Components  

Cables Needed  

Connection  

Go to

Satellite Receiver

TV

DVD Recorder

STO

P

CH+

/SK

IP+

CH-

/SK

IP-

FWD

REV

PLAY

/PAU

SE

OPE

N/C

LOS

E

REC

ORD

INP

UT

Cable Box

TV

DVD Recorder

STO

P

CH+

/SK

IP+

CH-

/SK

IP-

FWD

REV

PLA

Y/PA

USE

OPE

N/C

LOS

E

REC

ORD

INP

UT

TV

TV 

page 8

• Coaxial 
• Audio/video
• S-Video

TV + cable 
box

page 10

• Coaxial 
• Audio/video
• S-Video

TV + 
satellite 
receiver 

page 12

VCR Connection 


go to pages 56 and 57

If you want to copy content from a DVD to a videotape or 
vice versa, go to page 56 and 57 for general information.

Note: You can’t transfer copy protected content.

Summary of Contents for DRC8040N

Page 1: ...Changing Entertainment Again DVD Recorder User s Guide DRC8040N ...

Page 2: ...ion card allows us to contact you if needed Keep your sales receipt to obtain warranty parts and service and for proof of purchase Attach it here and record the serial and model numbers in case you need them The numbers are located on the back of the DVD recorder Model No __________________________ Serial No __________________________ Purchase Date _________________________________________________...

Page 3: ...the Hide Chapter Feature 31 Chapter 4 Playing Discs Regional Coding 33 Types of discs you can play 33 How to Load and Play Discs 33 Using Different Menus 34 Search Options 34 Playback Options 34 Using the On Screen Info Display 35 Time Display 36 Selecting a Title on DVDs or a Track on Audio CDs or VCDs 36 Chapter Icon 36 Subtitle Icon 36 Repeat Icon 37 Audio Icon 37 Camera Angle Icon 38 Play Mode...

Page 4: ...ter software are used and the discs themselves Things to consider before you connect Protect components from overheating Don t block ventilation holes on any of the components Arrange the components so that air can circulate freely Don t stack components When you place components in a stand make sure you allow adequate ventilation If you connect an audio receiver or amplifier place it on the top s...

Page 5: ...n optional audio receiver After you connect the DVD recorder to your TV choose an option above go to page 14 for general information about connecting an audio video receiver Coaxial Audio video S Video Components Cables Needed Connection Go to Satellite Receiver TV DVD Recorder STOP CH SKIP CH SKIP FWD REV PLAY PAU SE OPEN CLO SE RECORD INPUT Cable Box TV DVD Recorder STOP CH SKIP CH SKIP FWD REV ...

Page 6: ...cks are usually found on high end TVs such as HDTVs multimedia monitors and some of the flat LCD and Plasma TVs or monitors Notes Also remember to connect the left and right audio cables because the Y Pb Pr jacks and cables carry only the picture signal not the sound S Video Jacks and Cables The S Video separate video jack provides better picture quality than a composite video jack sometimes label...

Page 7: ... a compatible component such as a satellite receiver Another set of Input Jacks INPUT 2 are on the front of the DVD recorder for temporarily connecting components such as a camcorder or a video game unit VIDEO Color coded yellow the video cable you use with this jack provides better quality than an RF Coaxial cable but isn t as good as S Video Connect corresponding video cable to a compatible comp...

Page 8: ...IAL INPUT S VIDEO VIDEO OUTPUT Y Pb Pr COMPONENTVIDEOOUT L R AUDIO VIDEO DIGITAL AUDIO OPTICAL OUT If you have a Dolby Digital or DTS receiver or decoder with a Digital Audio Optical Input jack you can achieve enhanced sound quality by connecting a digital optical cable not supplied CH3 Ch4 Switch This switch is also found on VCRs it corresponds to the TV channel you would use to watch a DVD if yo...

Page 9: ...front of the DVD recorder you would press the INPUT button until INPUT 2 Front appears to see what the camcorder is playing on the TV CH SKIP channel down skip reverse Goes to the previous channel in the channel list when you re watching TV When playing a disc goes to the beginning of the current chapter or track unless you re within the first minute of a chapter or the first 15 seconds of a track...

Page 10: ...Input 1 channel or Vid 1 channel If you need help finding your TV s various Video Input Channels go to page 18 The remote control packed with your DVD recorder is capable of being programmed to operate many brands and models of TVs and VCRs For instructions go to page 21 If the remote operates your TV press TV and INPUT to access the Video Input Channel Details about the different kinds of cables ...

Page 11: ...to the OUTPUT AUDIO L left white and R right red jacks on the back of your DVD recorder and to the corresponding Audio Input jacks on your TV sometimes labeled AUDIO IN L and R 3b Connect the video cable The cables you use for the video determine the quality of the picture you ll see on your TV when you re playing DVDs For more information about cables and signal quality go to page 4 Connect the v...

Page 12: ...f you don t know how to access Video Input Channels on your TV go to page 18 for help A general explanation based on the connection shown above follows To watch one program while you record another Tune the TV to its Input 1 channel or Vid 1 channel Tune the DVD recorder to the cable box channel usually channel 2 3 or 4 Use the channel buttons on the cable box to tune to the channel you want to re...

Page 13: ...sometimes labeled AUDIO IN L and R 3b Connect the video cable The cables you use for the video determine the quality of the picture you ll see on your TV when you re playing DVDs For more information about cables and signal quality go to page 4 Connect the video cable yellow to the OUTPUT VIDEO jack on the back of your DVD recorder and to the Video Input jack on your TV sometimes labeled VIDEO IN ...

Page 14: ...might look different than the one pictured here Tune the TV to its Input 1 channel or Vid 1 channel Tune the DVD recorder to the INPUT 1 channel press the INPUT button on the remote Tune the satellite receiver to the channel you want to watch To watch TV satellite programming with the DVD recorder turned off Tune the TV to its CABLE ANTENNA INPUT channel usually channel 2 3 or 4 Tune the satellite...

Page 15: ...cables A set of audio video cables was packed with your DVD recorder Connect the audio cables to the OUTPUT AUDIO L left white and R right red jacks on the back of your DVD recorder and to the corresponding Audio Input jacks on your TV sometimes labeled AUDIO IN L and R 3b Connect the video cable The cables you use for the video determine the quality of the picture you ll see on your TV when you r...

Page 16: ... your ears and could damage headphones or speakers It is important to choose the correct Digital Output setting in the System Options menu For more information go to page 46 DVD Recorder OUTPUT AUDIO L left and R right DIGITAL AUDIO OUT Consult the manual that came with your receiver to connect it properly Connecting your DVD Recorder to an audio video receiver You ll need to consult instructions ...

Page 17: ...nother brand of TV turn on the TV and tune the TV to the correct Video Input Channel if you don t know how to access the Video Input Channel on your TV go to page 18 for help Note You can program your remote to operate most brands of remote controllable TVs Instructions are on page 21 Complete the Interactive Setup The next few pages step you through the series of screens that will appear the firs...

Page 18: ...ble box or satellite receiver there will be few if any channels in the channel list Antenna Cable Antenna Cable Done Searching channels 35 complete 2 channels found Please wait Ch 03 Ch 04 Ch 02 Edit the list of channels found Select your local time zone Eastern Central Mountain Should the clock be automatically adjusted for daylight savings time Yes No 4 Channel List The Channel List contains the...

Page 19: ...e Input Jacks on the TV you used to connect the TV to the DVD recorder If you need help finding the TV s Video Input Channel go to page 18 The Main Menu Appears The main menu appears whenever you turn on the DVD recorder To watch TV press the OK button when the Watch TV menu is highlighted When you change channels the channel banner appears to give you programming information that is available for...

Page 20: ...ote Number VIDEO VID1 S VID 00 93 SIGNAL LINE INPUT 90 VID 1 VID 1 VID SOURCE 91 VID 2 VID 2 VIDEO AUX 92 INPUT How to find your TV s Video Input Channel In order to see what s playing on your DVD recorder you need to tune the TV to the Video Input Channel that corresponds to the Input Jacks on your TV that you used to connect the DVD recorder to the TV The Video Input Channel s varies for differe...

Page 21: ...es might be different in your product than they appear in this book The on screen help text provides the most current operational information Chapter 2 The Remote Control Explanation of the buttons Find out if the remote can operate your TV Programming the remote to operate your TV Programming the remote to operate other components ...

Page 22: ...lays DVD Turns on the DVD recorder and puts the remote in DVD mode so it operates the DVD recorder FORWARD Searches forward through the disc GO BACK Returns you to the previous menu When watching TV goes back to the previous channel INFO Displays the on screen Info Display for details about the Info Display go to page 35 Chapter 2 The Remote Control ON OFF MUTE RETURN GO BACK INPUT ANTENNA 1 2 3 4...

Page 23: ...any of your components press CLEAR until the indicator on the remote turns off 1 Turn on the TV 2 Press and hold the TV button While you continue pressing the TV button press and hold the ON OFF button until the indicator light on the remote turns on then release both buttons 3 Point the remote at the TV Press and release PLAY then wait 5 seconds or until the indicator on the remote stops flashing...

Page 24: ...ching for the correct code you ll know it s found the correct code when the satellite receiver or cable box turns off go to step 4 If after 5 seconds the the satellite receiver or cable box doesn t turn off press PLAY again to tell the remote to search the next set of codes Continue pressing PLAY until the satellite receiver or cable box turns off or you have searched through all of the codes The ...

Page 25: ... 1064 1072 1087 1105 1128 1171 1172 1181 1201 Janeil 1174 JBL 1062 JCB 1002 Jensen 1004 1006 JVC 1012 1013 1014 1054 1060 1065 1066 1067 1157 1158 1159 1182 Kawasho 1002 1004 1006 Kenwood 1004 1006 1019 Kloss Novabeam 1068 1069 1174 1183 KTV 1038 1070 1171 1177 Loewe 1062 Logik 1083 Luxman 1004 1006 LXI 1000 1006 1049 1062 1071 1072 1073 1162 1181 1207 Magnavox 1004 1006 1008 1019 1062 1068 1069 1...

Page 26: ...210 1217 Cable Box SAT CABLE button ABC 5002 5003 5004 5006 5053 Antronix 5008 5009 Archer 5008 5009 5010 Cabletenna 5008 Cableview 5008 Colour Voice 5012 5013 Comtronic 5014 Contec 5016 Eastern 5017 GC Electronics 5009 GE 5000 5001 Gemini 5018 5019 General Instrument 5003 Hamlin 5020 5021 5022 5028 5035 5045 Hitachi 5003 Jerrold 5003 5018 5023 5024 5046 5053 Magnavox 5025 Memorex 5026 Movie Time ...

Page 27: ...of the menu screens buttons and display messages might be different in your product than they appear in this book The on screen help text provides the most current operational information Chapter 3 Recording Playback Features Watching TV Recording DVD R and DVD RW Disc Library Playback ...

Page 28: ...e Each time you press the RECORD button on the remote the recording time increases by 30 minutes up to the maximum limit the status is listed on the far right side of the recording banner The DVD recorder will record for the amount of time you specified and then stop automatically If you press INFO the amount of recording time left appears At anytime during the recording you can extend the recordi...

Page 29: ...th and day To change the frequency once daily weekly etc press the right arrow button When finished press OK highlight moves to Start Time 6 Use the number buttons to enter the time you want to start recording Press the right arrow button to change the a m p m setting When finished press OK the highlight moves to Stop Time 7 Use the number buttons to enter the time you want the DVD recorder to sto...

Page 30: ...d amount of space to keep disc contents If the Disc Library becomes full you ll have to delete some of the discs from the Disc Library to make room Finding a title movie program etc by using the Sort Feature 1 Press MENU the main menu appears 2 Press the down arrow button until Disc Library is highlighted and press OK a list of titles appears 3 Press the right arrow button Each time you press the ...

Page 31: ...ame Title For DVD RW discs or DVD R discs which have not been finalized Play Title Plays the movie program or show Play Full Title Can only be selected for DVD RW discs that may have hidden chapters Delete Title For DVD RW discs only Note You can delete a title from a DVD R disc that hasn t been finalized but the program will still be on the disc You will not be able to access the program once the...

Page 32: ...le Follow the on screen instructions on the confirmation screen to delete the title Not available for finalized DVD R discs If you delete a title from a non finalized DVD R disc the information will still be on the disc but the title will be erased so there won t be any way to access the title Clear Chapters The DVD recorder adds a chapter marker about every 5 minutes of recording You can also add...

Page 33: ...ecording at that point you ll have to wait for a minute or so while the information is updated Now you have two titles named Simon s 4th birthday Start playing the second title and rename it to fit the description of the event Continue this sequence until you ve divided the disc into as many separate titles as you want 12 Additionally you can easily remove any unused part of the disc Typically the...

Page 34: ...ght be different in your product than they appear in this book The on screen help text provides the most current operational information page 32 Chapter 4 Playing Discs Regional Coding Types of Discs You Can Play How to Load and Play Discs Using the Different Menus Search Options Playback Options Using the On Screen Info Display ...

Page 35: ...me discs may not be compatible due to laser pickup and disc design How to Load and Play Discs Turn on the TV and your DVD recorder press ON OFF on the remote or press the ON STANDBY button on the DVD recorder 1 Make sure the TV is tuned to its Video Input channel if you need more information go to page 18 2 Press the OPEN CLOSE button the disc tray opens 3 Place a disc gently into the tray with th...

Page 36: ... press PAUSE again the on screen icon changes from PAUSE to FRAME Each time you press the FORWARD or REVERSE button the picture goes to the next or previous frame To resume normal playback press PLAY Slow Motion in Freeze Frame Mode DVD discs only While a disc is playing press PAUSE Press REVERSE or FORWARD each time you press REVERSE or FORWARD the slow motion will get a little faster until you r...

Page 37: ...splay feature isn t available for the disc you re playing The invalid symbol appears on the screen when you press a button that doesn t have any function To make the Info Display disappear from the screen press INFO on the remote control Text will appear here as you highlight different icons to help you use the Info Display This is the Info Display you ll see when you re playing a pre recorded DVD...

Page 38: ...cks on a CD You can skip to a specific chapter by using the Chapter feature in the Info Display 1 While a disc is playing press INFO on the remote the Info Display appears 2 Press the right arrow button until the chapter icon is highlighted 3 Press the up and or down arrow buttons to go to different chapters Notes You can also use the number button s on the remote to enter the chapter you want to ...

Page 39: ...the disc gets to the beginning point of the segment the A point that you want to repeat 3 Go to the end of the segment you want to repeat Press OK to set the B point if the info banner is not displayed on the TV press INFO and then OK to set the B point The segment you marked will play repeatedly until you turn off the Repeat feature 4 To turn off the Repeat feature highlight the Repeat icon and p...

Page 40: ...feature lets you set up the order in which you want the tracks on the CD to play There are three Play Modes Standard the tracks play in the same order as listed on the CD starting with track 1 This is the default play mode Random the tracks on the CD play in a random order Program the tracks play in the order you designate To use the Program play mode you must set up the order in which you want th...

Page 41: ...n only play true mp3 files in the DVD recorder some products use software to compress mp3 files and convert them to other formats such as MPX Your DVD recorder won t recognize or play MPX files or other types of converted mp3 files JPEG files are image files Make sure that they have a resolution of less than 5 megapixels approximately 2MB Note The time taken for the contents of the disc to be disp...

Page 42: ...T_S_ 04 WHY ON WHY Example of mp3 files Example of JPEG files Musical Slide Show Playing JPEG and mp3 files at the same time The way the JPEG files and mp3 files are displayed when you put the CD R disc in the DVD recorder varies depending upon how you set up the files and folders when you created the CD The musical slide show enables you to display JPEG files while listening to mp3 music files th...

Page 43: ...menu screens buttons and display messages might be different in your product than they appear in this book The on screen help text provides the most current operational information Chapter 5 Menu System Overview of the Menu System Watch TV Menu Disc Menu Disc Library Menu Timer Menu Setup Menu ...

Page 44: ...is DVD recorder You can use the Disc Library as a search tool by sorting recorded programs As much information as possible is stored automatically The information is stored in the DVD recorder s memory and has storage limits You may need to delete some library contents in the future to make room for new recordings For detailed information about the Disc Library go to page 45 Timers set up timer re...

Page 45: ... RW discs only If you have made edits to the disc such as adding or deleting chapter markers or hiding chapters this option enables the edited version of the disc to be compatible with other DVD players If you press OK when one of the recordings titles is highlighted the following choices appear Rename title Play title Play full title Delete title and Clear chapters Player Menu shows you how a DVD...

Page 46: ...vie but it will take up a smaller portion of the screen vertically The movie might appear with black bars at the top and bottom of the screen 4 x 3 Standard Choose this setting if you want the movie to fill the entire screen of your TV This might mean that parts of the picture the left and right edges won t be seen Most discs that are produced in a widescreenonly format can t be cropped in this fa...

Page 47: ...imits and then lock the player Don t confuse the DVD recorder s Parental Control feature with a parental control feature that may be in your TV often referred to as V Chip The ratings described here refer to discs that you play in the recorder not TV programs Parental Control System Options Recording Options Disc Options Languages Installation Lock Rating Limits Unrated Titles Lock Rating Limits U...

Page 48: ...gital Output If you connected your DVD recorder to a receiver via the DIGITAL AUDIO OUT jack on the back of the player choose the type of receiver or decoder you have Dolby Digital or DTS Note If you select DTS and you don t have a DTS receiver connected to the DVD recorder you won t hear any audio or the audio will be distorted SRS TruSurround The TruSurround feature simulates a six speaker liste...

Page 49: ...o select it Audio the language that appears when you access this menu the first time reflects the option you chose during the interactive setup You can change the audio language by highlighting an option and pressing the OK button The language selected will only apply when it is available on the disc Subtitles Some movies on DVD discs have subtitles Set up your default settings in this menu You ca...

Page 50: ... signal and put the latest channels in the DVD recorder s channel list Use the arrow buttons to highlight Channel Search and press OK to begin a progress indicator appears to let you know how quickly the search is being completed Clock Setup If the clock is incorrectly set or you skipped this step during the interactive setup you can set the DVD recorder s clock using the number buttons on the rem...

Page 51: ...our product than they appear in this book The on screen help text provides the most current operational information Chapter 6 Additional Information Troubleshooting Handling Cautions Maintenance of Cabinet Limited Warranty Accessory Information Copying content from DVD R or DVD RW disc to VCR videocassette Copying VCR videocassette to a DVD R or DVD RW disc ...

Page 52: ...ibrary The time clock is wrong Go to the System Options menu and select AutoClock Set it to off and then set the time manually via the Clock Setup menu which is found in the Installation menu DVD Problems Disc won t eject When you put a disc into the player the player may take up to 15 seconds to read the disc You won t be able to eject the disc during this time Wait 15 seconds and try again Maybe...

Page 53: ...ou can t advance through the opening credits and warning information that appear at the beginning of movies because the disc is programmed to prohibit that action Subtitle and or audio language is not the one selected from the initial setting If the subtitle and or audio language does not exist on the disc the disc s priority language will be selected instead Set the subtitle and or audio language...

Page 54: ...rates like 192 kb sec or more only rarely give even better sound quality Conversely files with sampling rates below 128 kb sec won t be played Can t get to DVD recorder s main menu Press the STOP button until the main menu appears or press the left arrow button to return to the previous menu If that doesn t work remove the mp3 disc from the disc tray Can t make the Info Display appear The Info Dis...

Page 55: ...ng other components to this unit be sure to turn all components off Don t move the player while a disc is being played The disc may get scratched or broken and the player s internal parts may be damaged Don t put any container filled with liquid or any small metal objects on the unit Don t put your hand into the disc tray Don t place anything other than the disc in the disc tray Exterior influence...

Page 56: ...he online Product Registration on RCA com or complete and mail the Product Registration Card packed with your unit It will make it easier to contact you should it ever be necessary The return of the card is not required for warranty coverage Limitation of Warranty THE WARRANTY STATED ABOVE IS THE ONLY WARRANTY APPLICABLE TO THIS PRODUCT ALL OTHER WARRANTIES EXPRESS OR IMPLIED INCLUDING ALL IMPLIED...

Page 57: ...rice 15 95 6 feet part number DV6 price 19 95 Optical Plug to Mini Plug 3 feet part number DV3M price 15 95 6 feet part number DV6M price 19 95 busy protected wiring reset off Surge Protector part number SCTV4000C price 49 95 How to Order On Line Accessories may also be purchases at www rca com accessories subject to availability By Phone To place an order by phone have your Visa MasterCard or Dis...

Page 58: ...al to the In From Antenna jack on the VCR 3 Make sure all of the components TV VCR and DVD recorder are plugged into working power outlets 4 Turn on all of the components 5 Tune the TV to channel 3 or 4 depending on the whether the VCR s 3 4 switch is set to 3 or 4 because the VCR is connected to the TV with an RF Coaxial Cable 6 Change the channel on the VCR to its Video Input Channel sometimes c...

Page 59: ...he other end to the Cable Antenna Input jack on your TV sometimes labeled CABLE ANTENNA 4 Make sure all of the components TV VCR and DVD recorder are plugged into working power outlets 5 Turn on all of the components 6 Tune the TV to the Video Input Channel that corresponds with the Audio Video Input jacks you used to connect it to the DVD recorder 7 Insert the videocassette you want to record ont...

Page 60: ...This page intentionally left blank ...

Page 61: ...This page intentionally left blank ...

Page 62: ...This page intentionally left blank ...

Page 63: ......

Page 64: ...s manual or on the carton This will only add delays in service for your product Thomson Inc 10330 North Meridian Street Indianapolis IN 46290 2004 Thomson Inc Trademark s Registered Marca s Registrada s Printed in China TOCOM 16421400 Visit our website at www rca com THOMSON ...

Reviews: