RC-Xplanes EDGE 540 T Outrunner Tabs Instruction Manual
Page 9 of 10
Distributed by RC-Xplanes 541-261-2707
rcxplanes.com
A
2005
7E:
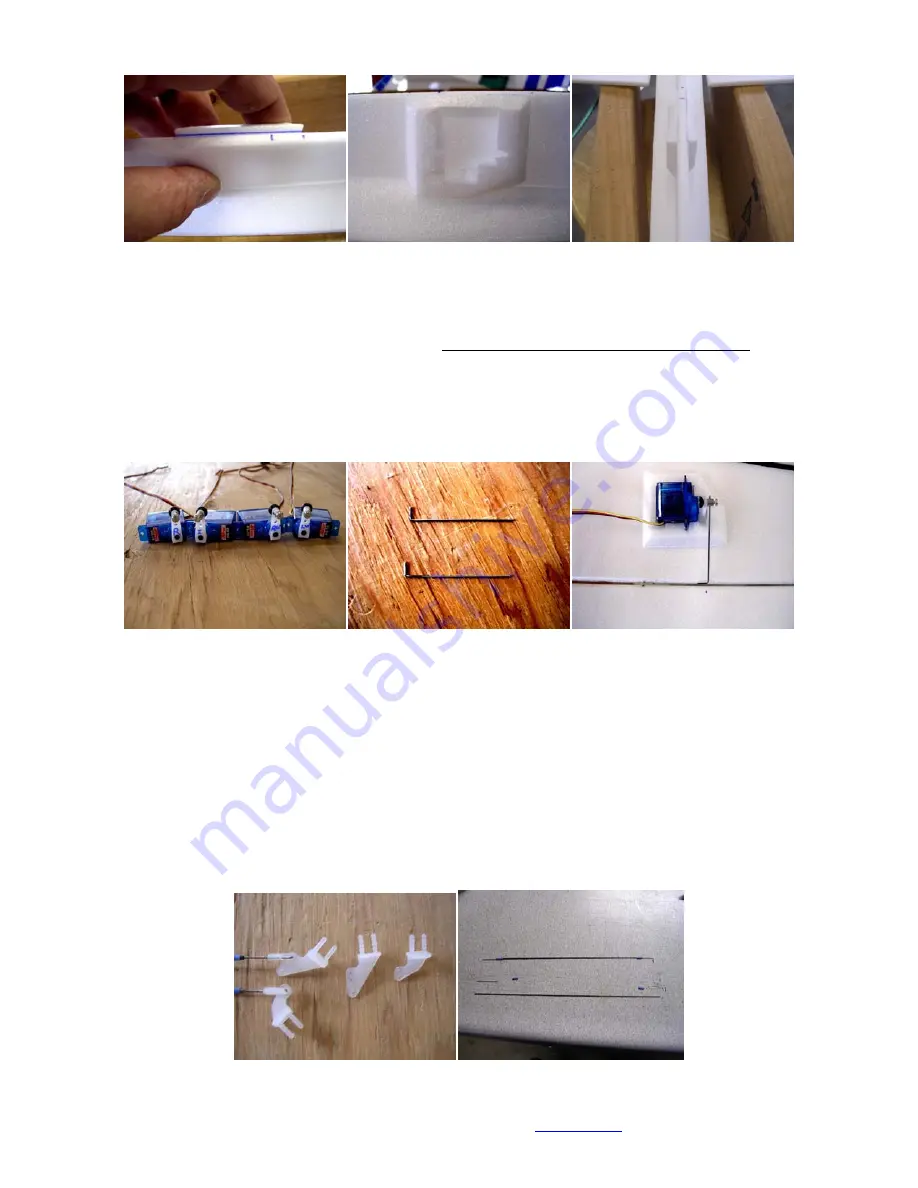
Prepare four servos as shown. Start with a fresh model memory in your radio if possible. Zero all trims and sub trims. Center all of
your servos with your radio for each channel and mark the servos for that channel. Use the long double-sided arms with the
largest holes if you are using HiTec HS55s. Test each one of the arms on each servo to get the best 90 degree orientation
without trims on each servo. Mark the horn arms for their location and cut off the unnecessary opposing arms. Install the EZ
connectors to the farthest holes from center. Press the plastic retainers on the posts with the rounded side toward the arm. Install
the horns to your centered servos as they were marked. MAKE SURE THE SERVO HORN SCREWS ARE TIGHT.
Use a dab of clear silicone inside the center of each servo mount. Make sure the servos are centered and the horn screws are
tight. Press the appropriate servo into its mount. If needed, tape or clamp the tail control servos in place while the silicone cures.
Gravity should hold the aileron servos in place
Find the 0.032” wire and make two, pieces with 90 degree bends on one end at 2” in length from the bend to the end for the
aileron control rods. Loosely install the rods in the wing servos with the bent end facing the fuselage. Mark a point just inside the
rod on the aileron for the control horn center position. The Elevator control horn center location will be just behind the right
elevator joiner tube and 0.75” out from the fuselage. The Rudder control horn mounts on the left side at 1 3/8” from the bottom
edge of the rudder.
7F:
Before Installing the surface control horns, you will need to modify all four of them to look like the one at the far right of the left
picture below using a pair of diagonal cutters.
Once modified, the control horns will allow for full control surface movement and can be mounted at the locations marked in step
7E. The marks are the centerline of the control horn. Place the control horn on the surface with the center aligned with the mark
and the holes aligned with the hinge centerline. Press them lightly to make two dents where the posts will go. Push a “T” pin
through the surface at these dents. Apply some Medium CA to the posts and the bottom surface of the horn base. Push the
control horn posts into the surface holes until the base contacts the surface and apply CA accelerant.
Find the 24” x 0.050” carbon rod, the remaining 0.032” wire and the 2” section of heat shrink tubing. Make two more 90 degree
wires that are 1” long from the bend. Make two straight 1” long wires. Cut four 0.25” sections of the heat shrink. Make one 0.050”
carbon rod 9.5” long and one 7.75” long. It is very important to sand the wire and the carbon rod for a good CA bond. Sand one
end of each carbon rod and the straight portions of all four wires. Slip a 0.25” piece of shrink tube over the sanded end of the
carbon rod at 1/32” from the end and insert the sanded end of the 90 degree bent wire into the heat shrink tube sticking out 1/32”
past the other end of the shrink tube. Shrink the tube in this position. Apply a drop of thin CA to the wire at the carbon rod side
and allow it to flow through the inside of the heat shrink tube toward the 90 degree end. When you see the CA coming through
the heat shrink, set aside for 2-3 minutes then apply accelerant. Repeat this for the other carbon rod. Insert the 90 degree bend
into the lowest hole of the control surface horn and align the rod to the centered servo arm E-Z connector. Mark this end at 0.5”
from the E-Z connector and cut it off there on both control rods. Sand this end of the carbon rod and repeat the attachment
procedure above for the two straight 0.032” wire ends.


