background image

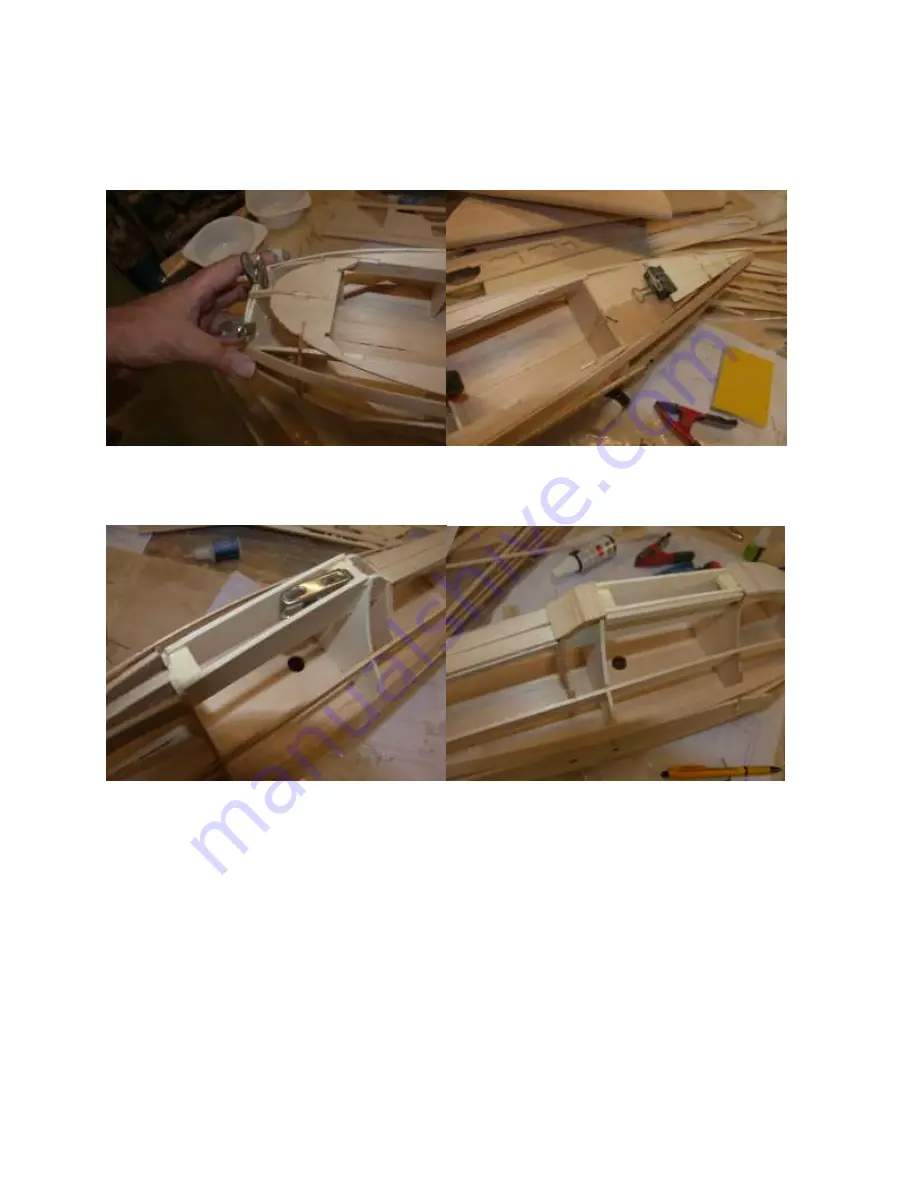
Use clamps and pins to join halves , making sure for straightness Former F2B is placed in the fuselage 
to F2 Note that F2b has the M3 and M4 nuts glued in before placing to the fuselage  
F16 and F24 is also placed  


Place bottom formers  and scrap sheeting bottom nose part.and sand to match the formers 
As the fuselage sheeting is glued to that parts 


Make up the canopy formers (note the kit parts look different), place temporarly canopy closing and 
fastener hooks 

Summary of Contents for Komet

Page 1: ... perfect fit CAD Drawn Plans The plans in this kit are not copied from a master set They are originals drawn directly from the CAD program where the airplane was designed We do this because it allows us to use colour which helps you better visualize the various components of the airplane and we can use better quality paper which greatly reduces the possibility of shrinkage Since you re going to bu...

Page 2: ...k out of the sheets Hardware and a motor mount are not included in the kit There are so many choices for quality hardware that these choices are left to the individual preferences of the builder rather than include something in the kit that you ll probably throw away anyway This aircraft is not a toy It must be flown in a responsible manner according to the rules set forth by Law The builder assum...

Page 3: ... and trailing edges cut from the supplied balsa as per drawing and sand the hnge lines flat with the ribs do not sand the leading edge yet Cut and join the sheeting as per plan Place sheeting to the leading edge and over the ribs to the trailing edge Other halve also take them of the drawing test fit the spruce 3x10 joiner and join the halves Use clamps do not glue the spruce joiner yet used it on...

Page 4: ...tect it with plastic Start by making the bottom sheeting from the supplied balsa sheet place the sheets on the work plate and nail them down use cello tape to connect the edges take them of and glue the edges with thick ca place on the work plate and sand down the glued edge turn the sheet over and take of the cello tape and sand the edges now there will be one smooth side and a lesser smooth side...

Page 5: ...ou can mark the formers with a soft pencil if you like sand of all holding tabs PLacemain formers and place ribs check the drawing for the correct position of the Formers Mark the main formers ribs on the bottom sheeting place main formers on sheeting place ribs do not glue yet make sure for straightness ...

Page 6: ... ribs Place ailevon leading edge between the ribs to the bottom sheeting Place servo and scrap fill for taking horns and hinges Place servo and wires into the wing place servos on extra 1 5mm balsa we shrinked the servo in shrinking foil and ca them to the bottom sheeting with a fill on top make also a opening for the servo arm in the bottom sheeting cut the top sheeting as per plan Note the X mar...

Page 7: ...important is that they all have the same height this will give the correct washout place then under the trailing edge as per drawing and pin down the wing bottom on the X markings and the at the helpformer position as on the drawing Do make small cuts in the bottom sheeting at the aileron hinge line and edges this will be very helpful later Apply the top sheeting with slow ca take of the wing from...

Page 8: ...e sand leading edge to shape as per plan place wing tips and take out ailerons and sand edges as per plan Sand tip step by step flatten first then round it of nicely When sanded cut out ailevons you did make small cuts from the top before it was sheeted ...

Page 9: ...ied hinges for the ailevons they are easy and do perform very well but do pin them with needles or a toothpin and ca place hinges place servo arm and make opening in aileron for the horns center servo and aileron and glue in horns we used very secure Z Bends ...

Page 10: ...the drawing Place formers step by step one by one without glue pin the mid formers to the building board It is a but puzzling fit formers one by one When Former F11 is added and alignment is ok you can slowly ad some glue points to this ...

Page 11: ...ignment is ok the use thin ca to fasten the formers Start with a 2x12 strip to give a bit stability to the fuselage also place the 3mm bottom sheeting strip 3x12mm Take of fuselage halves from the building board ad slow glue to all joining formers ...

Page 12: ... M3 and M4 nuts glued in before placing to the fuselage F16 and F24 is also placed Place bottom formers and scrap sheeting bottom nose part and sand to match the formers As the fuselage sheeting is glued to that parts Make up the canopy formers note the kit parts look different place temporarly canopy closing and fastener hooks ...

Page 13: ... and 3x6 stringers there is a angle at the canopy former see the drawing Place layer of 3mm balsa sheeting on top and sand to edges Sand the bottom edges and start sheeting with strips of 2x12 balsa shorten them the leftovers are needed to Ad strips to give more stability to the fuselage ...

Page 14: ...ilwheel steering tube also Now ad the sheeting strip by strip even on each side you might need to taper some strips or even wet some for easyer bending if neccesary The sheeting is overlapping the side former F11 that is a little edge sanded Turtleback sheeting also ...

Page 15: ...The bottom sheeting is also build up in some parts Place nose fill with some scrap balsa and sand to shape also for fin fairing Sand complete fuselage and fill all open edges with lightweigt filler we thinned down the filler with water and brushed it up after dryine it sands of easy with 60gritt sand paper ...

Page 16: ...e fuselage with the 6x15 spruce joiner and the 6mm aligning dowels Check for straightnes or twist look from behind and check the alignment of the traiking edges they should be equal if not adjust with the opening of the alignment dowel untill it is straight and in line with the other wing ...

Page 17: ...that the kit version has a 6x15 battery strip glued in F12 and F15 see the drawing Cut out the wing fairings along the lines the small back fairing fits into the large parts it might be easy to glue the back fairing into the large frontfairing before fitting all onto the fuselage and wing cut ...

Page 18: ...iece Test fit and glue to wing and fuselage finish with ultralight filler and sand Place rudder steering cable through fuselage straight line from nose to back Bend 2mm steel wire for tailwheel glue a short piece of steering cable into the rudder to take the steel place hinges and check for free movement place rudder horn into rudder harden horn with thin ca ...

Page 19: ...eel a scrp piece of wood is placed between the tube and ring this makes for enough free space Now bend the steel wire use 2 pliers taking care not to ruin the fuselage after this you can place the rudder to the fin Make up the canopy place formers and hooks paint all black before gluing the canopy ...

Page 20: ...ge and canopy formers we used cellotape to hold canopy and ca to glue to formers Landing gear dump unit Make the cross with the axel retainers make the 2mm mild steel slot wire and glue with epoxy to cross place short piece of 4mm dowel into cross dowels are slightly tapered for light fit ...

Page 21: ...en to fuselage with the 2 9x13mm fasteners Place the pre bend axel to the cross and fasten with the landing gear straps and fasten with the 2 9x13 fasteners yu might need some fitting and sanding before it is working ok Motor cowl Place the cowl former F1 on approx 9 10mm balsa scrap place cowl over it and it should fit with minimum play between former and cowl if not adjust until good fit glue wi...

Page 22: ...nds great and smooth when ready a thinned layer of sanding dope is OK Now finish with Vallejo humbrol or we used cheap spray cans take care for the vacuumformings as some paints will not hold as good Have you found an error in the drawing or parts or instructions just mail us at info rbckits com I am sure we can find a solution for your build Flying The ME163 easy lifts but do make speed do not pu...

Page 23: ...y is in the tail section onto the 6x15 strip Centre of gravity as on the plan without wheels you might want to have it a few mm forward you will see this back in up trim of the ailevons The ME163 will also fly nice slow do not slow it down toooo much when cornering it will stall Throws of the rudders etc we like them big but it might be to much so always make them large and have a dual rate button...

Reviews: