background image

3 | razer 


2. TECHNICAL SPECIFICATIONS 


6400dpi Razer Precision 4G Optical Sensor 


Ergonomic Right-Handed Design With Textured Rubber Side Grips 


5 Independently Programmable Hyperesponse Buttons 


Razer Synapse 2.0 Enabled 


1000hz Ultrapolling / 1ms Response 


On-The-Fly Sensitivity Adjustment 


Always-On Mode 


200 Inches Per Second And 50g Of Acceleration 


Gold-Plated USB Connector 


Seven-Foot, Lightweight, Braided Fiber Cable 


Razer Synapse 2.0 Enabled 


Approximate Size : 127 mm / 5.00” (Length) x 70 mm / 2.76” (Width) x 44 mm / 

1.73” (Height) 


Approximate Weight: 105 g / 0.23 lbs 

Summary of Contents for PeathAdder

Page 1: ...ncing and optimizing the Razer DeathAdder utilizing next generation technologies and further ergonomics tweaks The Razer DeathAdder s optical sensor was upgraded from 3 5G to the cutting edge 4G infra...

Page 2: ...1 PACKAGE CONTENTS SYSTEM REQUIREMENTS REGISTRATION 2 2 TECHNICAL SPECIFICATIONS 3 3 DEVICE LAYOUT 4 4 INSTALLING YOUR RAZER DEATHADDER 5 5 CONFIGURING YOUR RAZER DEATHADDER 6 6 SAFETY AND MAINTENANCE...

Page 3: ...REMENTS PC or Mac with a free USB 2 0 port Windows 7 Windows Vista Windows XP 32 bit Mac OS X 10 6 10 7 Internet connection 100MB of free hard disk space REGISTRATION Please visit www razerzone com re...

Page 4: ...esponse Buttons Razer Synapse 2 0 Enabled 1000hz Ultrapolling 1ms Response On The Fly Sensitivity Adjustment Always On Mode 200 Inches Per Second And 50g Of Acceleration Gold Plated USB Connector Seve...

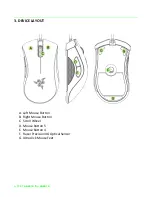
Page 5: ...4 For gamers by gamers 3 DEVICE LAYOUT A Left Mouse Button B Right Mouse Button C Scroll Wheel D Mouse Button 5 E Mouse Button 4 F Razer Precision 4G Optical Sensor G Ultraslick Mouse Feet...

Page 6: ...r into the USB port of your computer Step 2 Download the Razer Synapse 2 0 installer from www razersupport com Step 3 Run the installer and follow the onscreen instructions Step 4 Register for a Razer...

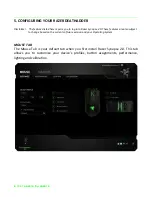
Page 7: ...Razer Synapse 2 0 These features are also subject to change based on the current software version and your Operating System MOUSE TAB The Mouse Tab is your default tab when you first install Razer Syn...

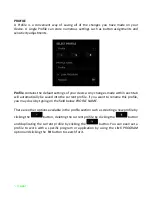
Page 8: ...ically be saved into the current profile If you want to rename this profile you may do so by typing on the field below PROFILE NAME There are other options available in the profile section such as cre...

Page 9: ...STOMIZE TAB The Customize Tab is where you can modify the basic functionalities of your device such as button assignments to suit your gaming needs The changes made in this tab are automatically saved...

Page 10: ...Default This option enables you to return the key to its original function To choose the DEFAULT simple select it from the Button Assignment Menu Keyboard Function This option enables you to change th...

Page 11: ...n Scroll Down Performs a Scroll Down command using the assigned button Macro A Macro is a prerecorded sequence of keystrokes and button presses that is executed with precise timing By assigning a Macr...

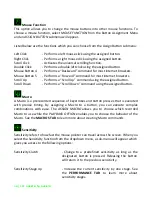
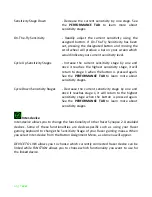
Page 12: ...TAB to learn more about sensitivity stages Cycle Down Sensitivity Stages Decrease the current sensitivity stage by one and once it reaches stage 1 it will return to the highest sensitivity stage when...

Page 13: ...ich profile to use An on screen display will automatically appear whenever you switch profiles Launch Program The Launch Program allows you to run a program using the assigned button When you select L...

Page 14: ...Tab the changes made here are automatically saved to your current profile Listed below are the performance options and their descriptions Sensitivity Sensitivity pertains to how much effort is needed...

Page 15: ...sitivity stage up down buttons You may use the ENABLE X Y SENSITIVITY concurrently with this option Acceleration Acceleration increases the cursor s movement speed depending on how quickly you move th...

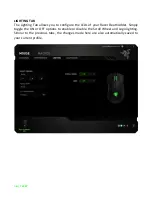
Page 16: ...you to configure the LEDs of your Razer DeathAdder Simply toggle the ON or OFF options to enable or disable the Scroll Wheel and Logo lighting Similar to the previous tabs the changes made here are al...

Page 17: ...r better tracking To use this feature you must select the ON option under SURFACE CALIBRATION The LIFTOFF RANGE allows you to set the distance in which the sensor stops tracking as it is being lifted...

Page 18: ...en paired with Razer mouse mats If you are using a Razer mouse mat click the button to access the Razer Mats submenu This menu showcases an extensive list of Razer branded mouse mats Select the approp...

Page 19: ...18 For gamers by gamers Other Mousing Surfaces If you are using a non Razer mouse mat or a non standard mousing surface select OTHERS then click the button to access the manual calibration submenu...

Page 20: ...y adjust the Razer Precision Sensor to suit any mousing surface To begin calibrating the sensor click the button After clicking the button Razer Synapse 2 0 will begin tuning the sensor Please avoid m...

Page 21: ...tire mousing surface release the left mouse button This will bring you back to the manual calibration submenu which contains new information regarding your mousing surface There are also other options...

Page 22: ...ong macro commands at your disposal The Macro section works similarly to Profile wherein you can rename a macro by typing on the field below MACRO NAME There are also other options available in the ma...

Page 23: ...the button to end the session The Macro section allows you to input the delay in between commands In RECORD DELAY the delay in between commands are registered as how it is entered The DEFAULT DELAY u...

Page 24: ...anged sequentially with the first command shown at the top of the screen The button allows you to edit a particular command and the button enables you to delete a command The and buttons gives you the...

Page 25: ...u have pressed the button a new display window will appear beside the list of macro commands The dropdown menu on this window allows you to choose a keystroke or a delay to be added in before or after...

Page 26: ...25 razer You may add in a new set of macro commands by clicking the button on the keystroke menu or input time delays on the duration field using the delay menu...

Page 27: ...der abnormal current loads 4 Keep the device away from liquid humidity or moisture Operate the device only within the specific temperature range of 0 C 32 F to 40 C 104 F Should the temperature exceed...

Page 28: ...omfort while using your mouse such as pain numbness or tingling in your hands wrists elbows shoulders neck or back please consult a qualified medical doctor immediately MAINTENANCE AND USE The Razer D...

Page 29: ...registered concerning the product in this guide Furnishing of this guide does not give you a license to any such copyright trademark patent or other intellectual property right The Razer DeathAdder th...

Page 30: ...ceeding the retail purchase price of the Product GENERAL These terms shall be governed by and construed under the laws of the jurisdiction in which the Product was purchased If any term herein is held...

Reviews: