


1.
RayNet data connection.
2.
12V / 24V power connection.
Note:
• A separate power cable is supplied with all
Quantum
™
Radar variants.
• Not all Quantum
™
radar variants are supplied
with a RayNet cable. Refer to the
Chapter 2
Document and product information
section
for more information.
• Refer to the
11.4
RayNet to RayNet cables and
connectors
section for information on suitable
accessory RayNet cables.
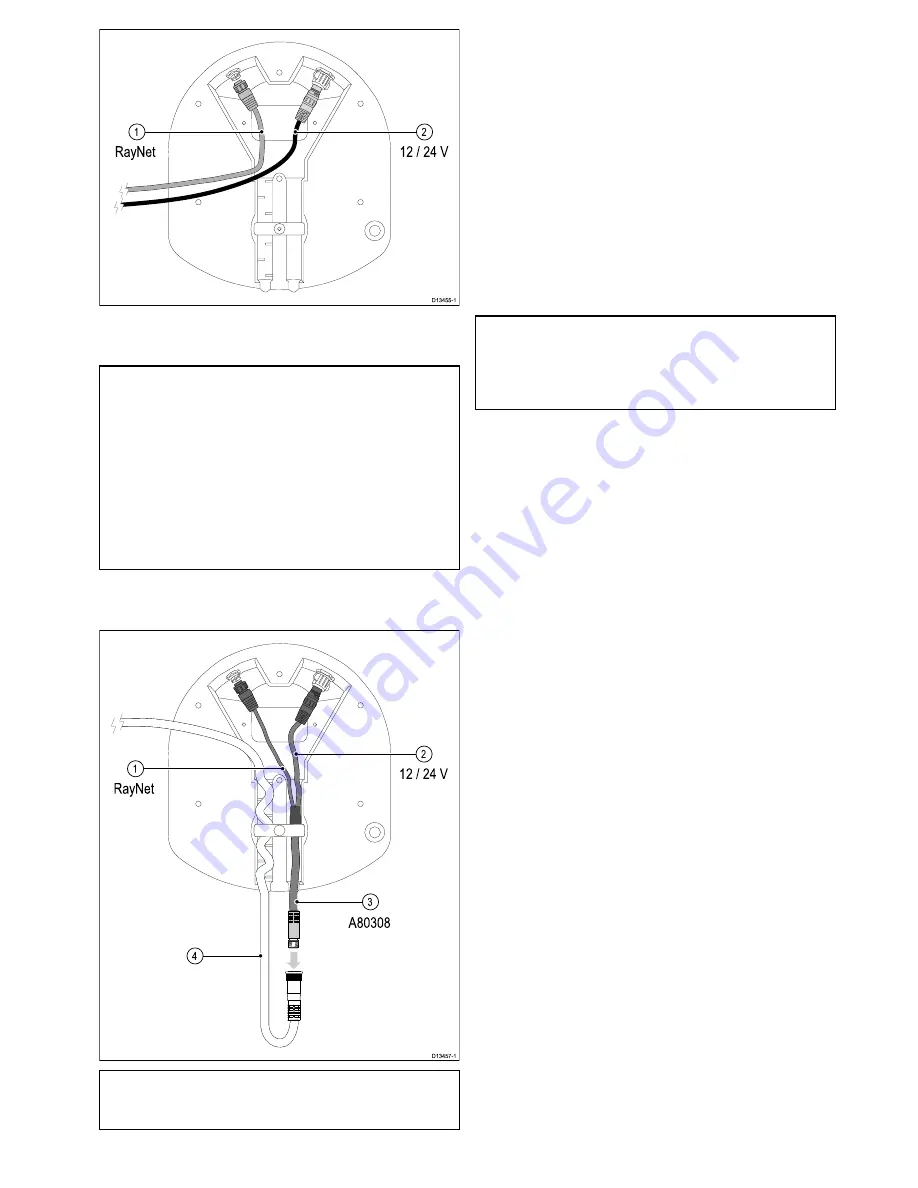
Using an existing combined power / data cable
from an older Raymarine Digital Radar
Note:
The Y-adapter cable is actually white. For
clarity, it is shown in the above drawing in different
colors.
1.
RayNet data connection. This cable is part of
the
A80308
Y-adapter accessory cable.
2.
12V / 24V power connection. This cable is part
of the
A80308
Y-adapter accessory cable.
3.
A80308
Y-adapter accessory cable (not supplied
with the scanner).
4.
Existing combined Digital Radar power / data
cable.
Making connections
Follow the steps below to connect the cable(s) to
your product. If you intend to use the scanner’s Wi-Fi
functionality to connect to your multifunction display,
you need only connect a power cable to the scanner.
Note:
If your vessel is already fitted with a
combined power / data Digital Radar cable, you
can use a Y-adapter (part number A80308) to
connect the existing cable-end to the scanner’s
connectors.
1. Ensure that the vessel's power supply is switched
off.
2. Ensure that the multifunction display being
connected to the scanner has been installed
in accordance with the installation instructions
supplied with that device.
3. Ensure the power connector locking collar on the
scanner is in the unlocked position.
4. Route the power cable and optional data cable
within the scanner base, as shown in the cable
routing illustrations in this section. Cable routing
depends on whether you mount the scanner on
a platform or on a pole, and on whether you
are using a Y-adapter to connect to an existing
combined power / data Digital Radar cable.
5. Ensure that the power cable connector is
orientated so that the notch lines up with the
guide in the connector.
6. Push the power cable connector all the way into
the scanner’s power connector.
7. Rotate the locking collar clockwise until it is in the
locked position (2 clicks).
8. Push the optional data cable fully onto the
corresponding connector on the scanner.
9. If you are using a Y-adapter, make the final
connection between the adapter and the existing
combined power / data Digital Radar cable.
Cables and connections (Quantum variant with RayNet)
29


