


How do the controls work?
D6762_3
ERASE WAYPOINT
SORT LIST
SET DEFAULT SYM
& GROUP...
WAYPOINT
GROUPS...
VIEW AND EDIT
DETAILS…
EDIT DEFAULT
SET UP DEFAULT
SYMB GROUP
WAYPOINT AT
CURSOR
WAYPOINT AT
VESSEL
WAYPOINT AT
LAT/LONG...
GO TO WAYPOINT
OPTIONS…
REVIEW AND EDIT
WAYPOINTS
WPTS/
MOB
PAGE
ACTIVE
MENU
DATA
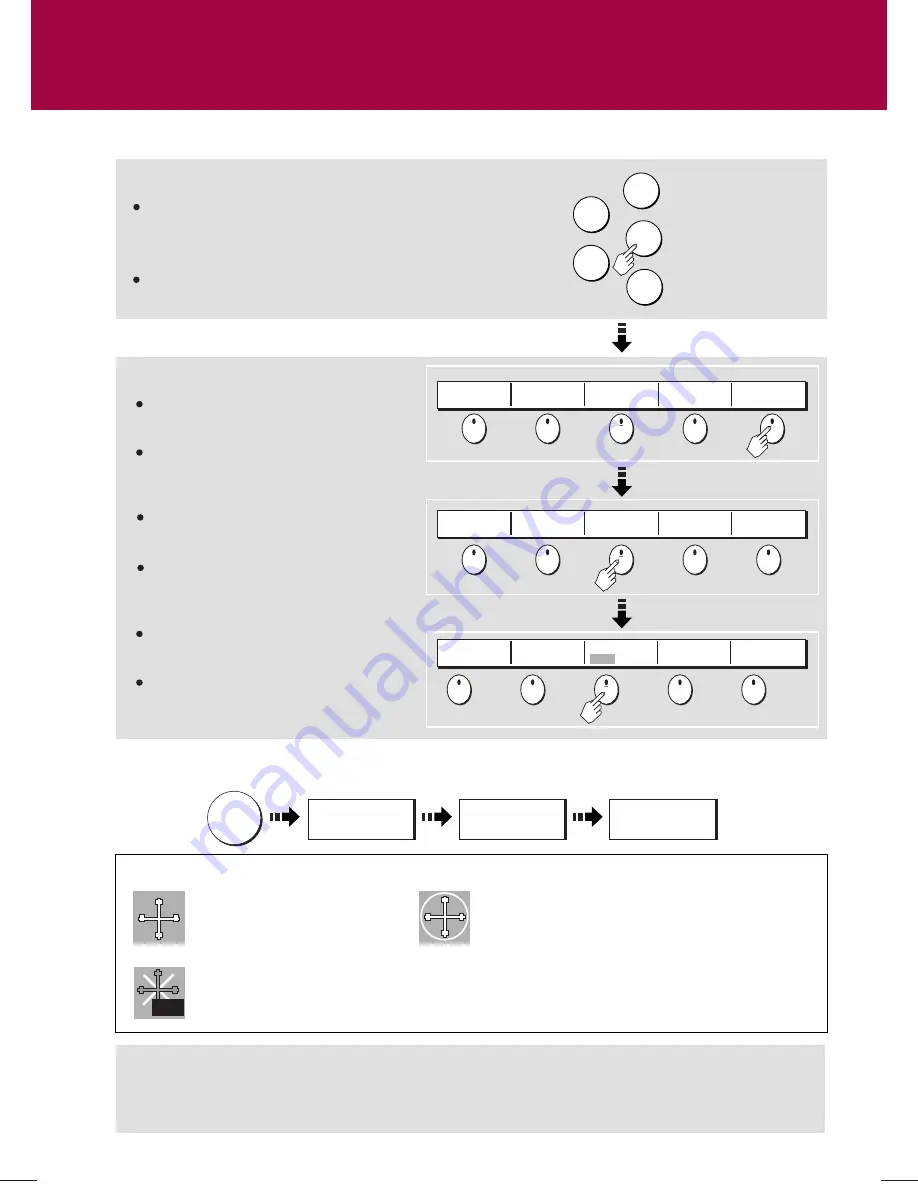
Example:
This example shows
the series of button
and soft key presses
required to change
the waypoint default
symbol or group.
Access system functions or change what you see on-screen.
Within the text of this document they are written in bold capitals
e.g.
WPTS/MOB.
Press and hold to access short cuts - see individual buttons on
facing page.
They change depending on application or
function being performed.
Press and hold
MENU
to display help
information for the currently displayed
soft keys.
Press the corresponding key (below the
screen) to select.
Further soft keys may be displayed.
If a key has several options, each press
will highlight the next option.
If a key displays a single value or a slider
above, use the rotary control to adjust.
Within the text of this document they are
written in capitals e.g. SORT LIST.
Buttons
Soft keys
D7366-1
The Cursor appears on the screen as
a white cross.
To make it easier to locate on screen, the cursor
changes to a circle with a cross in it, when it is moved
after a 10 second period of inactivity.
The cursor is context-sensitive. When it is placed over an object e.g. a waypoint or chart feature, it
changes color and a label or information associated with the object is displayed. When you place
the cursor over certain items, the soft keys change to enable you to access related operations.
WPTS/
MOB
REVIEW AND EDIT
WAYPOINTS ...
SET DEFAULT SYM
& GROUP...
SET UP DEFAULT
SYMB GROUP
This process of pressing buttons and soft keys to navigate to the required function, is simplified within this
guide and represented by a strip e.g.
The Cursor
WPT
Simulator:
To practice using your Display without data from a GPS scanner or fishfinder, switch on the simulator via the
System Setup menu.
General Operation
Using the controls
Card No. 2


