


Screen
item
Description
5
Icon
— each icon represents an application
page. A page can display multiple applications
simultaneously.
6
Status bar
— the status icons confirm the status
of externally-connected equipment, including
GPS, AIS, radar, sonar and autopilot units.
Pages
Pages are made up of 1 to 4 panes that are used
to display applications on your multifunction display
(MFD).
Pages are accessed using the icons on the
Homescreen.
• You can create up to 2 application panes per page
using an MFD that has a screen size of 7 inches or
less.
• You can create up to 4 application panes per page
using an MFD that has a screen size of greater than
7 inches.
• MFDs with a screen size of 7 inches or less can view
pages with more than 2 application panes but only if
they are sharing the Homescreen of an MFD which is
capable of creating those pages.
Pages can be customized, enabling you to group your
applications into different pages, each designed for
a specific purpose. For example, you could have a
page that includes the chart and fishfinder applications,
suitable for fishing, and another page that includes the
chart and data applications, which would be suitable for
general sailing.
Icon for a page featuring a single
application.
Icon for a page featuring multiple
applications.
You can also define the layout for each page, which
determines how the applications are arranged on the
screen.
Changing an existing page on the homescreen
With the homescreen displayed:
1. Select
Customize
.
2. Select
Homescreen
.
3. Select
Edit Page
.
4. Select the page icon that you want to change.
The Customize menu options are displayed.
5. Select the appropriate page layout (for example,
“Splitscreen”).
6. Select the application(s) you want to display on the
page, either by selecting the relevant menu item or
dragging it over to the displayed page.
7. Select
Finish
.
The Rename Page dialog is displayed.
8. Use the on-screen keyboard to name the page, then
select
Save
.
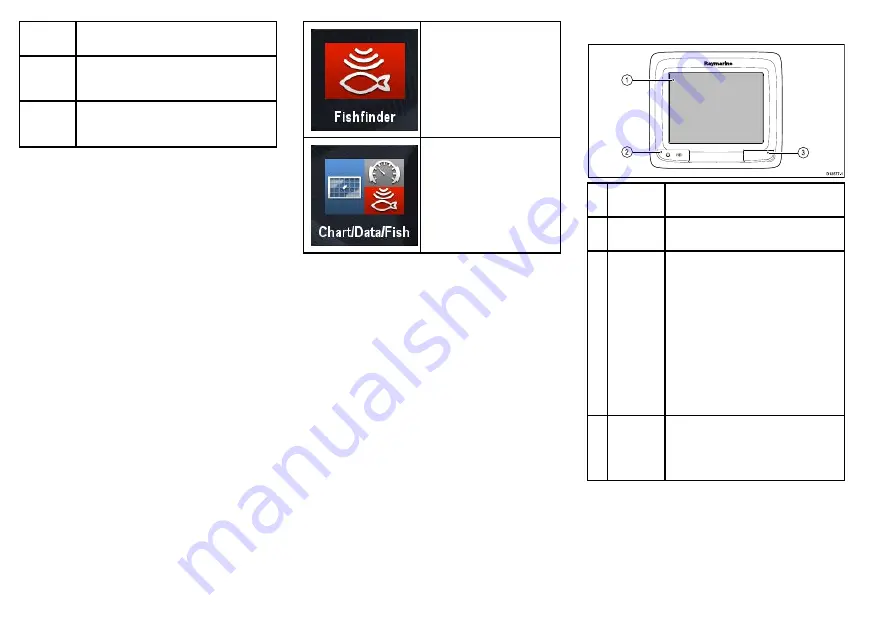
a Series Controls
D12577-1
3
1
2
Descrip-
tion
Functions
1
Touch-
screen
Touch the screen to operate functions,
including all menu operations.
2
Power
• Press once to switch the unit ON.
• Once powered on, press the Power
button again to open the shortcuts page
where you can adjust the brightness,
perform a screen capture, access
Powersave mode or access the power
controls of external devices.
• Press and hold to switch the unit OFF.
• If an integrated pilot is engaged, press
and hold to put the autopilot into
STANDBY mode.
3
Card
reader
slot
MicroSD card reader
• a6x and a7x = 1 x MicroSD card slot
• a9x and a12x = 2 x MicroSD card slots
Touchscreen overview
The touchscreen provides an alternative to using
physical buttons to control your multifunction display.
All functions can be accessed using the touchscreen
16
a9x / a12x
Summary of Contents for a125
Page 2: ...ENGLISH Document number 88032 1 Date 05 2014 ...
Page 18: ...18 a9x a12x ...
Page 19: ......
Page 20: ...www raymarine com ...


