background image

12

Additional Information

References | Références | Referencias

Please read all the instructions and precautions in this manual before using the vacuum

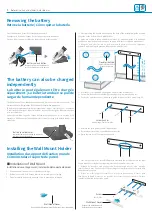
Battery Removal and replacement

˙Vacuum will not operate until battery is securely installed.

˙Battery could fall and become damaged if not securely locked in place

˙When removing the battery, make sure the power cord is not attached to the battery.

Charging the battery and safety

˙Do not charge the battery right after vacuuming when the battery is still hot.  Charge the 

battery after a few minutes when it is cooled down. 

˙Removing the battery during operation could cause malfunction

˙Do not cause impact to the battery such as dropping the battery.

˙Battery is best kept at temperature between 5C-45C (41F - 113F) for normal operations

˙When installing the battery, make sure a click sound is heard to ensure it is securely 

attached to the vacuum.

˙Charge the battery when battery level is low, particularly if there is a plan to store the 

vacuum for extended period fo time.

˙To improve the battery heat ventilation, we recommend to not have battery adhere to 

the bedding when using on bed.  Lift the vacuum slightly to increase air flow.  

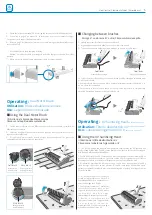
Installing the Wall Mount Holder

Use to Dual Motor Brush

˙When installing the wall mount onto the wall, make sure the installation area has the 

proper strength to support the mount and the vacuum.  Improper installation could cause 

damage to the vacuum as well as injuries.

˙Do not mount the wall mount close to area of high humidity.  

˙Prior to installing the Wall Mount, please make sure that the location does not have any 

electrical wires or water pipes running through to prevent risk of damages.

Vacuuming

˙To prevent vacuum from malfunctioning, avoid vacuuming extensive amount of fine 

powder or particles.  Use vacuum as designed as described in this manual.

˙Do not vacuum on liquid and sharp objects.  

˙Only allow individuals capable of operating a vacuum to use this machine

˙Do not use the vacuum directly on a human or an animal.  

˙Do not use excessive force to press down on the soft brush as it could cause damage to 

the vacuum.

˙Do not step on the foot lever and brush with excessive force

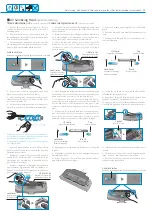
Use to UV Sanitizing Head

(optional accessory)

˙Simply gliding the vacuum back and forth slowly by laying the vacuum against the 

surface will achieve the same result as pressing the vacuum head against the fabric surface.  

˙Do not touch the UV lamp during and right after use, as the lamp is hot and could cause 

injury.

˙Do not look directly into the UV Lamp or expose skin to UV Lamp for an extended period 

of time as it could cause injury to the eyes and/or skin diseases.

˙When the Dual Motor Brush is tilted up to a certain angle, it is designed to stop operating

˙When the Dual Motor Brush is turned upside down, it will turn itself off

˙When soft brush is raised, the motor will stop working.  

Designed for Safety

˙The UV Sanitizing Head attachment incorporates sensors to turn off the UV lamp

    automatically if it cannot detect a surface for safety reasons.

Designed for Safety

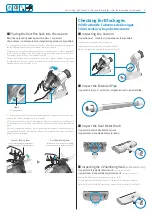
Checking for Blockages

˙If the vacuum has a sudden reduction in suction power and/or abnormal noise, follow 

the instructions below to trouble shoot. 

˙During cleaning when vacuum detects blockage, the power button               indicator will 

turn red and flash 5 times.

˙Use caution to remove any potential sharp objects that might be caught in the vaccum path.

˙Prior to inspection, make sure the vacuum or UV lamp is cool to avoid injuries.

 ・If vacuum is damaged by foreign objects, warranty could be voided.

˙The vacuum and its motorized attachments will automatically stop working when foreign 

objects have disrupted its operation.  Remove the object prior to operating the vacuum.

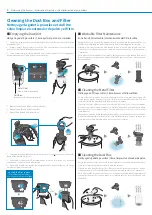
Cleaning the dust box and filter

˙Clean the dust box and filter at least once a month is recommended

˙Prior to putting the dust filter back to the vacuum, make sure the filters are completely dry

˙Placing the dust box or the filter directly under the sun could cause the product to 

deform or change color.  We recommend placing the items in the shade.

˙If Turbo Mode is used most of the time, we recommend the filters to be washed more 

frequently than recommended intervals

˙Squeezing or twisting the washable filter to dry will cause damage to the filter.

˙Do not insert Micro HEPA Filter back into the vacuum before it is completely dry.

˙Do not wash the micro HEPA filter with hot water or detergent, as it could cause malfunction.

˙If Micro HEPA filter is not properly installed, the vacuum will not function.              The 

power button will flash 5 times indicating there is an error.

˙Recommended replacement of a new HEPA filter is once every 1.5 years, assuming 30 

minutes of usage on a daily basis.  

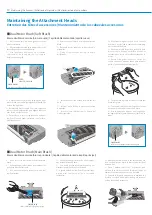
Maintaining the attachment heads

˙Foreign objects caught on the brush could degrade the performance of the vacuum.  

Clean the head regularly for optimal performance.

˙Do not wash the soft brush in water as it could cause malfunction. 

˙If the soft brush needs replacement, contact Raycop support 

˙ Main brush cannot be removed from the vacuum

˙Use caution not to cut the vacuum brush with scissor when removing trapped hair.

˙If softbrush is not correctly installed back to the Dual Head, the vacuum could 

malfunction and cause injury to the user.  

˙UV lamp is fragile and can be damaged if not handled carefully

˙UV lamp cannot be washed with water as it could cause malfunction

˙Dual Motor Brush cannot be washed with water, and could Potentially cause damage if 

exposed to water

˙Contact customer support at [email protected] if the brush or UV lamp is damaged.

˙UV lamp contains a little silver ball that moves freely within the lamp and is normal

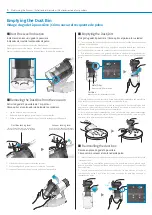
Emptying the Dust Bin

˙ When dust level is high, the vacuum suction strength will deteriorates.  Empty the dust 

box after each use is recommended. 

˙If the dust level exceeds the MAX indicator, suction strength will deteriorate significantly.  

Re-installing  and Placing the Dust Box back into the vacuum

˙If the dust box set is not installed back into the vacuum correctly, the performance of the 

vacuum could be impacted and the vacuum could malfunction.

˙Dust box could fall and be damaged if it is not secured properly to the vacuum.

˙Contact Raycop Support at [email protected] if dust box has a crack or is broken to 

prevent the vacuum from normal use.

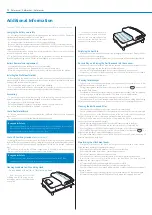
1.Run the vacuum across the 

bedding slowly like using an iron,  

covering as much of the surface area 

as possible

2.For fabric areas with more skin 

contact, such as around your head 

and feet, we recommend passing 

over those areas multiple  times to 

achieve best sanitization results

Cleaning Schedule to UV Sanitizing Head 

 : 

Use on bedding and mattress at least once per week.

Summary of Contents for Omni Power RPC-100

Page 1: ...l be turned off automatically Si la batterie se décharge complètement pendant le fonctionnement l indicateur lumineux de niveau de la batterie s éteint automatiquement Si el nivel de batería se agota durante el funciona miento se apagará automáticamente la iluminación indicadora de nivel de batería CLICK CLICK CLICK CLICK Approx 3 5Hr When battery is fully charged the indicator light will turn off L...

Page 2: ...e conexión Micro HEPA Filter can be rinsed and washed with water Il est possible de rincer et laver avec de l eau le micro filtre HEPA El microfiltro HEPA se puede enjuagar y lavar con agua Washable Filter Filtre lavable Filtro lavable Metal Filter Filtre en métal Filtro metálico Hook Crochet Gancho Air Intake Admission d air Entrada de aire Dust Box lock lever Levier de verrouillage du godet à pous...

Page 3: ... the brush on the regular basis to ensure optimal performance Les objets coincés par la brosse risquent de détériorer les performances de la brosse Veuillez nettoyer la brosse régulièrement pour assurer des performances optimales Si se atascan objetos en el cepillo se puede deteriorar el funcionamiento del cepillo Limpie el cepillo de forma regular para garantizar un funcionamiento óptimo Objects ...

Page 4: ... positionnez le guide de manière à ce que sa partie inférieure soit bien au niveau du sol 2 Después de quitar la cinta de doble cara en la parte posterior de la guía de instalación ubique la guía para que la base quede al ras del piso 1 Remove the wall mount cover as shown in the image 1 Retirez le couvercle de la fixation murale comme indiqué sur l image 1 Quite la cubierta del soporte de pared co...

Page 5: ...t à ne pas cogner la tête de désinfection UV contre l e s m e u b l e s a fi n d e n e p a s endommager le système de rayons UV 2 Deslice la aspiradora por las superficies lentamente Tenga cuidado d e n o g o l p e a r e l c a b e z a l d e higienización UV fuerte contra ningún mueble para no dañar la luz UV 6 Check the instruction manual P 3 for storing the vacuum on the Wall Mount Holder 6 Consult...

Page 6: ...er up to unlock 1 Relevez le levier du godet à poussière pour le déverrouiller 1 Voltee la palanca del contenedor de polvo hacia arriba para desbloquearlo Dust Box Level Indication Indicateur de niveau du godet à poussière Indicador de nivel del contenedor de polvo Emptying the Dust Dirt Vidage du godet à poussière Cómo quitar el polvo o la suciedad 1 Twist and turn the dust box cap counter clock ...

Page 7: ...ad optional accessory Inspectez la tête de désinfection UV accessoire optionnel Inspeccionar el cabezal de higienización UV accesorio opcional Remove the UV head grille to inspect for obstacles P 11 Enlevez la grille de la tête UV pour vérifier l absence d obstructions Page 11 Quite la rejilla del cabezal UV para inspeccionar en busca de obstáculos Pág 11 OF F 1 Align the lower part of the dust box...

Page 8: ...nto del filtro lavable To more effectively remove dust from the metal filter we recommend using an old toothbrush to brush off the dust on the filter Wash the metal filter and allow it to dry completely Wash the metal filter and allow it to dry completely Pour éliminer plus efficacement la poussière du filtre en métal il est recommandé d utiliser une vieille brosse à dents pour en éliminer la poussière Lave...

Page 9: ... filter back into the vacuum Turn the Micro HEPA Filter clockwise until a click sound is heard to lock the filter into place 4 Replacez le micro filtre HEPA dans l aspirateur Faites pivoter et tournez le filtre micro HEPA dans le sens horaire jusqu à ce que vous entendiez un clic pour verrouiller le filtre 4 Coloque el microfiltro HEPA seco nuevamente dentro de la aspiradora Gire el microfiltro HEPA en e...

Page 10: ...iduels 2 Agite la unidad del cepillo doble motorizado para quitar cualquier polvo o suciedad residuales 3 Attach the narrow nozzle to the vacuum and use it on the dual motor brush to remove any residual dust and dirt 3 Fixez l embout étroit sur l aspirateur puis utilisez le sur la brosse double mécanisée pour éliminer toute trace de poussière ou de saleté 3 Conecte la boquilla angosta con la aspir...

Page 11: ...rame align the UV lamp connector to the two holes on either side of the frame and turn the lock lever to lock the lamp in place 5 Lorsque vous insérez à nouveau la lampe UV dans le support de la brosse alignez le connecteur de la lampe UV avec les deux orifices situés de chaque côté du support puis tournez le levier de verrouillage pour verrouiller la lampe en place 5 Al momento de insertar la lámp...

Page 12: ... detects blockage the power button indicator will turn red and flash 5 times Use caution to remove any potential sharp objects that might be caught in the vaccum path Prior to inspection make sure the vacuum or UV lamp is cool to avoid injuries If vacuum is damaged by foreign objects warranty could be voided The vacuum and its motorized attachments will automatically stop working when foreign objec...

Page 13: ...pirateur son fonctionnement pourrait en souffrir et il pourrait ne pas fonctionner correctement Si le godet à poussière n est pas correctement fixé à l aspirateur il pourrait tomber et s endommager Contactez l assistance technique Raycop à l adresse support raycop com si votre godet à poussière est fissuré ou cassé et empêche l aspirateur de fonctionner normalement 1 Passez l aspirateur lentement sur...

Page 14: ...ría funcionar mal El contenedor de polvo podría caerse y dañarse si no se asegura correctamente a la aspiradora Comuníquese con soporte de Raycop al correo support raycop com su el contenedor de polvo está quebrado o roto e impide el uso normal de la aspiradora 1 Pase la aspiradora por la ropa de cama lentamente como si estuviera usando una plancha cubriendo la mayor cantidad de superficie que sea ...

Page 15: ...le à support raycop com L aspirateur ne fonctionne pas Essayez de l éteindre et le rallumer en appuyant sur le bouton marche arrêt Vérifiez si la batterie doit être rechargée Retirez puis réinsérez la batterie Vérifiez que le micro filtre HEPA est installé correctement Retirez le et installez le à nouveau L aspiration semble faible Videz le godet à poussière Lavez le filtre en métal et le filtre lavabl...

Page 16: ...si hay algún objeto extraño atascado en la ruta de succión Quite los pelos o cualquier residuo del cepillo La batería no carga Asegúrese de que el conector de alimentación eléctrica esté enchufado correctamente a la aspiradora Compruebe que su tomacorrientes funcione La batería podría estar funcionando mal debido a que se la ha utilizado durante mucho tiempo El cepillo no gira El cepillo doble mot...

Page 17: ... l i s e z u n i q u e m e n t d e s p i è c e s d o r i g i n e R a y c o p p o u r l e remplacement La mise au rebut de l aspirateur ou de sa batterie doit se faire en conformité aux réglementations locales 1 2 3 4 5 6 7 8 9 10 11 12 13 14 15 16 17 18 19 Precauciones importantes de seguridad Lea todas las instrucciones y precauciones en este manual antes de usar la aspiradora La advertencia a co...

Page 18: ...ltro lavable Recommended replacement is once every 1 5 years or when it emits odors that won t go away after wash Il est recommandé de le remplacer tous les 1 5 an ou quand il émet des odeurs qui ne disparaissent pas après le lavage Se recomienda cambiarlo una vez cada 1 5 año o cuando emite olores que no desaparecen después del lavado Micro HEPA Filter Micro filtre HEPA Microfiltro HEPA UV Sanitizi...

Page 19: ...19 References Références Referencias ...

Page 20: ...er de la date d achat Les pièces et les produits supplémentaires ne sont pas inclus 2 año desde la fecha de compra las piezas y los productos adicionales no están incluidos EPA Company No 92492 EPA Est N 92507 KOR 1 N o EPA de la compañía 92492 N o de establecimiento EPA 92507 KOR 1 10 X 48 8 X 10 5 in 254 x1 240 x 267 mm Approximately 6 39 lbs 2 9 kg Approximativement 2 9 kg 6 39 lb Aproximadamen...

Reviews: