C
HAPTER
4
24
RBR Enterprise Vector 300 LS/Venturi LS RS1/HDU Installation Manual
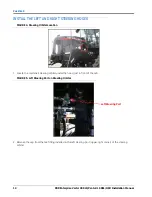
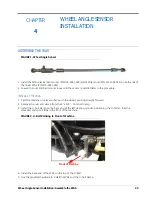
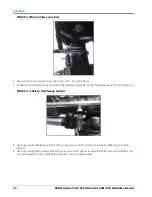
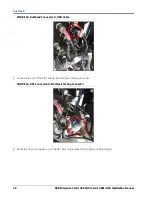
FIGURE 3. WAS and Clamp on U-Bolt
6. Remove the nuts and clamp from the 2” W x 5/16” - 18 U-bolt clamp.
7. Install the U-bolt clamp on the rod end of the left steering cylinder so the threaded ends of the U-bolt point up.
FIGURE 4. U-Bolt on Left Steering Cylinder
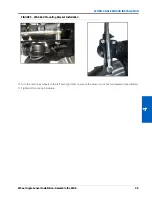
8. Use the provided hardware U-bolt, 3/8” long spacers, and 5/16” washers to install the WAS Rod mounting
bracket.
9. Use the provided M10 x 60mm bolt, M10 lock nut, and 3/4” spacer to install the WAS rod end of the WAS rod
mounting bracket in the middle hole of the WAS rod mounting bracket.
Summary of Contents for RS1/HDU
Page 4: ...Table of Contents ii RBR Enterprise Vector 300 LS Venturi LS RS1 HDU Installation Manual...
Page 8: ...CHAPTER 1 4 RBR Enterprise Vector 300 LS Venturi LS RS1 HDU Installation Manual...
Page 12: ...CHAPTER 2 8 RBR Enterprise Vector 300 LS Venturi LS RS1 HDU Installation Manual...
Page 13: ...2 Introduction Updates 9 INTRODUCTION...
Page 14: ...CHAPTER 2 10 RBR Enterprise Vector 300 LS Venturi LS RS1 HDU Installation Manual...
Page 26: ...CHAPTER 3 22 RBR Enterprise Vector 300 LS Venturi LS RS1 HDU Installation Manual...
Page 30: ...CHAPTER 4 26 RBR Enterprise Vector 300 LS Venturi LS RS1 HDU Installation Manual...
Page 45: ...Cab Component Installation System Diagrams 41 CAB COMPONENT INSTALLATION SYSTEM DIAGRAMS...
Page 46: ...CHAPTER 5 42 RBR Enterprise Vector 300 LS Venturi LS RS1 HDU Installation Manual...
Page 51: ...APPENDIX A 44 RBR Enterprise Vector 300 LS Venturi LS RS1 HDU Installation Manual...
Page 53: ...Index 46 RBR Enterprise Vector 300 LS Venturi LS RS1 HDU Installation Manual...

