41
36
34
2.9
Seismic Restraint
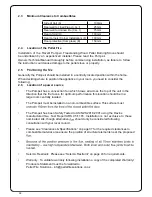
All installation scenarios for Pompeii require the use of hold-down anchors (one on each side).
Fixing to Concrete Floor:
•
Minimum M8 expansion anchors (M10 recommended) or min M8 epoxy- set anchors.
•
Approved Anchors: Expansion Anchors-Ramset Dynabolt and Trubolt, Hilti HAS.
•
Epoxy-set Anchors – Ramset Epcon, Ramset Chemset and Hilti HVU.
2.10 Fixing to Timber Floor Framing
Minimum 14g x 60 screws (6.3mm diameter) or M10 X 90 coach-screws. These shall be xed a minimum
of 40mm into the centre-line of the existing oor joists. If screws cannot be installed directly into an
existing oor joist, solid blocking between joists (min size 90x45) shall be provided.
2.11 Installation
Pompeii should be installed in a centrally located position within the home. This will assist
the appliance to perform to the level required. As Pompeii heats space by convecting air across
the top of the unit, the heater should face the area the majority of the area to be heated.
Pompeii requires a power source to function. This is standard mains feed 240v plug - if this
is unavailable in close proximity, a grounded extension lead may be used.
Pompeii is to be installed on a non-combustible surface which must have a forward projection of
a minimum of 150mm from the glass door.
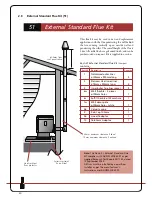
Ensure all 75mm ue joins are sealed with a high temp silicon (Maniseal).
Please check all clearances to combustibles as listed on page 37 and page 38 of this Owners’/
Technical manual.
In accordance with the requirements of AS/NZS 2918:2001 Pompeii must be secured by seismic
restraint.
Summary of Contents for Pompeii
Page 14: ...Pull to clean exchanger tube bundle 12 5 8 How to Clean the Tubulators ...
Page 32: ...30 25 Page 16 7 Maintenance Record SIGNATURE WORK CARRIED OUT DATE ...
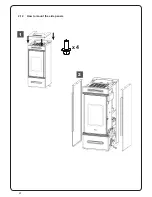
Page 44: ...42 1 2 x 4 2 12 How to mount the side panels ...
Page 50: ...48 38 4 Maintenance Record DATE WORK CARRIED OUT SIGNATURE 40 ...
Page 52: ......
Page 53: ......


