


Maintenance and service
12
126
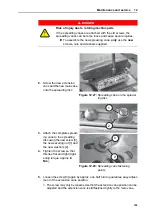
4.
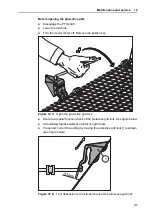
Loosen the screw [8] again by approx. one half turn to guarantee easy adjust-
ment of the extension vane position.
The screw may only be loosened so that the extension vane position
can be adjusted and the extension vane is still fastened tightly to the
main vane.
5.
Click the flat spring back into place with the adjustment lever.
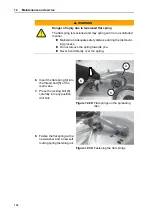
6.
If necessary, repeat the work stages with other extension vanes which must
be replaced.
Reattach both spreading discs. See
12.8.2: Mounting the spreading
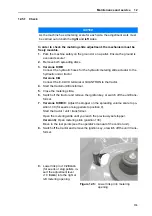
2.
Attach the spreading vane
to the spreading disc using
the new screw [8], the new
securing nuts [6] and the
new washers [7].
Figure 12.20:
Spreading vane fastening
points
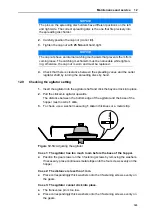
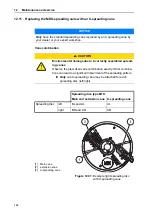
3.
Tighten the screw so that
this lies flat and tight (tight-
ening torque: approx.
8
Nm
).
Figure 12.21:
Spreading vane fastening
points
8
7
7
6
Summary of Contents for MDS 14.2
Page 8: ...Intended use 1 2...
Page 28: ...Safety 3 22...
Page 38: ...Technical data 4 32...
Page 42: ...Axle load calculation 5 36...
Page 44: ...Transportation without tractor 6 38...
Page 86: ...Machine settings 8 80...
Page 96: ...Calibration and discharging residual material 9 90...
Page 110: ...Important information on spreading 10 104...
Page 114: ...Faults and possible causes 11 108...
Page 146: ......


