Chapter 5: System Settings
43
Assigning or Modifying Channel Names
By default there are no channel names assigned to any connected devices
on the Selection Menu. Only channel port numbers are available. It is not
easy to identify the computers or devices without appropriate channel
names, so you should specify a channel name for each connected
computer or device.
To specify or change channel names:
1. If you do not see the OSD on the screen, press the hot key twice
QUICKLY to activate it. The default hot key is Scroll Lock.
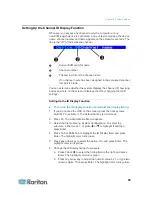
2. Press F5. The Administration Menu appears.
3. Select the third submenu, Channel Configuration. To select the
submenu, either press 3, or press to highlight it and then press
Enter. The Channel Configuration submenu appears.
4. If you do not find the channel on the current page, press Page Down
or Page Up to go to the next or previous page.
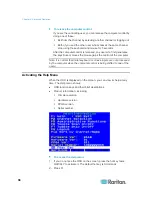
5. Press or to highlight the channel name you want to modify, and
press Enter. The yellow highlight color turns light blue.
6. Type a new name up to twelve characters. The highlight color turns
green when you type.
7. Press Enter to confirm the new name. The highlight color turns yellow
again.
8. Repeat Steps 4 to 7 to modify more channel names.
9. Press S to save the changes or Esc to quit the current menu or
submenu.
If pressing Esc, the message “Save the changes [Y/N/ESC]”
appears on the message bar. Press Y to save the changes, N to
abort the changes, or Esc to return to the current menu or
submenu.
Note: To name the channels of the second-tier devices in a two-tier
system, see
Setting Up the Second-Tier Channels
(on page 92) for
information.


