17
5 Close the magazine. Make sure it is safely locked.
REMOVE STAPLES FROM THE MAGAZINE
1 Press the magazine latch
🅔
to unlock it from the tacker body.
2 Slide the magazine
🅕
backwards.
3 Remove the staples from the magazine.
4 Close the magazine. Make sure it is safely locked.
OPERATION
ACTIVATING THE TOOL
1 Make sure the tool is in good working condition.
2 Firmly press the safety yoke
🅗
against the workpiece until it is
pushed in a few millimeters
ྲྀ
. The LED
🅐
lights green. The tool is
active now and ready for stapling.
STAPLING
1 Firmly press the safety yoke
🅗
against the workpiece until it is
pushed in a few millimeters.
2 Briefl y press the trigger
🅓
.
ཷ
3 Release the trigger and remove the tool from the workpiece.
4 To fi re again, do steps 1 thru 3 again.
ACTIVE MODE/SLEEP MODE
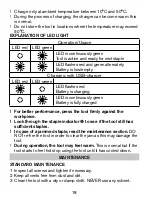
• When the tool is in active mode it stays in this mode for 15 seconds
when there is no activity.
• After 15 seconds of inactivity, the tool goes into sleep mode. The
spring decompresses and you hear a sound. This is normal.
• Press the safety yoke
🅗
to activate the tool again.
CHARGING OPERATING INSTRUCTIONS
ླྀ
! Do not use the tool whilst charging.
1 Connect the Micro-USB cable
🅘
to the Micro-USB port
🅑
.
2 Connect the Micro-USB cable to a USB-charger (not included).
3 Connect the USB-charger to a wall socket. The LED
🅐
fl ashes red
during the charging process.
4 When the battery is fully charged, the LED turns green.
5 Disconnect the Micro-USB cable and remove the USB-charger from
the wall socket.
Summary of Contents for BTX10
Page 2: ...2 G H F D C B E A I...
Page 3: ...3 F E 1 2...
Page 4: ...4 A H D...
Page 5: ...5 A B I 1 2 3 F E...
Page 51: ...51 Micro USB Micro USB 1...
Page 52: ...52 a 2 a...
Page 53: ...53...
Page 54: ...54 3 a...
Page 55: ...55...
Page 56: ...56 4 a...
Page 57: ...57...
Page 58: ...58...
Page 59: ...59 5 a...
Page 60: ...60 130 C 265 F...
Page 61: ...61 6 a...
Page 62: ...62 LpA 71 8 K 3 LwA 82 8 K 3 2 447 K 1 5...
Page 63: ...63 1 2 3 4 53 5 1 2 3 4 1 2 1 2 3 4 1 3 15 15...
Page 64: ...64 1 Micro USB Micro USB 2 Micro USB USB 3 USB 4 5 Micro USB USB 10 C 50 C 50 C USB...
Page 65: ...65 1 2 3 4 5 6 1 2 3 4 Rapid...
Page 164: ...164 1...
Page 165: ...165 2...
Page 166: ...166 GFCI GFCI 3...
Page 167: ...167...
Page 168: ...168...
Page 169: ...169 4...
Page 170: ...170...
Page 171: ...171...
Page 172: ...172 5...
Page 173: ...173 130 C 265 F...
Page 175: ...175 A LpA 71 8 dB A K 3 dB A A LwA 82 8 dB A K 3 dB A...
Page 176: ...176 2 447 m s K 1 5 m s 1 2 3 4 53 5 1 2 3 4 1...
Page 178: ...178 LED LED LED LED USB LED LED LED LED 1 2 3...
Page 179: ...179 4 5 6 1 2 3 4 Rapid...


