23
The oven light is not working
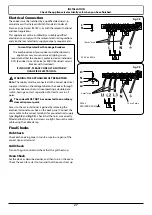
The bulb has probably blown. You can buy a
replacement bulb (which is not covered under the
guarantee) from most electrical stores. Ask for an Edison
screw fitting 15 W 230 V lamp, FOR OVENS
(Fig.6-1)
. It
must be a special bulb, heat resistant to 300 °C.
Before removing the existing bulb, turn off the power
supply and make sure that the oven is cool. Open the
oven door and remove the oven shelves.
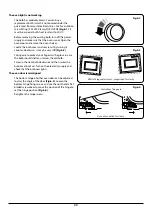
Locate the bulb cover and unscrew it by turning it
counter-clockwise – it may be very stiff
(Fig.6-2)
.
Taking care to protect your fingers with a glove in case
the bulb should shatter, unscrew the old bulb.
Screw in the new bulb clockwise and then screw the
bulb cover back on. Turn on the electricity supply and
check that the bulb now lights.
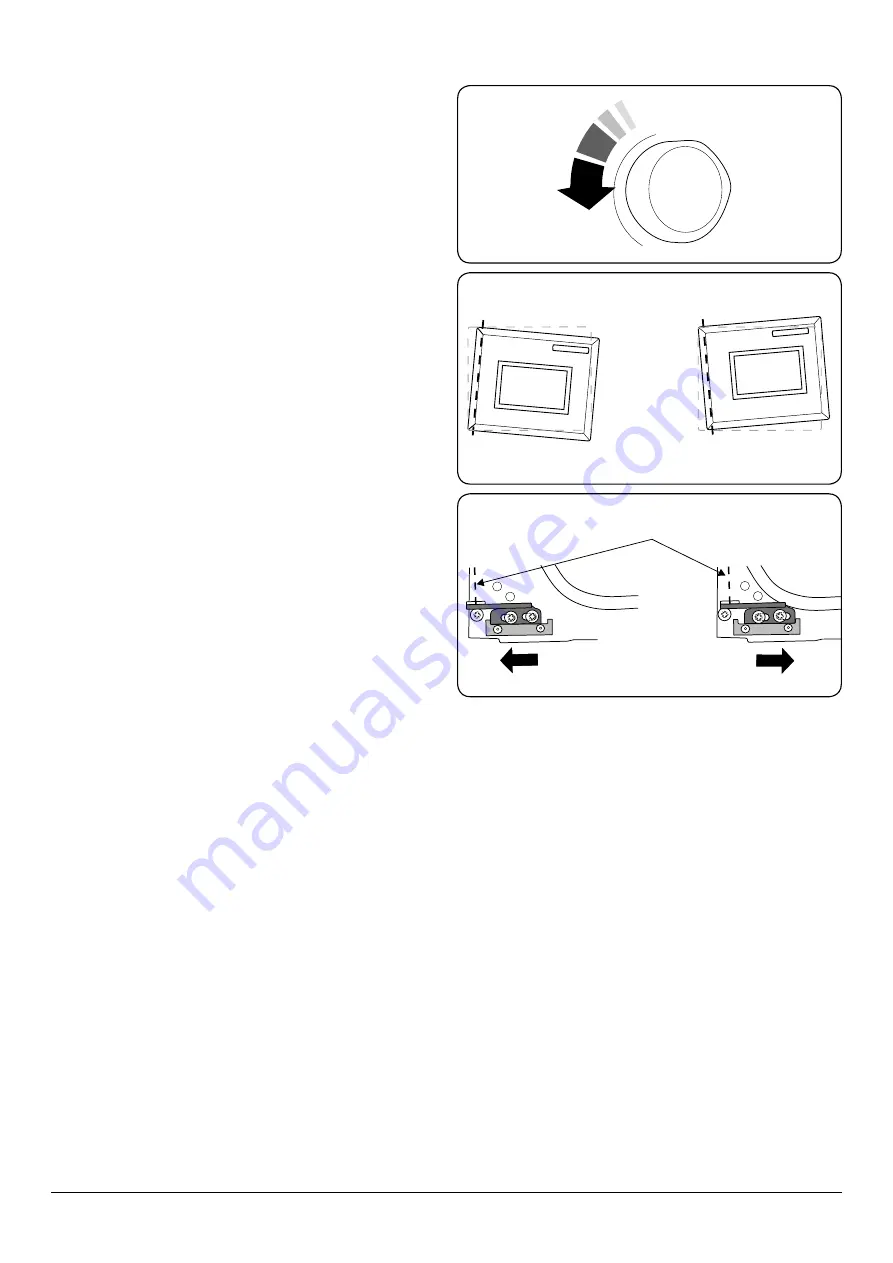
The oven door is misaligned
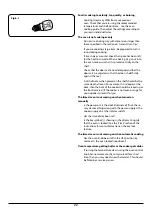
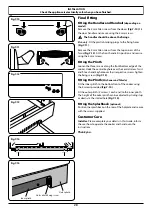
The bottom hinge of either oven door can be adjusted
to alter the angle of the door
(Fig.6-3)
. Loosen the
bottom hinge fixing screws and use the notch and a flat
bladed screwdriver to move the position of the hinge to
set the hinge position
(Fig.6-4)
.
Retighten the hinge screws.
ArtNo.320-0006 Oven door hinge adjustment 1
Fig.6-3
Effect of hinge adjustment – exagerrated for clarity
ArtNo.320-0007 Oven door hinge adjustment 2
Fig.6-4
Centreline of hinge pin
Oven door omitted for clarity
ArtNo.324-0007 Unscrewing the bulb cover
Fig.6-2
Summary of Contents for 90 Induction
Page 1: ...90 Induction Britain s No 1 Range Cooker USER GUIDE INSTALLATION INSTRUCTIONS...
Page 4: ...ii...
Page 38: ...34 Notes...


