background image

17

USA

First use

4.  Close the battery compartment and switch the receiv-

er on with the switch 

3

 (> 

ON

). Once the indicator 

appears on the display 

2

 of the receiver, the receiver 

is operational.

5.  Take the base unit 

5

 and open the battery compart-

ment 

11

 on the bottom of it. Insert two of the en-

closed batteries 

10

 in the battery compartment with 

the indicated polarity (see 

fig. C

).

6.  Close the battery compartment and switch the base 

unit on with the switch 

9

 (

POWER ON

).

7.  Take the temperature sensor 

6

 and insert the plug 

at the end of the transmission cable in the jack of the 
base unit (see 

fig. A

). 

The power indicator on the base unit will illuminate. 
The barbecue thermometer is now operational.

8.  Push various buttons to test whether all functions of 

the barbecue thermometer are accessible.

9.  Switch the receiver and the base unit back off. Affix 

the enclosed fastening clip 

22

 for attaching it to 

clothing (bag, belt) to the receiver (see 

fig. H

) and af-

fix the enclosed Velcro strip 

23

 to the base unit  

(see 

fig. G

) to attach it to the place of use (barbecue).

zur 

e the

e th

e receive

e receiv

nclosed fa

nclosed fa

ng (ba

ng (ba

Freigabe

d switch the

witch th

ER ON

R ON

).

)

ga

ga

 and insert

and ins

sion cable in t

sion cable i

r on the base 

n the bas

ermometer is 

ermometer

ttons to tes

tton

mom

mo

Summary of Contents for FB6200-S

Page 1: ...Digital BBQ Thermometer User Guide ID 05007 m y hansecontrol c o m M A N U A L DEVELOPED IN G E R M A N Y User friendly Manual eter e e...

Page 2: ...etails for example Advantage You do not need to manually enter a website ad dress or contact details This is how it works To scan the QR code all you need is a smartphone with QR code reader software...

Page 3: ...es 10 Safety notes for batteries 14 First use 16 Basic cleaning 16 Assembling the digital BBQ thermometer 16 Operation 18 Selecting the type of food and cooking level 18 Timer function 22 Selecting th...

Page 4: ...TASTE START TARGET TEMP CURRENT TEMP OF F ON PO WE R 1 7 5 9 10 11 8 4 5 6 1 2 3 z u z u r u r r z u z u F r e i g a b e F r e i g r e i g e i e r g a b g a g a g a g a g a g a g a g a g a g a g a g...

Page 5: ...TEMP CURRENT TEMP MEAT TASTE SEC MODE 22 1 2 21 20 19 18 17 13 12 14 15 16 4 23 OF F ON PO WE R 10 4x 6 z u r z z u r 4 u r r r F r e i g a b e b e b e b e F e b e b e b e a b F r e i F r F r e a a i...

Page 6: ...selector switch 9 Power ON OFF switch 10 4x AAA batteries 11 Battery compartment cover 12 Food icon indicator 13 CURRENT TEMP indicator 14 COOKING LEVEL indicator 15 COOKING LEVEL START button 16 SEC...

Page 7: ...may cause damage to the digital BBQ thermometer This instruction manual is based on the standards and rules in force in the European Union When abroad you must also observe country specific guidelines...

Page 8: ...azard with low risk that if not avoided may result in minor or moderate injury NOTICE This signal word warns of possible damage to property or provides you with useful additional information regarding...

Page 9: ...out of the packaging 2 Check whether the digital BBQ thermometer or the individual parts exhibit damage If this is the case do not use the digital BBQ thermometer Contact the manufacturer via the serv...

Page 10: ...e with the instructions and may lead to damage of property and or injury to persons The manufacturer or vendor cannot be held liable for damages incurred through improper or incorrect use Safety notes...

Page 11: ...ature sensor or the transmission cable during or after use WARNING Danger for children and per sons with impaired physical sensory or mental capacities e g partially disabled persons older persons wit...

Page 12: ...thermometer Cleaning and user maintenance must not be performed by children Do not leave the barbecue thermometer unattended while in operation Do not allow children to play with the packaging wrapper...

Page 13: ...er cable and do not lay it over sharp edges Do not allow the base unit and the receiver to come into contact with mois ture Never store the barbecue thermometer so that it is at risk of falling into a...

Page 14: ...attery acid The older the batteries the great er the risk of battery acid being leaked Leaking battery acid may lead to chemical burns Donotallowbatteryacidtocomeintocon tactwithskin eyesormucusmembra...

Page 15: ...arbecue thermometer on a hot surface or heat source Battery acid that is leaked may cause injury and damage to property Never insert the batteries in the battery compartment incorrectly contrary to th...

Page 16: ...the digital BBQ thermometer 1 Check whether the package contents are complete and that the parts of the barbecue thermometer are undamaged 2 Sort all parts of the barbecue thermometer as indicat ed on...

Page 17: ...able in the jack of the base unit see fig A The power indicator on the base unit will illuminate The barbecue thermometer is now operational 8 Push various buttons to test whether all functions of the...

Page 18: ...ase unit Operation Prepare the digital BBQ thermometer in accordance with the instructions for first time use Switch the receiver and the base unit on and connect the temperature sen sor to the base u...

Page 19: ...170 F 74 C 165 F 71 C 160 F 63 C 145 F Calf 74 C 165 F 71 C 160 F 66 C 150 F 63 C 145 F Pork 77 C 170 F 74 C 165 F 71 C 160 F Turkey 74 C 165 F Chicken 74 C 165 F Hamburger 71 C 160 F Fish 63 C 145 F...

Page 20: ...erhaspresettargettemperatures dependingontheselectedtypeoffoodandcookinglevel 1 On the receiver 1 select the food type with the MEAT button 18 Push the MEAT button until the de sired food type appears...

Page 21: ...from hot surfaces 6 Use the clip 22 to secure the receiver 1 near the bar becue for easy viewing or attach the receiver to your clothing belt or apron trouser or shirt pocket 7 As soon as you have pla...

Page 22: ...ect that these pieces of food will also be cooked according to the cooking level you selected 9 You can now cook more pieces of food to perfection by following the described steps Timer function If yo...

Page 23: ...ck to indicator mode for reaching the target temperature YoucanstopthetimerfunctionwiththeSTOPbutton 18 Selecting the target temperature The digital BBQ thermometer reliably helps you to achieve convi...

Page 24: ...e temperature based on your individual setting Only TARGET TEMP 20 and CURRENT TEMP 13 will appear on the display Once the cooking process is complete the alarm indi cator will be triggered again with...

Page 25: ...rature sensor in the socket WARNING Burn hazard The digital BBQ thermometer will become hot during operation Let the barbecue thermometer particularly the temperature sensor cool off completely each t...

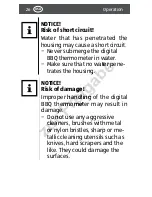
Page 26: ...CE Risk of damage Improper handling of the digital BBQ thermometer may result in damage Do not use any aggressive cleaners brushes with metal or nylon bristles sharp or me tallic cleaning utensils suc...

Page 27: ...mpletely 2 Wipe the receiver 1 and the base unit 5 off with a damp cloth Then let all parts dry completely 3 Clean the temperature sensor 6 and the transmis sion cable with warm water and a small amou...

Page 28: ...t you store the barbecue ther mometer in the original packaging and cover it with a cloth to protect it against dust and moisture Make sure that there is no risk of the barbecue ther mometer falling d...

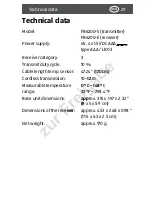
Page 29: ...e length temp sensor 47 24 120 cm Cordless transmission 10 12 m Measurable temperature range 0 C 148 C 32 F 298 4 F Base unit dimensions approx 3 15 x 1 97 x 2 32 8 x 5 x 5 9 cm Dimensions of the rece...

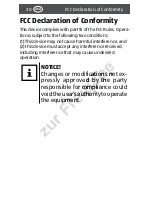
Page 30: ...armful interference and 2 this device must accept any interference received including interference that may cause undesired operation NOTICE Changes or modifications not ex pressly approved by the par...

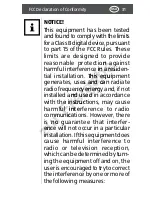
Page 31: ...tructions may cause harmful interference to radio communications However there is no guarantee that interfer ence will not occur in a particular installation Ifthisequipmentdoes cause harmful interfer...

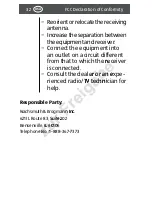
Page 32: ...uit different from that to which the receiver is connected Consult the dealer or an expe rienced radio TV technician for help Responsible Party Wachsmuth Krogmann Inc 621 IL Route 83 Suite 202 Bensenv...

Page 33: ...ser you are required by law to bring all bat teries and rechargeable batteries regardless whether they contain harmful substances or not to a collection point run by the communal authority or borough...

Page 34: ...34 USA z u r F r e i g a b e...

Page 35: ...anty card together with the faulty product to Wachsmuth Krogmann Inc 621 IL Route 83 Suite 202 Bensenville IL 60106 USA Toll free hotline YEARS WARRANTY 3 AFTER SALES SUPPORT customer service wk usa c...

Page 36: ...our service hotline by phone e mail or fax before sending in the device This allows us to provide support in the event of possible oper ator errors In order to make a claim under the warranty please...

Page 37: ...The period of warranty can only be extended in accordance with a legal standard In countries where a compulsory warranty and or spare part storage and or a system for compensation are is required by...

Page 38: ...z u r F r e i g a b e...

Page 39: ...PORT customer service wk usa com 1 888 367 7373 Product code 92205 05 2015 YEARS WARRANTY USA Made in China DISTRIBUTED BY ALDI INC BATAVIA IL 60510 USA www aldi us Model FB6200 E receiver FB6200 S tr...

Reviews: