6. Unscrew the muzzle bushing assembly
which includes the plastic outer sleeve.
Note: If this is difficult to do by hand,
grasp the barrel under the plastic
sleeve and use a wrench on the flats
on the muzzle collar to loosen the
entire muzzle bushing assembly.
7. Remove the piston and the buffer
assembly from the barrel.
8. Inspect all parts for wear or damage
and clean or replace as required.
Use detergent oil and cleaning brush.
Wipe parts dry before reassembly.
WEAR SAFETY GOGGLES WHEN
CLEANING TOOL PARTS.
9. Check the piston tip for mushrooming
or other deformities, and grind flat.
The tip of the piston must be 90° to
the shank and grinding must only
be done by qualified personnel. The
overall minimum length of the piston
must not be less than 6-1/8”. When
less than this length, the piston must
be replaced to avoid tool damage.
10. Reassemble the tool in the reverse
order of disassembly.
ALWAYS PERFORM THE DAILY
FUNCTION TEST BEFORE USING
THE TOOL AFTER CLEANING
OR SERVICING.
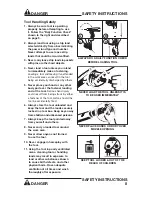
HOLD BARREL AND USE A
WRENCH TO LOOSEN THE MUZZLE
BUSHING ASSEMBLY
PULL PISTON OUT OF THE
MUZZLE BUSHING
5/16"
18°
90°
GRIND PISTON TIP FLAT AND
BEVEL THE TIP EDGE AT 18°
DISASSEMBLY
16
DISASSEMBLY


