10
11
TROUBLESHOOTING
TROUBLESHOOTING
TOOL OPERATING INSTRUCTIONS
TOOL OPERATING INSTRUCTIONS
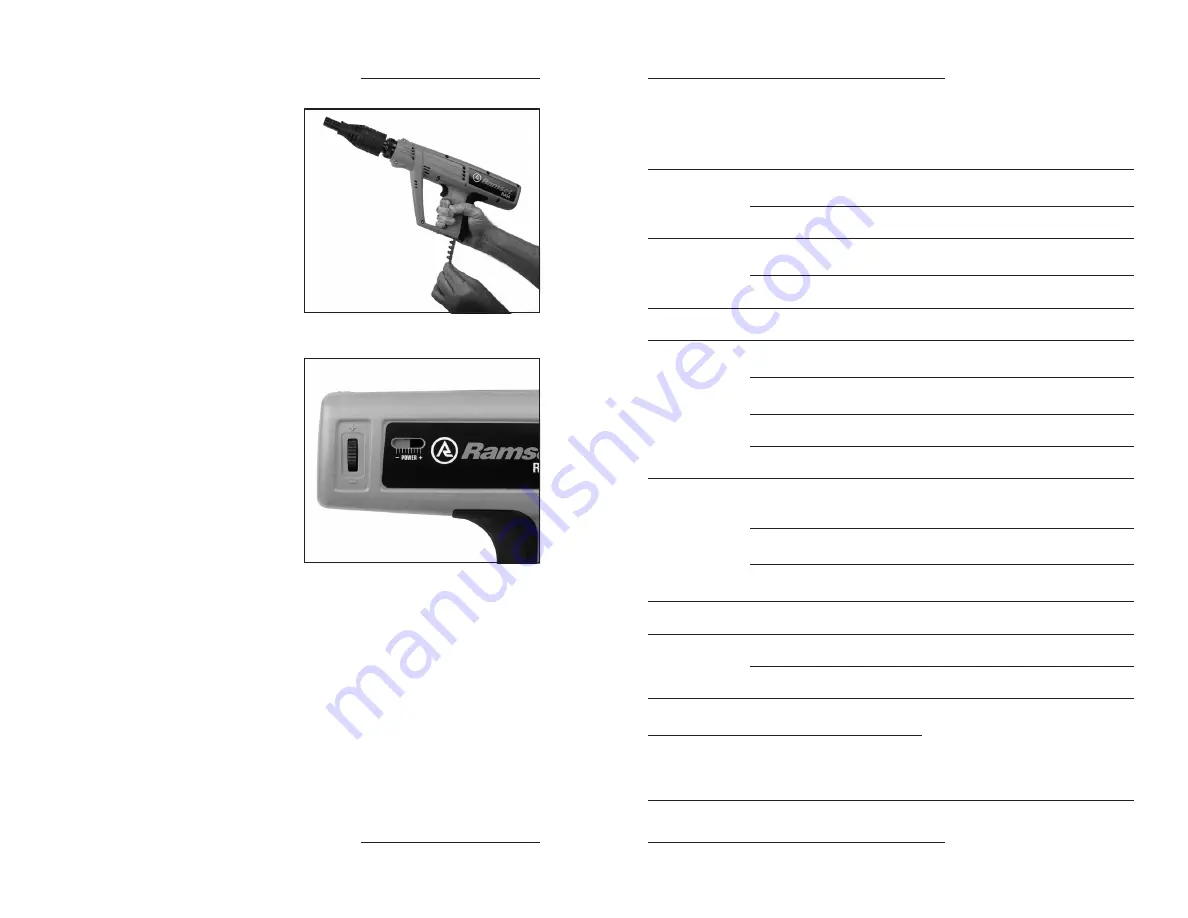
2. Insert the power load.
With the tool in the closed position
insert a power load strip into the cavity
in the base of the rubber handle and
push in until the flat of your finger tip is
firmly against the handle recess. The
first power load is now aligned with the
chamber.
Note:
Always use the lowest strength
power load and lowest power setting first,
for a firing test, then adjust the power to
suit the job.
3. Fire the tool.
Press the fastener guide firmly against
the work surface, and pull the trigger
4. Check the fastener has been correctly
set.
(See Fastening Applications, page 8)
5. Adjust the power, if necessary.
Increase power by increasing power
setting. When maximum setting is
reached, move wheel back to minimum
position and insert next strength power
load.
2. INSERT THE POWER LOAD
5. ADJUST THE POWER, IF NECESSARY
Most commonly, problems are caused by over driving due to poor fastener or charge
selection. It is wise to consider these two factors as the first options in trouble shooting.
SYMPTOM
POSSIBLE PROBLEMS
SERVICE
— Fastener over
driven
— Too much power
— Use a low strength power load or use the
power adjustment feature if applicable
— Fastener too short
— Select the correct fastener
— Fastener under
driven
— Too little power
— Use a higher strength power load or use
the power adjustment feature if applicable
— Fastener too long
— Select the correct fastener
— Rough action
— Excessive carbon build up
— Disassemble, clean and lightly oil tool
— Reduction or loss
of power
— Piston not returning to position
— Check the length of the piston return spring
(Refer to page 13)
— Faulty piston return spring
— Remove piston. Replace piston return
spring
— Buildup of dirt in tool
— Clean tool parts
— Broken piston
— Replace piston
— Tool misfire
Do not remove the
tool from the work
surface for at least
30 seconds
— Failure of tool to depress
completely
— Disassemble tool and check all parts for
correct assembly after first removing the
power loads
— Cartridge strip damaged
— Remove and replace with new cartridge
strip
— Problem with tool or faulty
charge / power load
— Refer to misfire procedure on page 6
— Tool Jam
— Damage to power load chamber
— Refer to misfire procedure on page 6
— Cartridge strip
does not index
in tool
— Cartridge strip damaged
— Refer to misfire procedure on page 6
— Strip index mechanism damaged — Refer to misfire procedure on page 6
— Cartridge strip
melts
— Tool overheated – fastening rate
too high
— Allow tool to cool. Disassemble tool to
increase rate of cooling
— Cartridge falls out
of the strip
— “Hot” tool compressed for too
long
— Reduce fastening rate
— Compress tool for a shorter period of time


