background image

7 Accessing the gateway

Make sure all the antennas are connected before powering the Gateway. 

The Gateway comes configured in such a way that you can use either the Ethernet port or the Wi-Fi in AP mode to connect 
to the Management platform. 

In both modes you can access the Management UI via a web browser pointing to the IP address of the gateway (check 
your router DHCP list). Alternately, the IP Address (192.168.230.1) is preconfigured as the one to use for access to the 
device provided you are directly connected to it. 

7.1 Wi-Fi AP mode 

By default, the gateway is configured to work in Access Point (AP) mode. It has the following parameters: 

Wi-Fi

 - SSID: RAK72XX_xxxx (no password is required to connect via Wi-Fi, "xxxx" represents the last two bytes of 

the gateway’s MAC address) 

Web UI

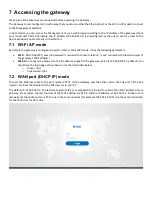
 - Connect via a browser to the IP address assigned to the gateway, which is 192.168.230.1 by default. You 

should see the login page shown below. Use the credentials below: 

o

UI user: root 

o

UI password: root 

7.2 WAN port (DHCP IP) mode 

Connect  the  Ethernet  cable  to  the  port  marked  “ETH”  on  the  Gateway  and  the  other  end  to  the  PoE  port  of  the  PoE 
injector. Connect the LAN port of the PoE injector to your PC.

The default IP is 169.254.X.X.


The last two segments (X.X) are mapped from the last four bits of the MAC address of your 

gateway. For example, the last four bits of the MAC address are 0F:01, and the IP address is 169.254.15.1. Make sure to 
manually set the address of your PC to one in the same network (for example 169.254.15.100). Use the same credentials 
for the Web UI as for AP mode.

Summary of Contents for RAK7289C

Page 1: ...d batteries With its new enclosure design it allows the LTE Wi Fi and GPS antennas to be inside the enclosure The gateway provides for a solid out of the box experience for quick deployment Additional...

Page 2: ...2 Packing List Device 1x Installation Bracket 1x Cable Gland 1x LoRa Antenna 1x or 2x Power Cord 1x Power Adapter 1x Waterproof Tape 1x PVC Insulating tape 1x 12V Cable 1x User Manual 1x...

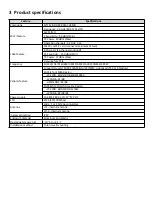
Page 3: ...cy EU433 CN470 EU868 US915 AS923 AU915 IN865 KR920 Supports Quectel EG95 E EG95 NA IoT M2M optimized LTE Cat 4 Module EG95 E for EMEA Region LTE FDD B1 B3 B7 B8 B20 B28A WCDMA B1 B8 GSM EDGE B3 B8 EG9...

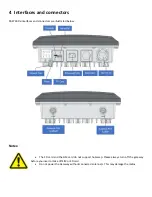
Page 4: ...connectors are illustrated below Notes The SD card and the SIM card do not support hot swap Please always turn off the gateway before you insert or take off SIM or SD card Do not power the Gateway wi...

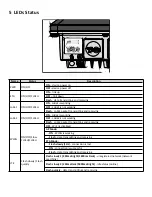
Page 5: ...working LoRa2 ON OFF FLASH Flash LoRa2 packet transmitting and receiving OFF Wi Fi is disabled AP Mode ON WLAN is working Flash data transmitting and receiving STA Mode Flash slowly 1Hz connection is...

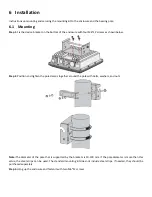
Page 6: ...ow Step 2 Position and tighten the pole clamps together around the pole with bolts washers and nuts Note The diameter of the pole that is supported by the brackets is 50 100 mm If the pole diameter is...

Page 7: ...er cord to the adapter Connect the other end of the power cord to a power outlet 6 3 Weather Protection To better protect the Ethernet cable gland and the antenna connector from the weather you need t...

Page 8: ...gth Wrap three layers around the connector with a 50 overlap Hold the tape in place with your hand for a few seconds Step 3 Wrap three additional layers with PVC tape with natural uncoiling force and...

Page 9: ...required to connect via Wi Fi xxxx represents the last two bytes of the gateway s MAC address Web UI Connect via a browser to the IP address assigned to the gateway which is 192 168 230 1 by default Y...

Page 10: ...wing measures Reorient or relocate the receiving antenna Increase the separation between the equipment and receiver Connect the equipment into an outlet on a circuit different from that to which the r...

Reviews: