RAISCUBE R10 3D PRINTER MANUAL
20
3
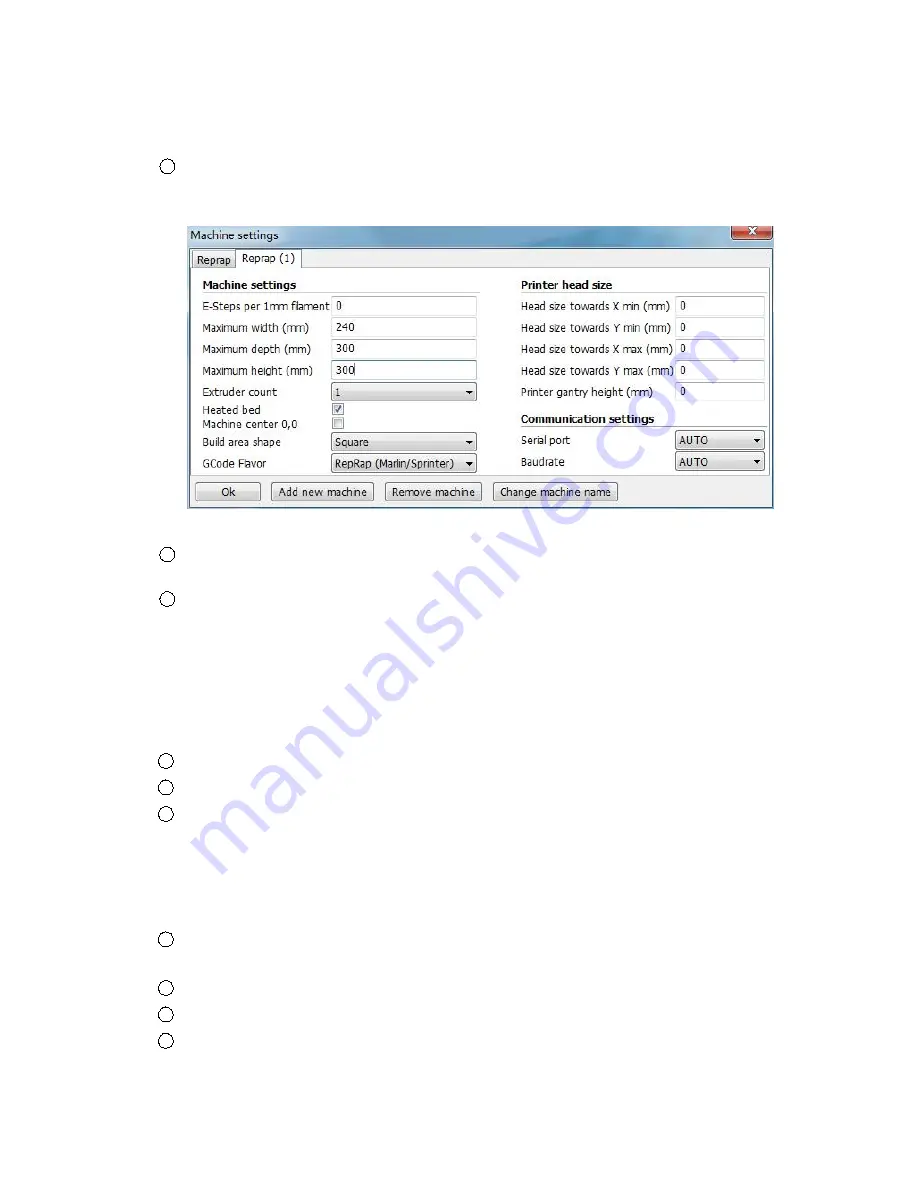
Once you add the new machine, click Machine > Machine settings and change the machine
settings to: Max width 240, Max depth 300, Max height 300, Extruder count 1, and check Heated bed.
Click “OK.”
4
Load the model file in Cura. Rotate the file to the best orientation for printing. You may want
to scale the file at this point as well.
5
When you are satisfied with the Cura settings and the position, orientation, and scale of the
model, select the “Save toolpath” (or “SD” if the microSD card is inserted) icon or File > Save GCode.
Save the file to the microSD card that came with your printer.
Step 3 Send the file to the printer
1
After saving the G-Code to the it, remove the microSD card from the computer.
2
Insert the microSD card, upside-down, into the slot on the right side of the control box.
3
By using this method, no computer needs to be plugged into your printer and it will run
autonomously until the print is finished.
Step 4 Print!
1
On the A31 control screen, select Init./Change SD card, the last selection on the bottom of
the main screen.
2
Select Print from SD.
3
Select your print (.gcode) file.
4
Watch the 3D printer create your model!
Summary of Contents for R10
Page 1: ...RAISCUBE R10 3D PRINTER MANUAL 1 RAISCUBE R10 USER MANUAL ...
Page 8: ...RAISCUBE R10 3D PRINTER MANUAL 8 Fig 06 Also please refer to Fig 07 when connecting ...
Page 9: ...RAISCUBE R10 3D PRINTER MANUAL 9 Fig 07 Overall Details ...
Page 11: ...RAISCUBE R10 3D PRINTER MANUAL 11 2 User Manual Screen Information ...


