19
English
RAIS/
attika
- User manual for RINA-HERA-VIVA-JUNO
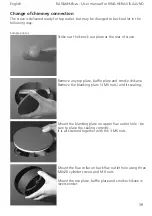
Change of chimney connection
The stove is delivered ready for top outlet, but may be changed to back outlet in the
following way:
Strike out the knock out plate at the rear of stove.
Remove any top plate, baffle plate and smoke chikane.
Remove the blanking plate (3 M6 nuts) and its sealing.
Mount the blanking plate on upper flue outlet hole - be
sure to place the sealing correctly.
It is all screwed together with the 3 M6 nuts.
Mount the top plate, baffle plate and smoke chikane in
reverse order.
Sample photos
Mount the flue collar on back flue outlet hole using three
M6x20 cylinder screws and M6 nuts.
Summary of Contents for Viva Series
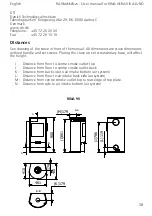
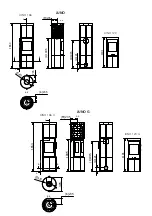
Page 11: ...B B A A B B A A 1067 I 219 M 120 L 992 J 219 470 40 447 214 K HERA...
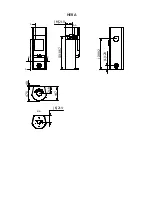
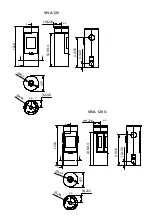
Page 12: ...A A B B A A B B VIVA 98 G B B A A B B A A VIVA 98...
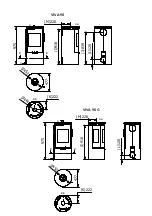
Page 13: ...B B A A B B A A VIVA 120 G B B A A B B A A VIVA 120...
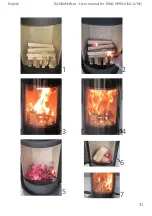
Page 31: ...31 4 1 2 3 5 6 7 English RAIS attika User manual for RINA HERA VIVA JUNO...
Page 37: ...37 English RAIS attika User manual for RINA HERA VIVA JUNO...
Page 45: ...45 English RAIS attika User manual for RINA HERA VIVA JUNO...
Page 46: ...4 3 5 2 10 8 7 6 12 11 9 1 13 RINA 90...
Page 47: ...4 3 5 2 10 8 7 6 12 11 9 1 13 14 15 16 17 Hera...
Page 48: ...2 4 1 5 6 9 7 11 10 23185 VIVA 9 3 12 8 2 4 11 1 10 9 7 6 5 12 3 8 VIVA 120 VIVA 98...
Page 50: ...1 2 10 8 1 9 5 3 4 6 7 JUNO 120 JUNO 166...
Page 51: ...1 2 3 4 4 5 6 7 8 9 10 11 12 13 JUNO 120 G JUNO 166 G...

