background image

STPi Controller Operation Manual

10

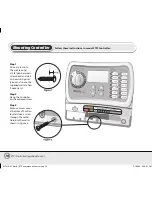
Mounting Controller

Follow these instructions to mount STPi Controller:

Step 1

Drive a screw into 
the wall, leaving 
an1/8” gap between 
screw-head and wall 
as shown in Figure 1 
(you can also use the 
supplied wall anchors 
if necessary).

Step 2

Hang the Controller 
on the exposed screw.

Step 3

Remove access cover 
at bottom of Control-
ler and drive a screw 
through the center 
hole into the wall as 
shown in Figure 2.

637418-01 Rev B (STP user manual) source.indd   10

3/7/2008   5:24:07 PM

Summary of Contents for STP-400i

Page 1: ...Simple To Program STPi Controller Installation Programming Operation Guide 637418 01 Rev B STP user manual source indd 1 3 7 2008 5 23 54 PM...

Page 2: ...Hole provided to hang manual next to controller 637418 01 Rev B STP user manual source indd 2 3 7 2008 5 23 54 PM...

Page 3: ...ain and we hope you enjoy your new Controller Welcome Simple To Program STPi Controller Contents Controller Functions 2 Set Clock 3 Set Date 4 Schedule Watering 5 Water Now 6 Rain Delay 7 Adjust Water...

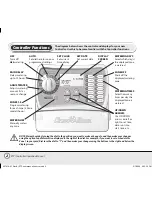
Page 4: ...and below the display screen OFF Turns off ALL watering AUTO Set dial here to run your programmed settings SET CLOCK Set current time of day SET DATE Set current date DISPLAY SCREEN RAIN DELAY Delays...

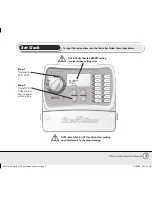
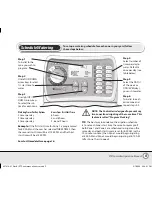
Page 5: ...ps below Step 1 Turn dial to SET CLOCK Step 2 Use left UP DOWN arrow keys to adjust current time NOTE Reset dial to AUTO position after making any adjustments to the programming NOTE Verify that the A...

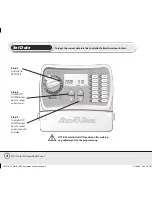
Page 6: ...below Step 1 Turn dial to SET DATE Step 2 Use left UP DOWN arrow keys to select current year NOTE Reset dial to AUTO position after making any adjustments to the programming Step 3 Use right UP DOWN...

Page 7: ...ay 4 and 8 hours 4 times per day 3 6 and 9 hours Example If the first start time for Zone 1 is programmed for 8 00 AM and the user has selected THREE TIMES then the second start time will be at 12 00...

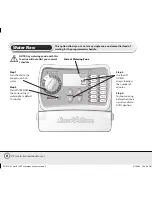
Page 8: ...to water Step 2 Press WATER NOW The zone will start watering for a default 10 minutes NOTE Any watering you do with this function will not affect your normal schedule Current Watering Zone Step 3 Use...

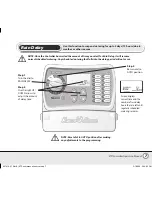
Page 9: ...time you select for Rain Delay it will resume normal scheduled watering Any scheduled watering that falls into the delay period will not occur Step 1 Turn the dial to RAIN DELAY Step 2 Use the right...

Page 10: ...Your scheduled start times will not change but the actual zone run time will be adjusted TIP Automatically adjust watering of each individual zone by using left UP DOWN arrows to adjust from 90 to 100...

Page 11: ...the cycle for that zone Normal Operations Screen displays current time the zone that is scheduled to be watered next and the date and time it will be watered With Rain Delay Screen displays current ti...

Page 12: ...8 gap between screw head and wall as shown in Figure 1 you can also use the supplied wall anchors if necessary Step 2 Hang the Controller on the exposed screw Step 3 Remove access cover at bottom of C...

Page 13: ...oller Step 2 Plug transformer into the wall socket NOTE DO NOT plug in the transformer until you have completed and checked all wiring connections Also do not attempt to link two or more Controllers t...

Page 14: ...inal marked MSTR VALVE Step 2 Connect the Common Wire usually White from the Master Valve or Pump Start Relay to the Controller terminal marked COMMON NOTE STPi Series Controllers allow a Master Valve...

Page 15: ...earest zone terminal screw in use For example if you have a 4 Zone Controller with only two zones in use route the terminals for Zones 3 and 4 to the nearest active terminal in this example Zone 2 NOT...

Page 16: ...o connect a Rain Sensor to the STPi Controller ConnectingRainSensor Step 1 Remove the jumper wire from the Rain Sensor terminals Step 2 Connect both Rain Sensor delay wires to the terminals marked RAI...

Page 17: ...ting the two yellow Rain Sensor terminals may be damaged or missing Connect the two yellow Rain Sensor terminals in the Controller s terminal bay with a short length of 14 to 18 gauge wire An electric...

Page 18: ..._ Min M T W T F SA SU ODD EVEN ___ ___ AM PM 1 2 3 4 9 ___ Min M T W T F SA SU ODD EVEN ___ ___ AM PM 1 2 3 4 Note A total of 4 start times can be assigned for each zone this can be helpful for zones...

Page 19: ...Notes 637418 01 Rev B STP user manual source indd 17 3 7 2008 5 24 11 PM...

Page 20: ...d com Technical services U S and Canada only 1 800 RAIN BIRD P N 637418 01 RAIN BIRD CORPORATION 6991 E Southpoint Road Building 1 Tucson AZ 85706 RAIN BIRD EUROPE S A R L 900 rue Ampere BP72000 13792...

Reviews: