GR5640 User Manual
4
4. Hardware Installation Procedure
Please follow the instructions below to complete the hardware installation.
1. Place the system on a stable surface. Ensure that it is well ventilated without blockage to the vent
and kept away from areas near water and damage prone areas.
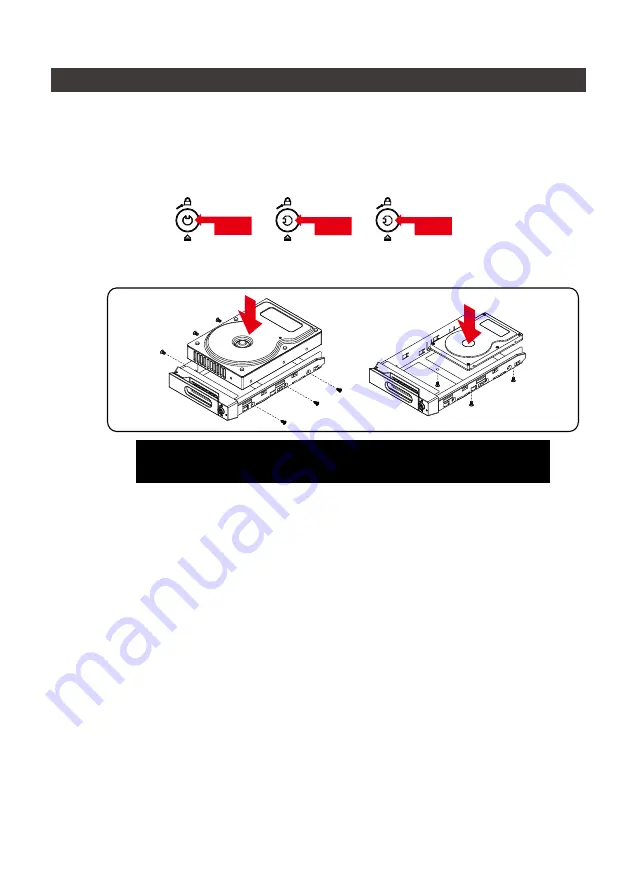
2. Use the key included in the kit to insert the key hole and turn 90 degrees to the left, then gently
press the locking extractor latch to open it and remove the hard drive.
4. When the hard drive installation has been completed, insert the hard drive tray into the system
horizontally and secure the latch into place.
5. Connect the AC power cable to the GR5640 and then plug the AC power to the wall socket.
Boot-up the unit.
6. Set the storage mode using the LCD and buttons on the front (please refer to section 5 for
front panel and LCD information).
7. Connect the cable to the PC and the GR5640 port.
8. After boot-up, your operating system will automatically detect the storage capacity of your hard
drives. Please follow the operating system instructions to configure and format your drives.
The formatted drives can be configured for the RAID setup.
Note: Please avoid using hard disk drives from different manufacturers or different
models from the same manufacturer as this may impact system performance.
Lock
Unlock
Press
3. For 3.5" HDD/SSD, please secure it by use six the larger screws included in the accessory kit.
For 2.5" HDD/SSD, please secure it by use four the smaller screws included in the accessory kit.
Summary of Contents for SAFETank Series
Page 1: ...GR5640 SafeTANK User Manual...
Page 43: ...GR5640 User Manual 41 10 macOS 1 Wi Fi macOS 10 14 Mojave 2 Mac Command R Apple 3 macOS Mac...
Page 44: ...GR5640 User Manual 42 4 macOS macOS 5 6 Mac Mac...
Page 46: ...GR5640 User Manual 44 5 USB 6 7...
Page 47: ...GR5640 User Manual 45 8 Windows 10 9 USB BIOS UEFI USB 10 Windows 10...


