


However, if the component certificates are signed by a different CA than SCOPIA
Management’s certificate, you may need to upload more certificates to establish authenticity,
as described in
“Uploading Certificates for Other Devices” on page 61
. For more information
about which certificates are required, see
“Planning the Required Certificates for TLS” on
.
Before you begin
1.
Ensure that you have the root certificate for the certificate authority that your
organization uses. The root certificate must be compatible with the Base-64 ASCII code.
2.
Ensure that you have the signed certificate from the CA for SCOPIA Management (see
“Generating the Certificate Signing Request for SCOPIA Management” on page 50
for
details on generating the CSR).
Procedure
Step 1
Copy the CA root certificate and the CA signed certificate that confirm the identity of SCOPIA
Management into the SCOPIA Management server.
Step 2
Access the SCOPIA Management administrator portal.
Step 3
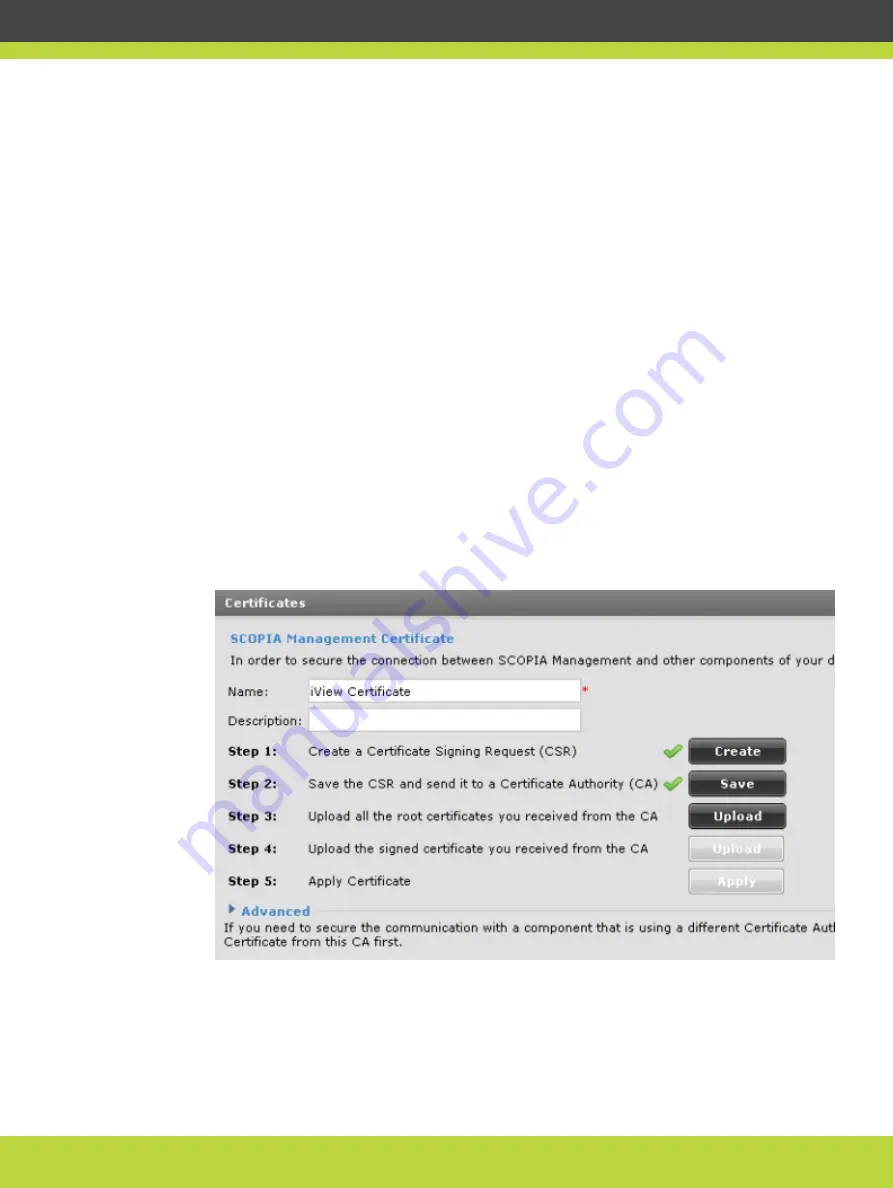
Select Settings > Security > Certificates.
Figure 6-9
Uploading certificates into SCOPIA Management
Step 4
Select Upload to bring in the CA root certificate, including intermediate certificates, into
SCOPIA Management by doing the following for each certificate:
RADVISION | Deployment Guide for SCOPIA TIP Gateway Version 8.0
Securing Your Video Network Using TLS | 54


